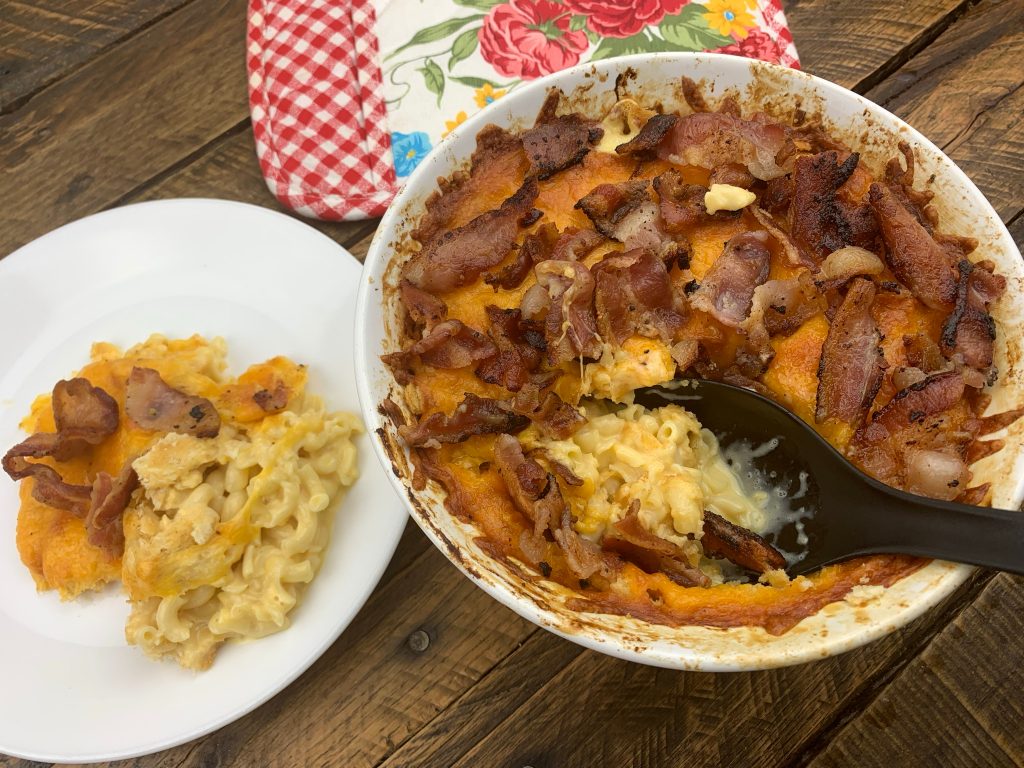
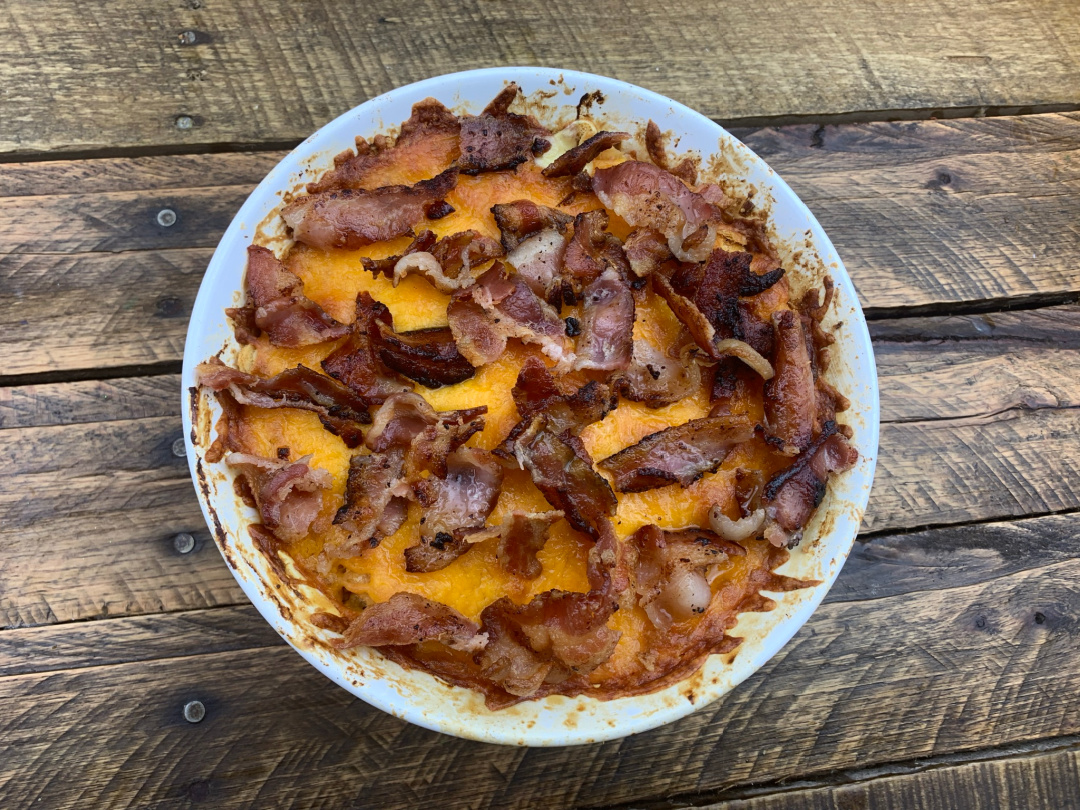
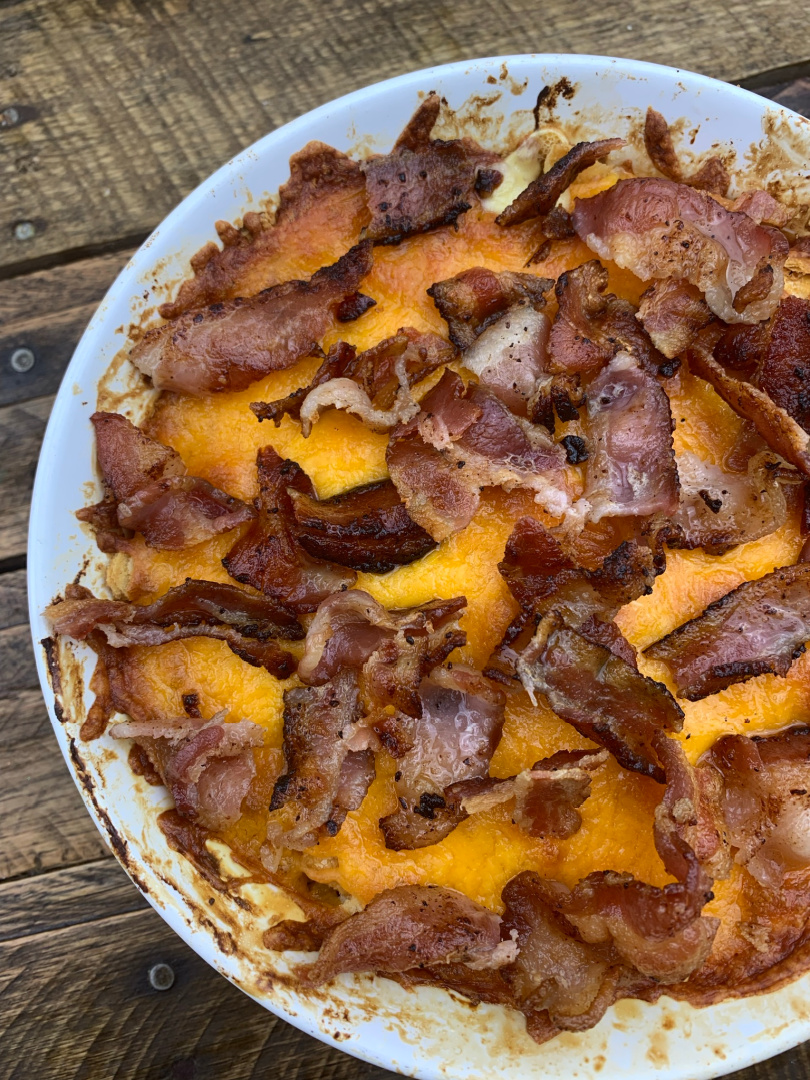
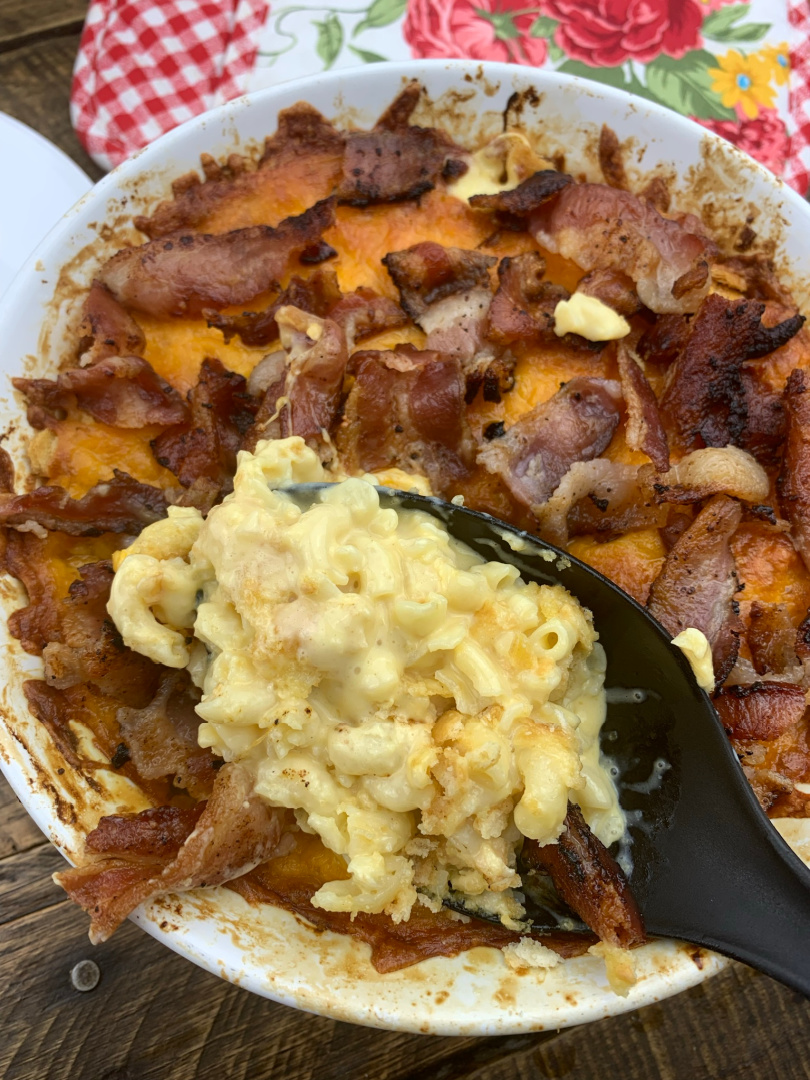
Dress up your mac and cheese with lots of flavor! Try this Baked Mac and Cheese with Ritz Crackers and Bacon topping!
If you are a fan of baked mac and cheese, I have a recipe that you MUST try.
I love trying new spins on traditional recipes. I enjoy making a variety of flavor combinations and mixing it up for my family!
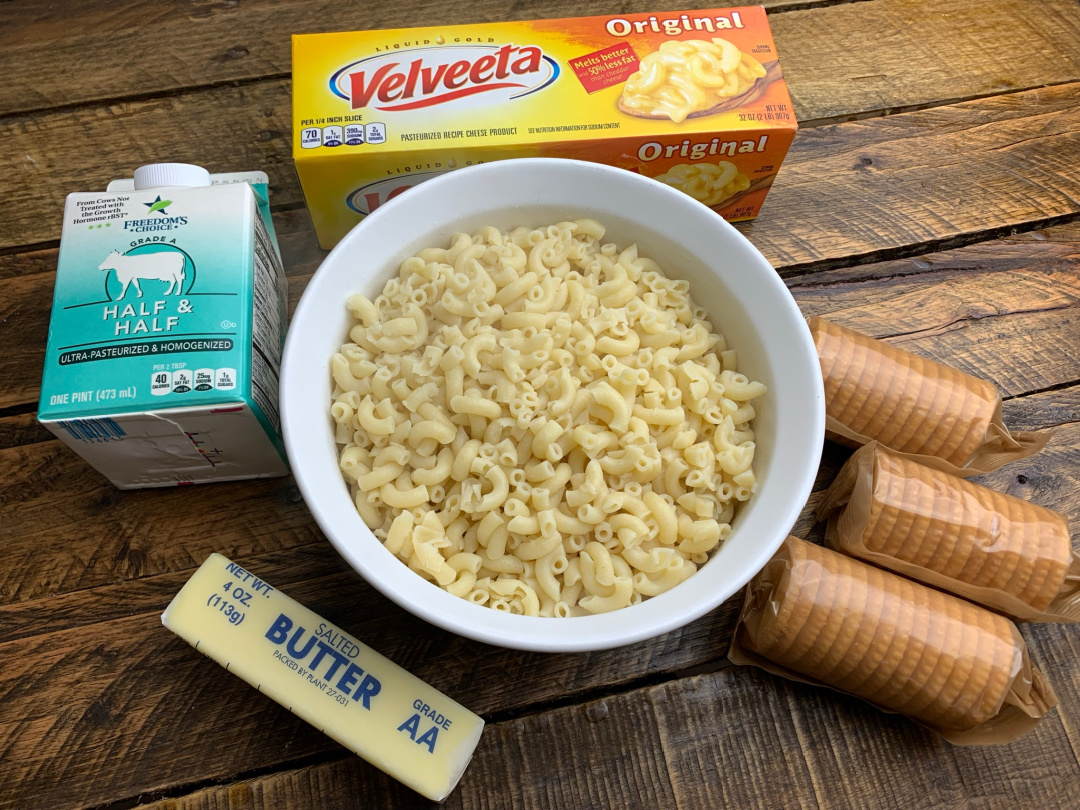
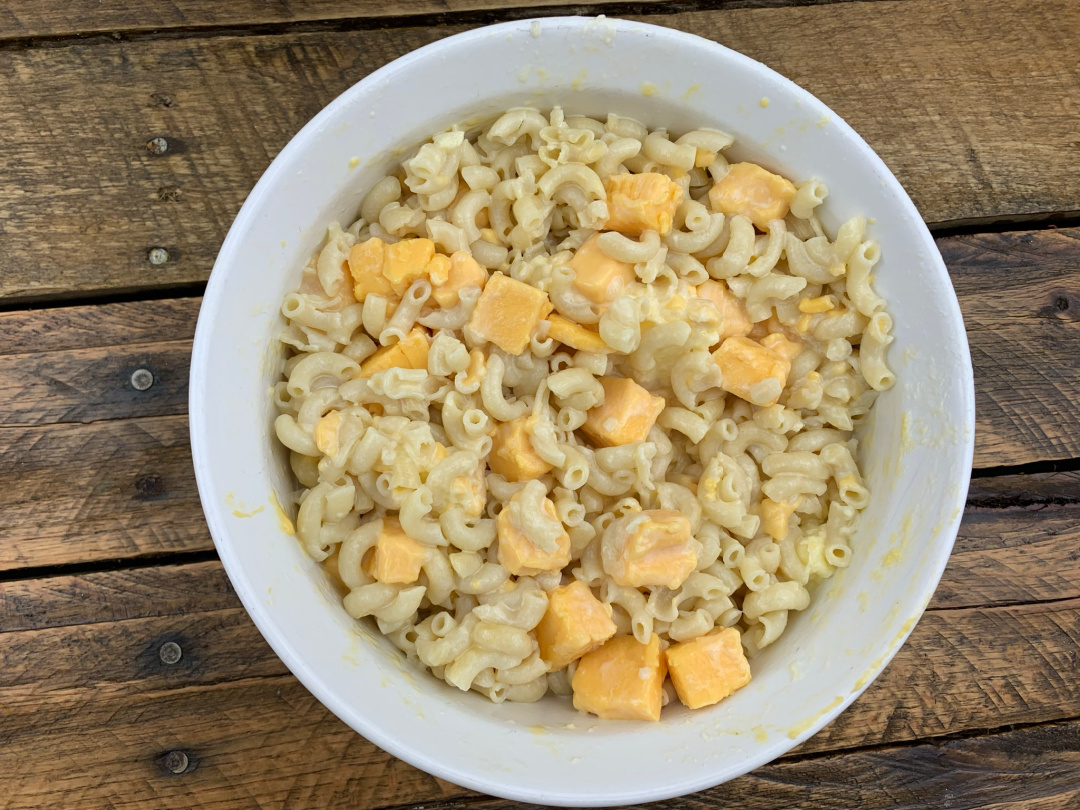
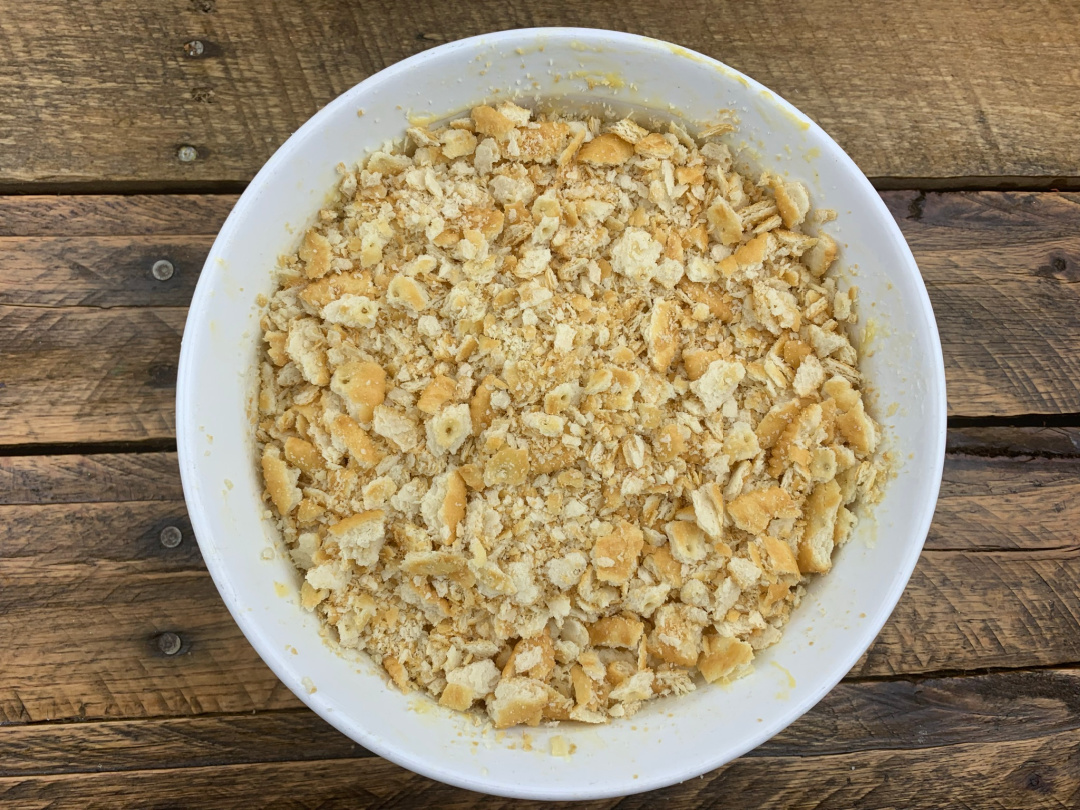
We love our traditional Creamy Mac and Cheese recipe, but often times, I want to add more flavor and crisp to recipes. That’s where the Ritz Crackers and bacon comes in for this recipe!
If you love bacon and you love mac and cheese, this cheesy recipe is for you.
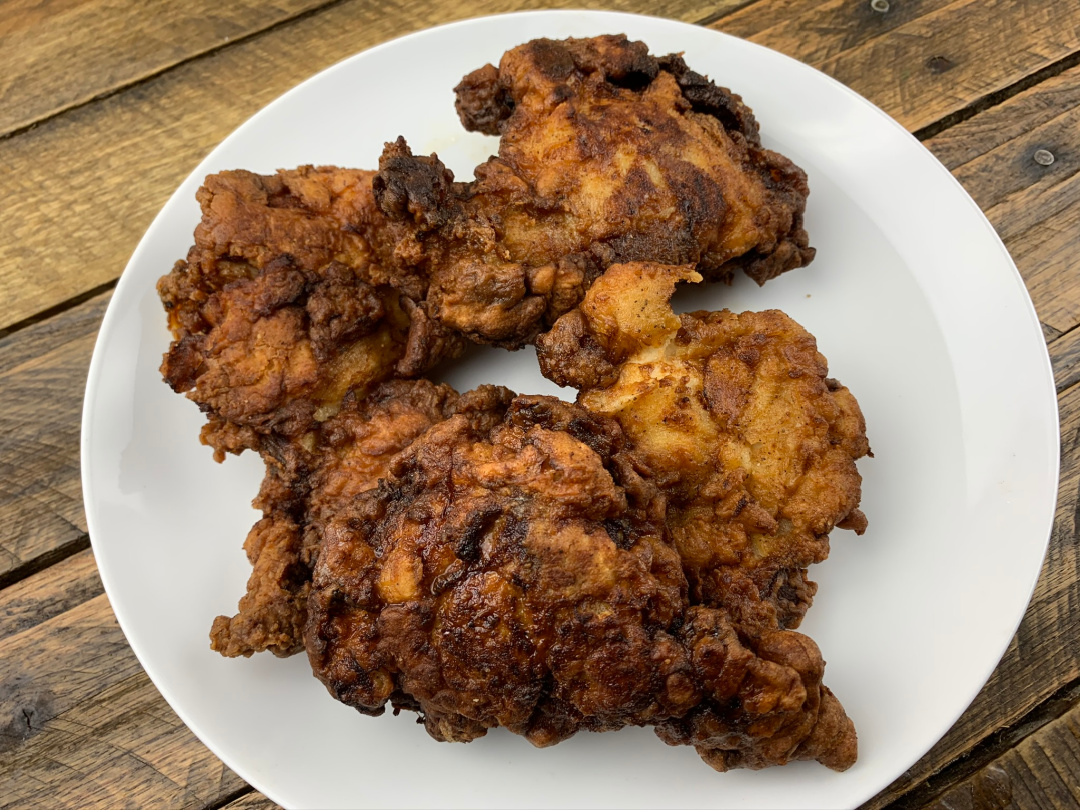
Serve this delicious Country Fried Chicken with your favorite sides for dinner this week or this weekend. This is a family favorite!
My kids love chicken tenders. Of course they like to eat them at restaurants, and while it’s nice for someone else to cook, it is often expensive to feed three kids chicken tender baskets when going out to eat.
I decided to try the next best thing and make them at home.
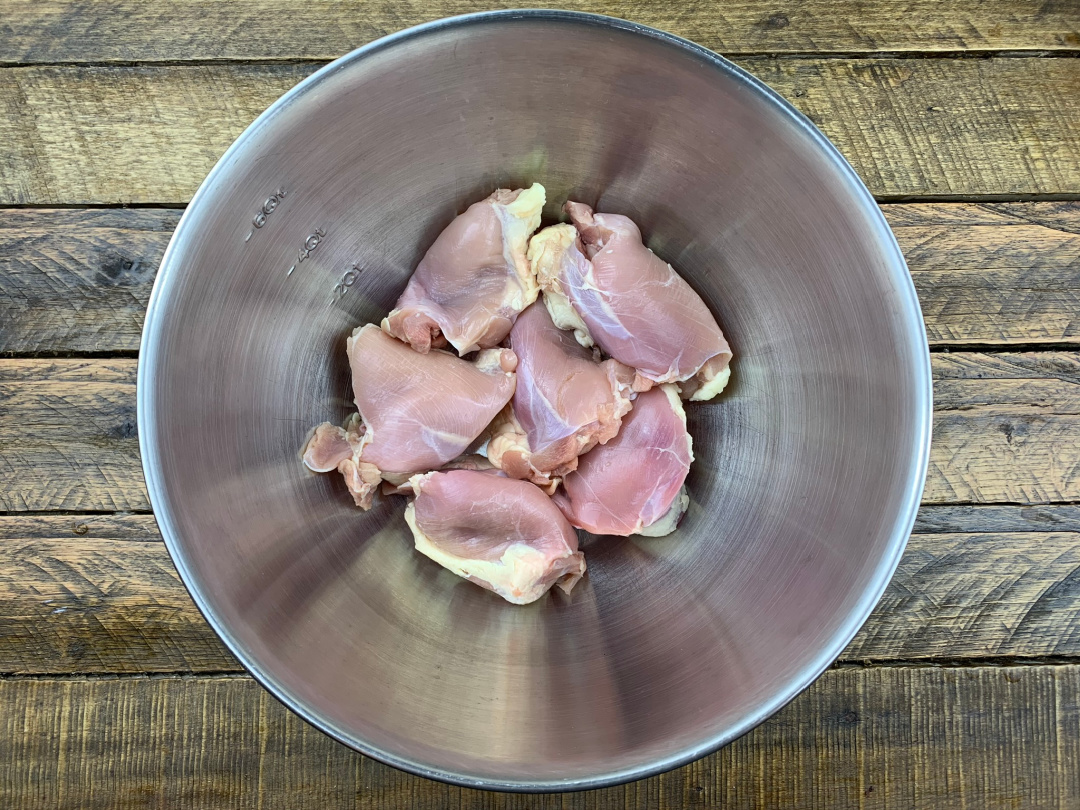
I used chicken thighs because I prefer the taste and moisture of dark meat chicken. For this recipe, I did not cut the thighs to resemble chicken tenders or nuggets, but if you’d like you can also cut the chicken into smaller pieces.
You can also use boneless skinless breasts, or even use this recipe for bone in chicken to make the classic fried chicken.
For the adults, you can serve the country fried chicken with vegetables for a great Sunday meal, or you can place the fried chicken on a bun with lettuce and tomato for an easy chicken sandwich.
As you can see, this is a very versatile recipe. Moreover, it is a pleaser for the entire family, and it is a huge money saver.
The very best part of this dish though was that after I fed the first few pieces to my wife and kids they wanted more! I was able to make a delicious restaurant quality dish for my entire family for a fraction of the cost.
This is also a great dish for parties. I love to watch any sporting event, and with the big game on the horizon, this is a great way to make crowd pleasing food for lots of people for not a lot of money.
Finally, even if you make too much, the leftovers are just as good the next day, and this dish makes a great food that you can toss into your kiddos lunchbox on Monday morning.
Country Fried Chicken
Ingredients:
boneless skinless chicken thighs
half gallon of buttermilk
hot sauce
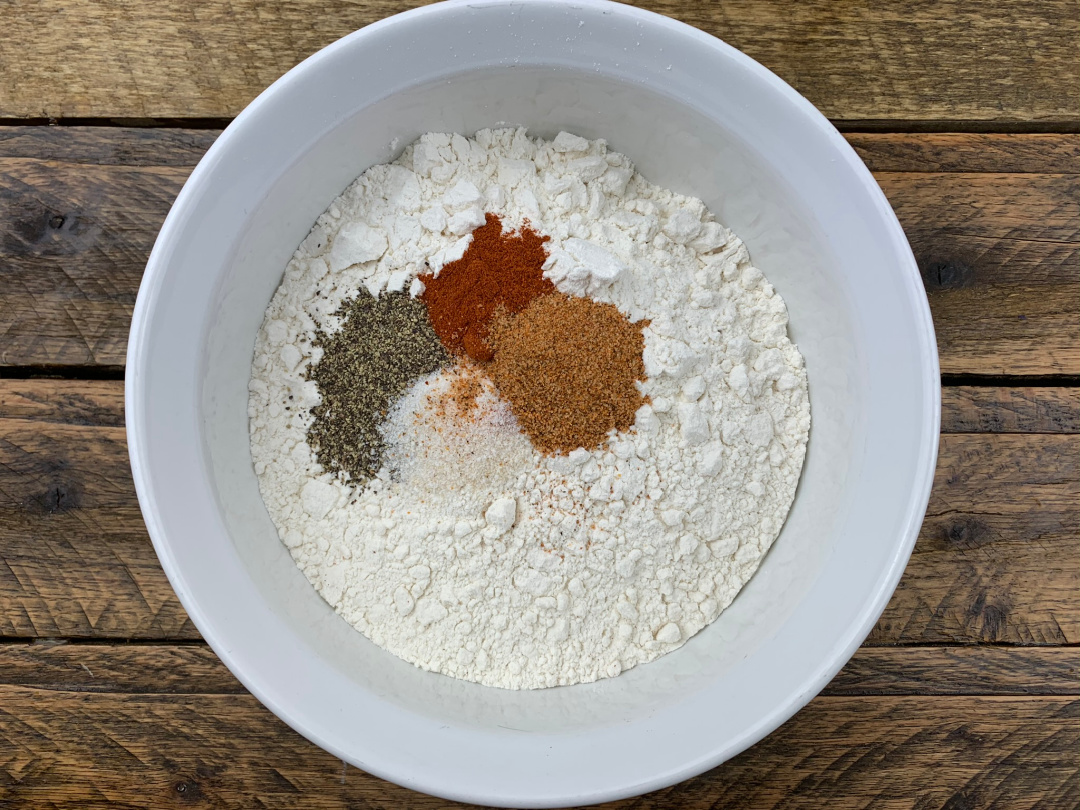
1.5 cups all purpose flour
1 tsp. pepper
1 tsp. salt
1 tsp. ground cayenne pepper
1 tsp. paprika
1 tsp. garlic powder
1 egg
2 quarts cooking oil
Directions:
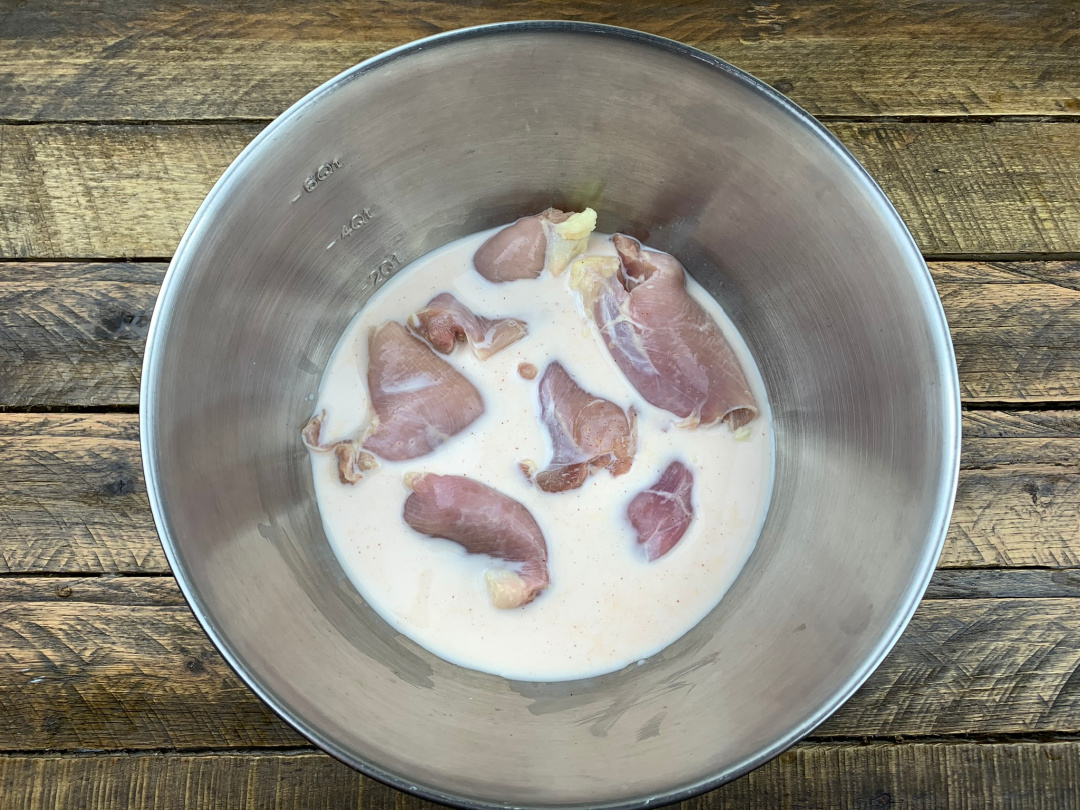
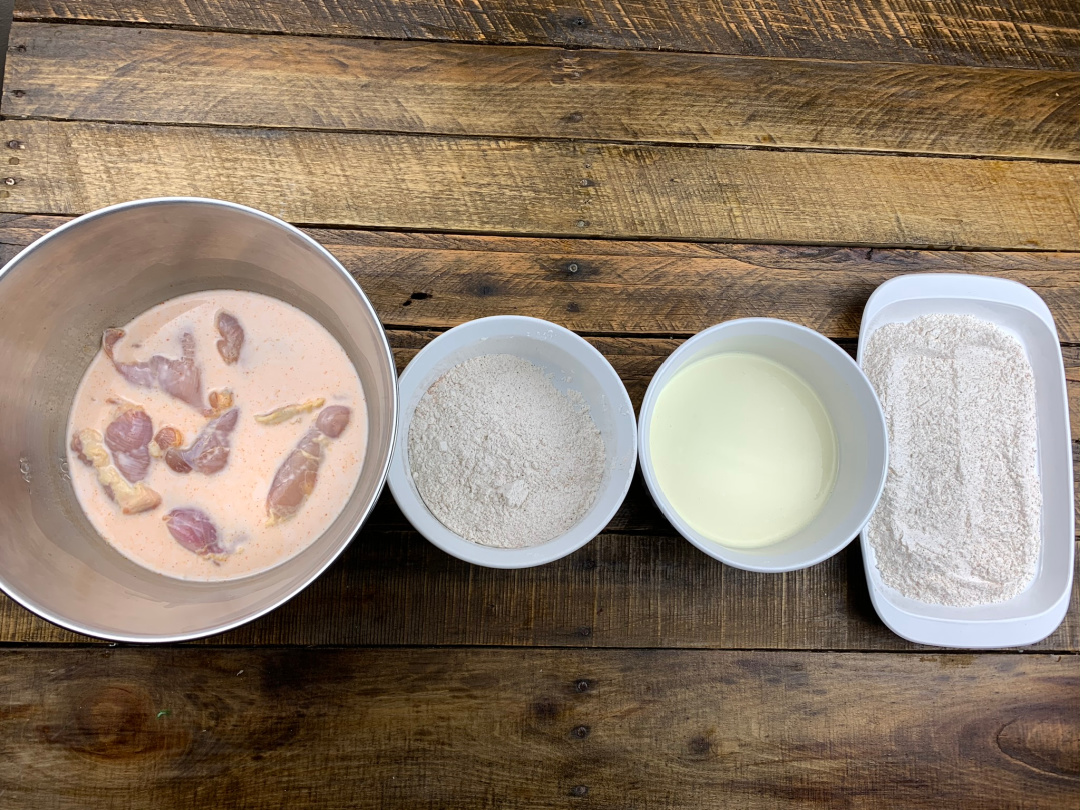
In a large bowl, add all chicken.
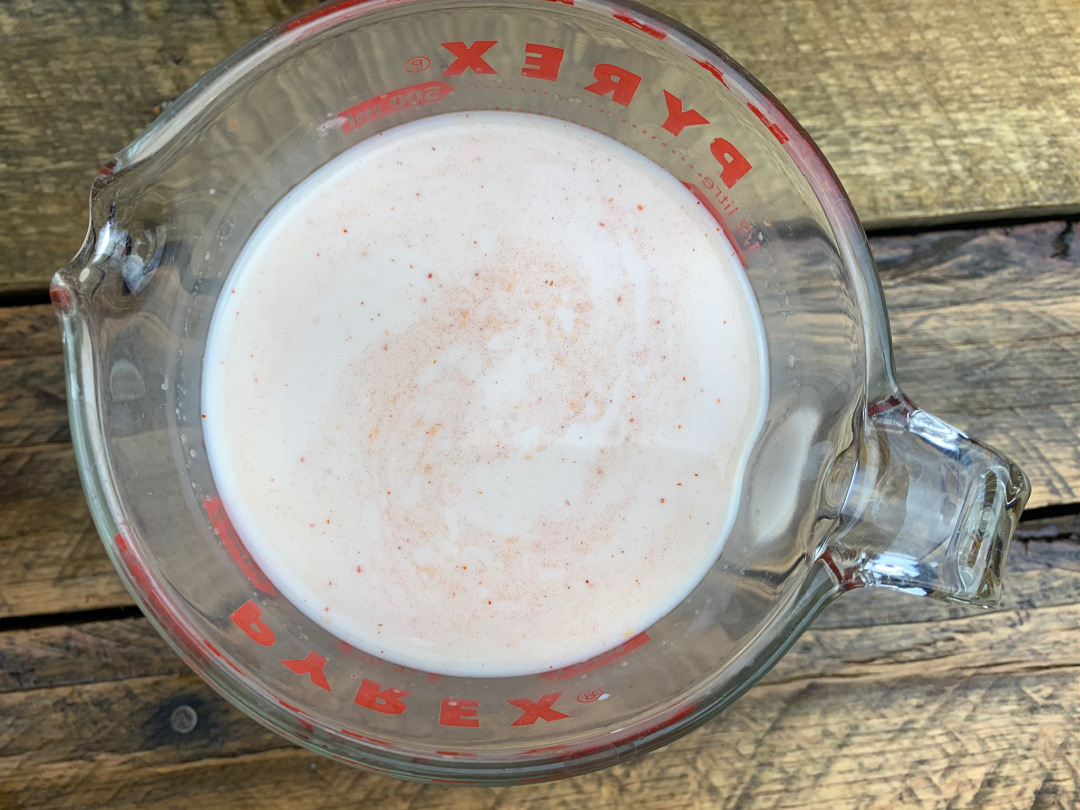
Pour enough buttermilk to cover the chicken.
Add liberal dashes of your favorite hot sauce.
Mix well to coat chicken with buttermilk and hot sauce mix and if able have all chicken submerged.
Marinate for at least 4 hours covered in a refrigerator.
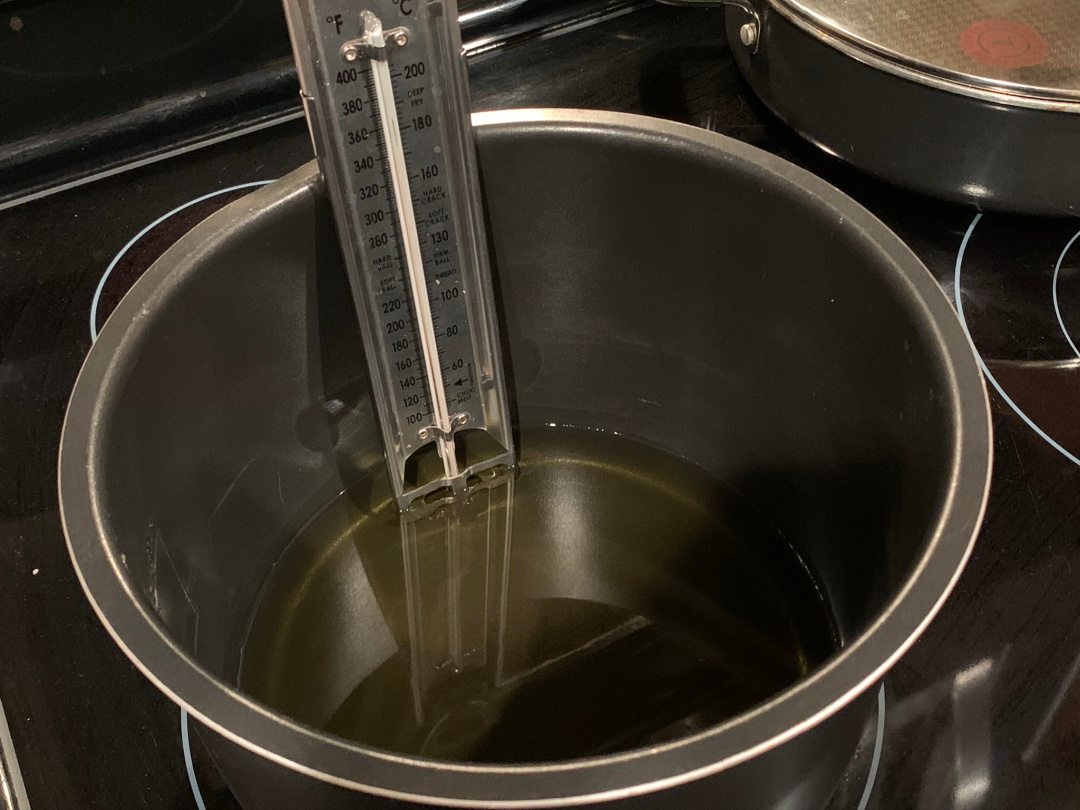
Pre-heat 2 quarts of cooking oil to 350 degrees in a deep frying pot to avoid splatter.
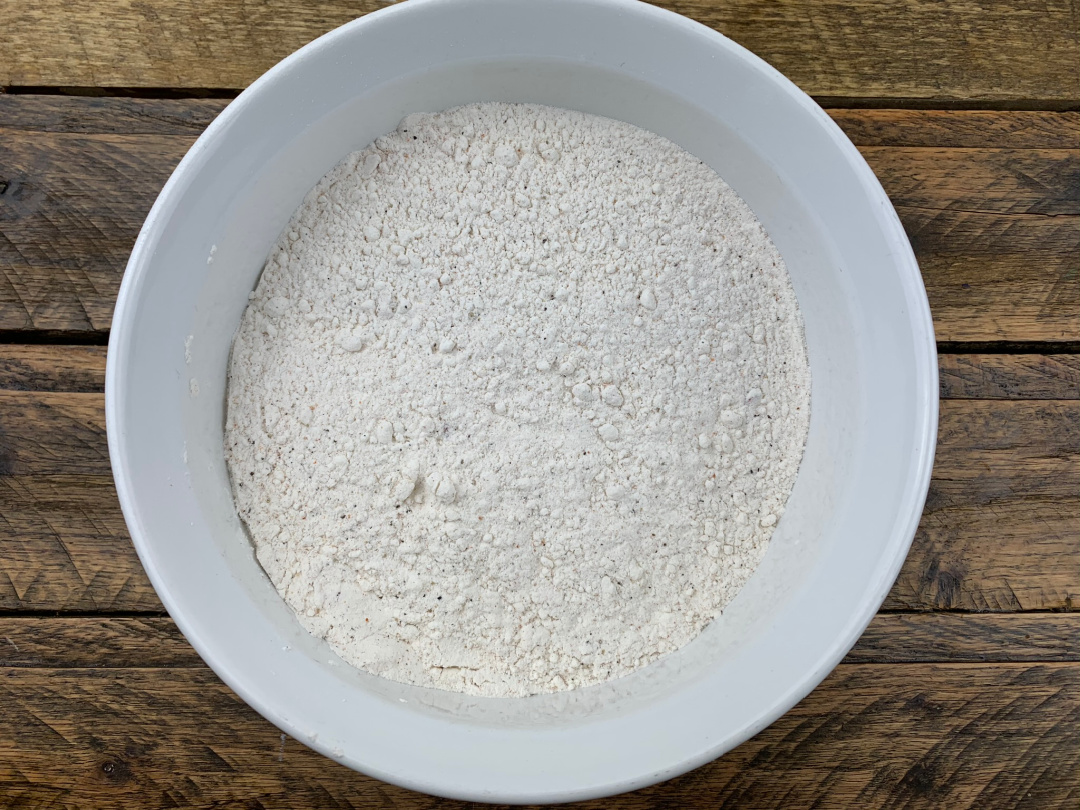
While oil is heating, mix flour and spices together well.
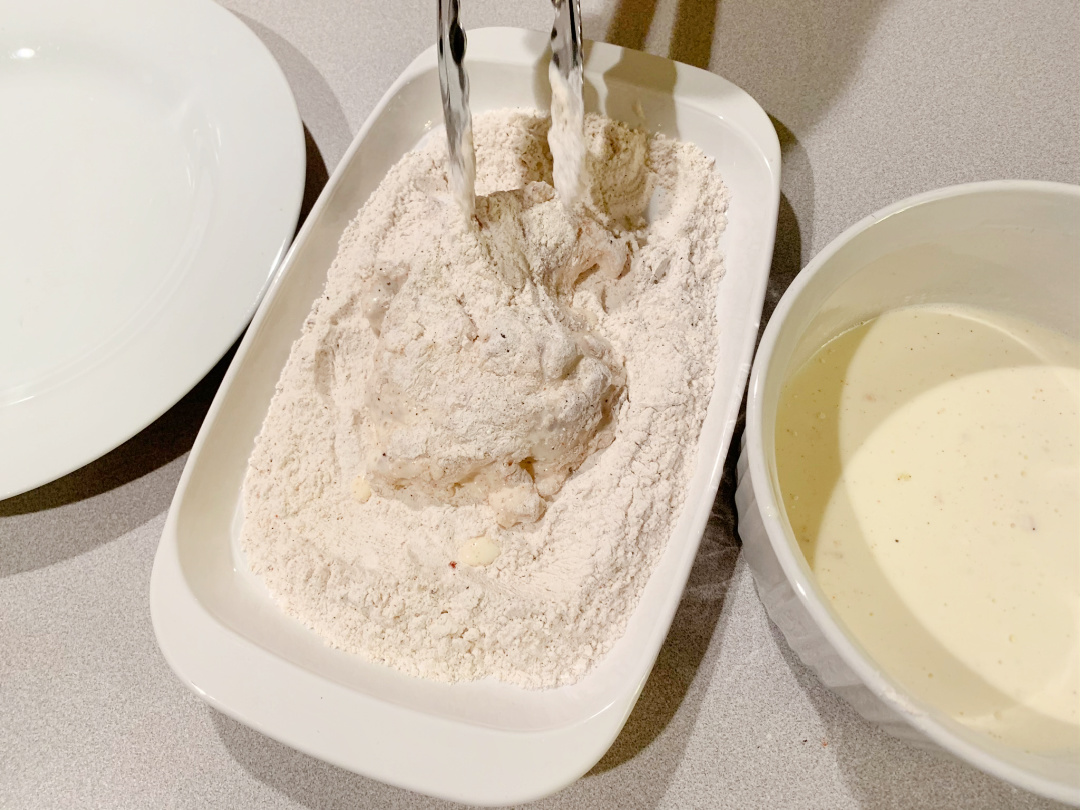
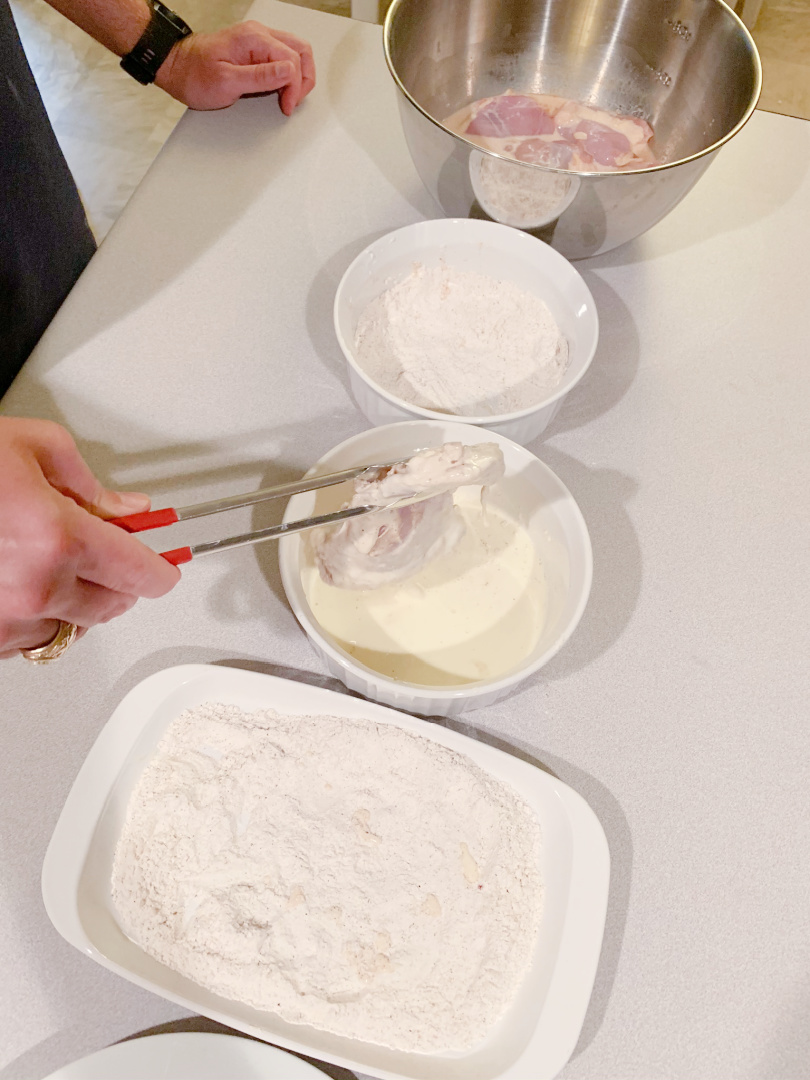
Remove chicken, and coat each piece with the flour mixture.
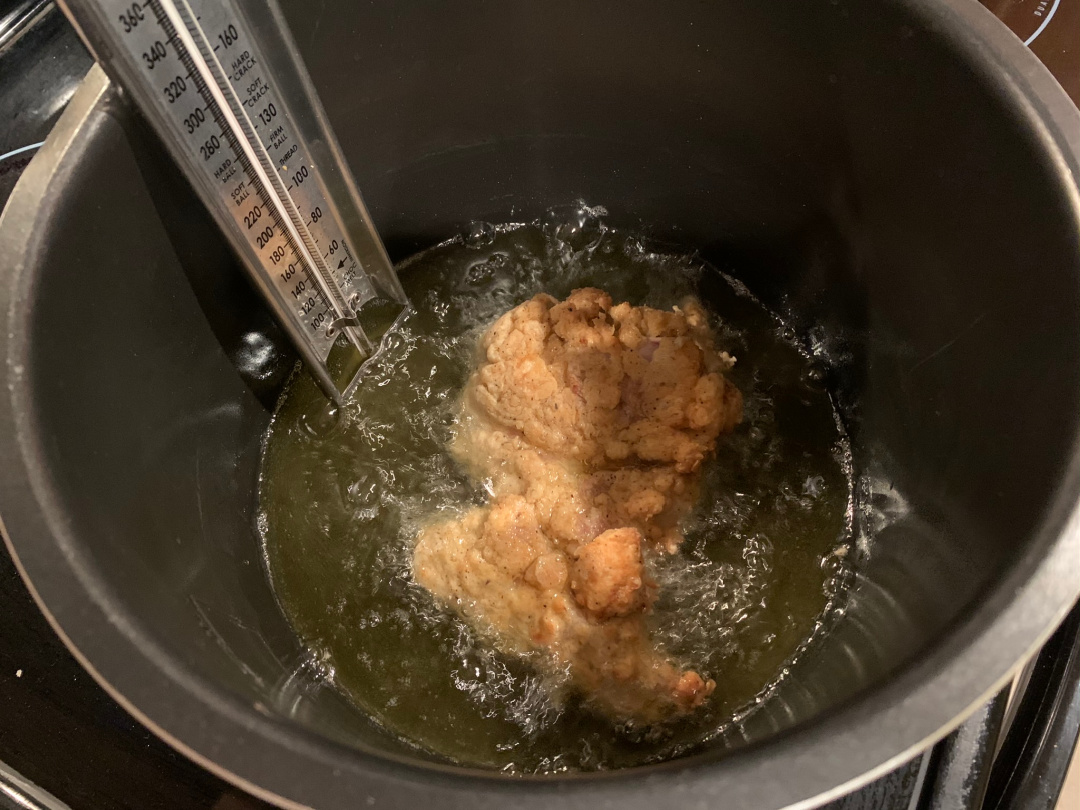
Once the oil is up to temperature, gently place each chicken piece in the hot oil.
Only fry 2 pieces of chicken at a time to ensure even cooking, and to keep the oil temperature at 350.
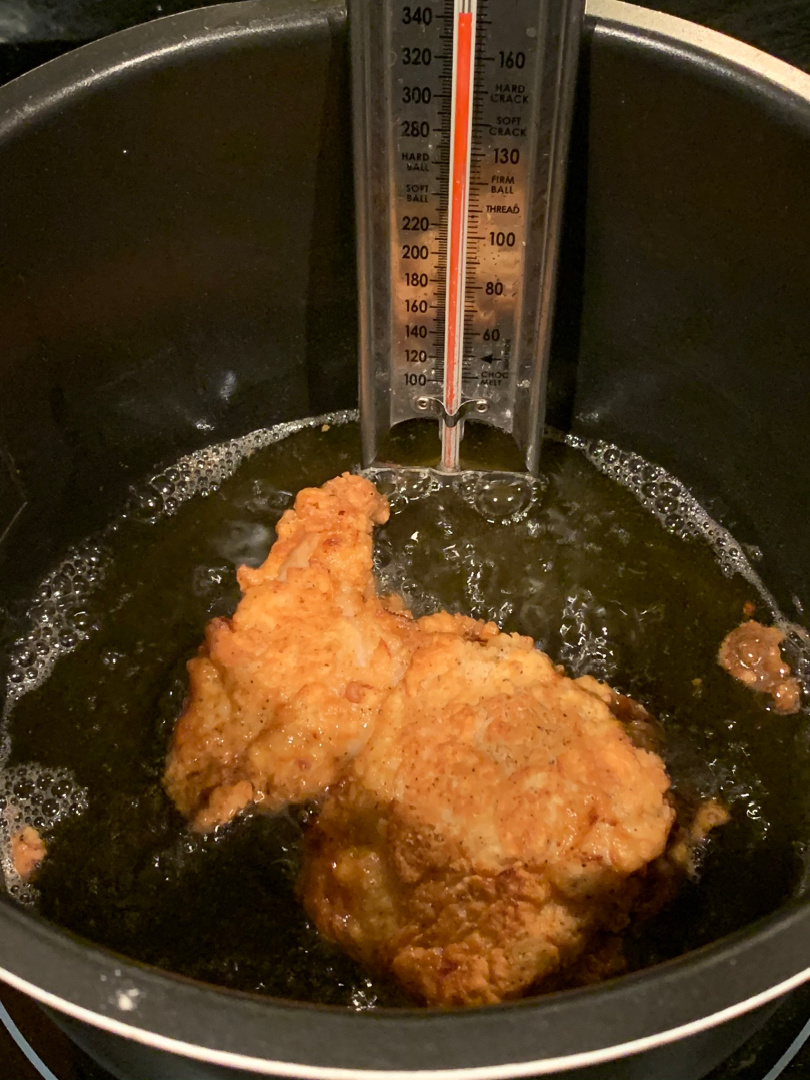
After 4-5 minutes, flip each piece of chicken to ensure even cooking.
After another 4-5 minutes, the chicken should be golden brown and crispy.
Remove the chicken and let cool. Serve with one of my yummy side dishes!
Country Fried Chicken
Ingredients
Boneless and Skinless Chicken Thighs
Half gallon or buttermilk
Hot sauce
1.5 cups All purpose flour
1 tsp Pepper
1 tsp Salt
1 tsp Cayenne
1 tsp Paprika
1 tsp Garlic powder
1 egg
2 quarts cooking oil
Instructions
In a large bowl, add all chicken, and then pour enough butter milk to cover.
Add liberal dashes of your favorite hot sauce.
Mix well to coat chicken with buttermilk and hot sauce mix and if able have all chicken submerged.
Marinate for at least 4 hours covered in a refrigerator.
Pre-heat 2 quarts of cooking oil to 350 degrees in a deep pot to avoid splatter.
While oil is heating, mix flour and spices together well. Remove chicken, and coat each piece with the flour mixture.
Once the oil is up to temperature, gently place each chicken piece in the hot oil.
Only fry 2 pieces of chicken at a time to ensure even cooking, and to keep the oil temperature at 350.
After 4-5 minutes, flip each piece of chicken to ensure even cooking.
After another 4-5 minutes, the chicken should be golden brown and crispy.
There’s lots of relaxing chairs to be sat in, music to be listened to, conversations to be had, and cold beer to be drank!
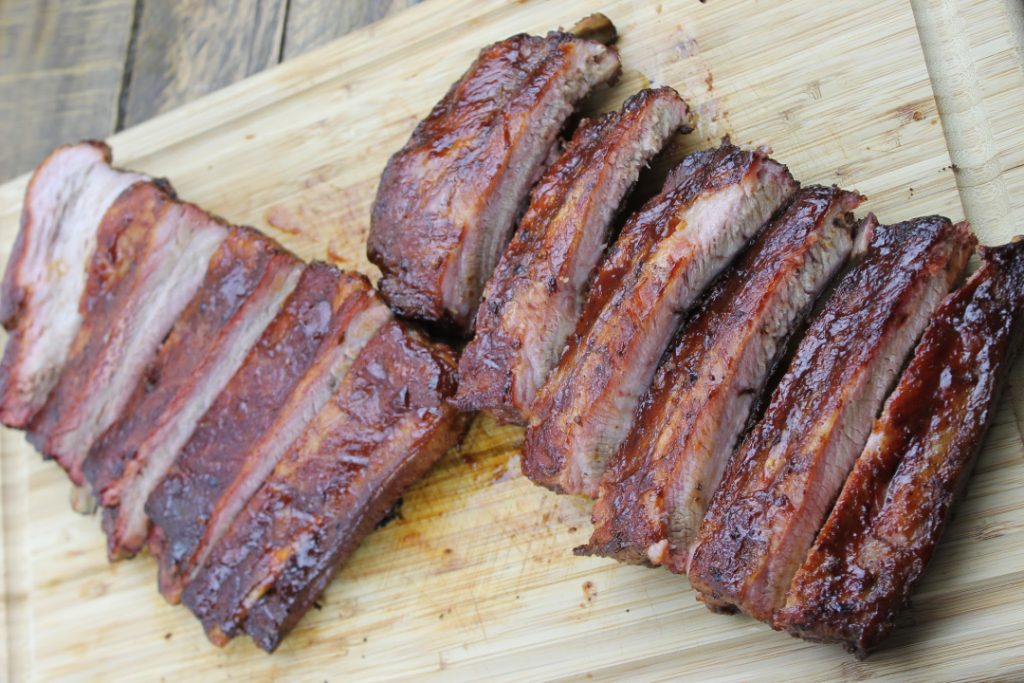
Barbecue is an easy going way of life. It’s why almost every southern state has its own style of barbecue.
In my mind, Texas will always be the king of barbecue, and when you think about Texas barbecue you think about brisket.
However, brisket is the most time intensive of all barbecue projects.
So, on lazy spring and summer days when I want a quicker barbecue project I turn to pork ribs.
I like to smoke all three kinds of pork ribs: St. Louis style, spare ribs, and baby back ribs. St. Louis ribs are like spare ribs, but they have the top portion and breast bone removed.
Baby back ribs are a little more expensive and not quite as big as the other two kinds of ribs, but they are usually more tender because of their location on a pig.
Regardless of what kind of ribs you decide to smoke, each kind of rib takes about 3-4 hours to smoke.
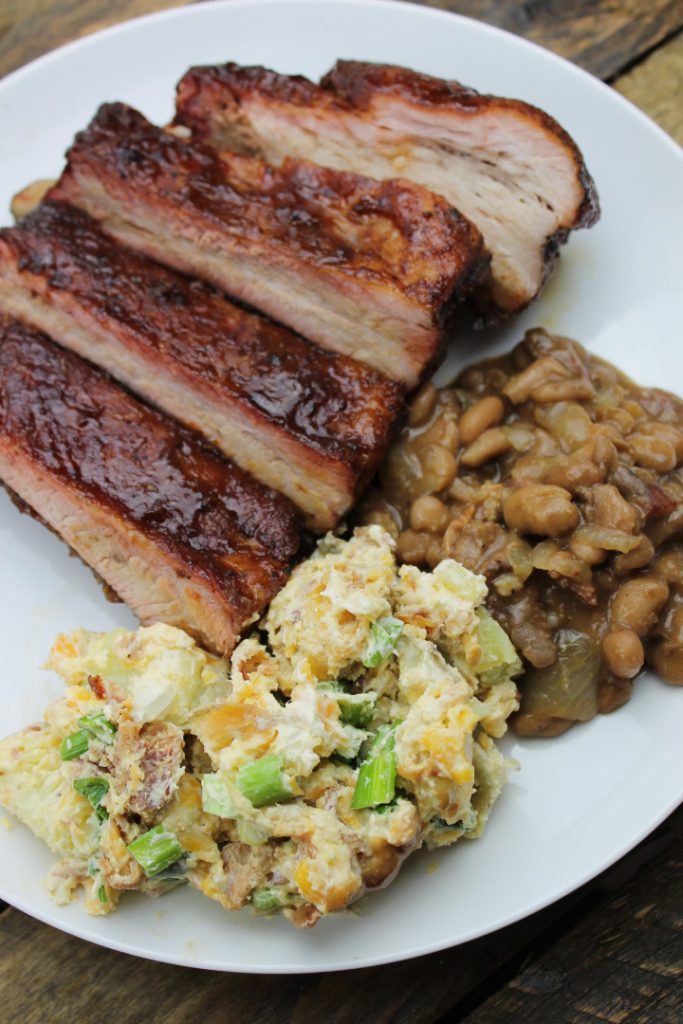
What Can I Make With Ribs
You can use the meat from ribs to make rib sandwiches. You can also use meat from spare ribs to flavor beans, like I did in my Ranch House Pinto Beans recipe.
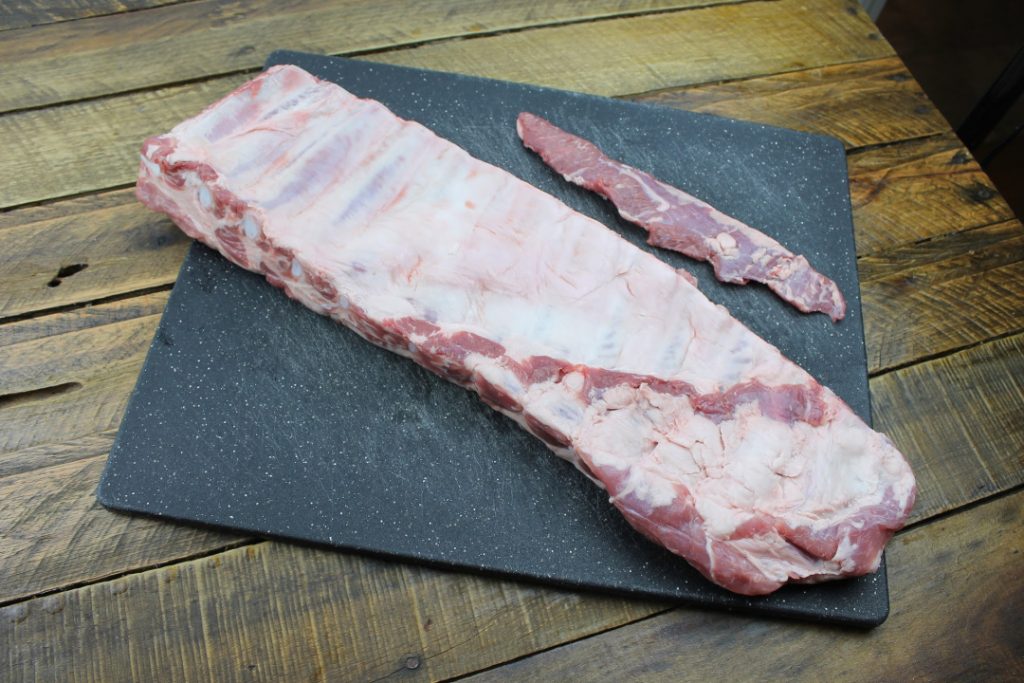
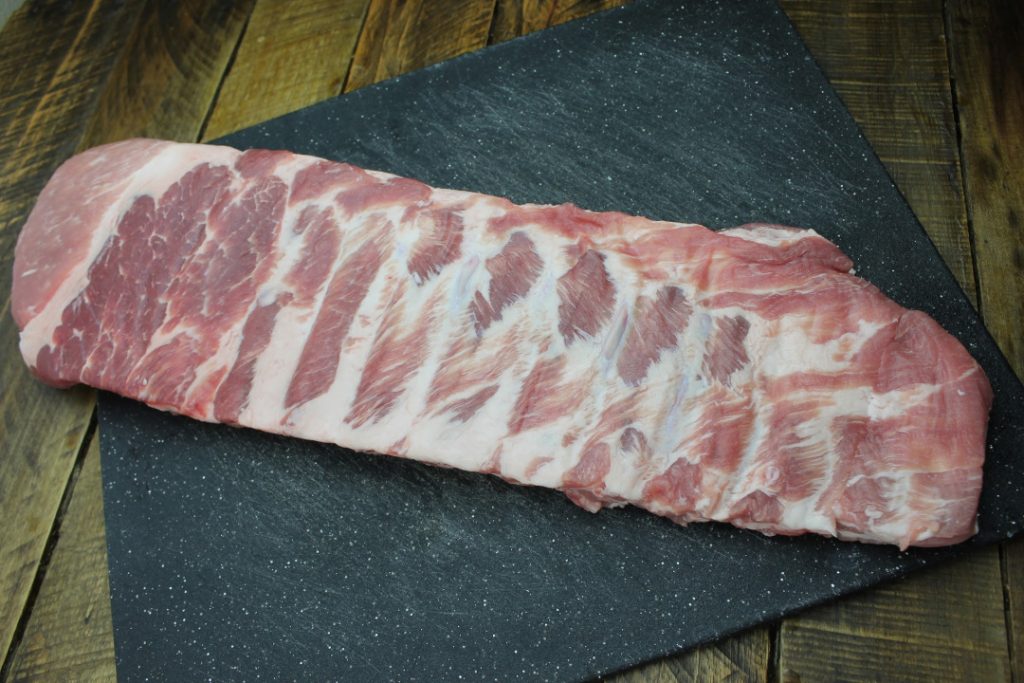
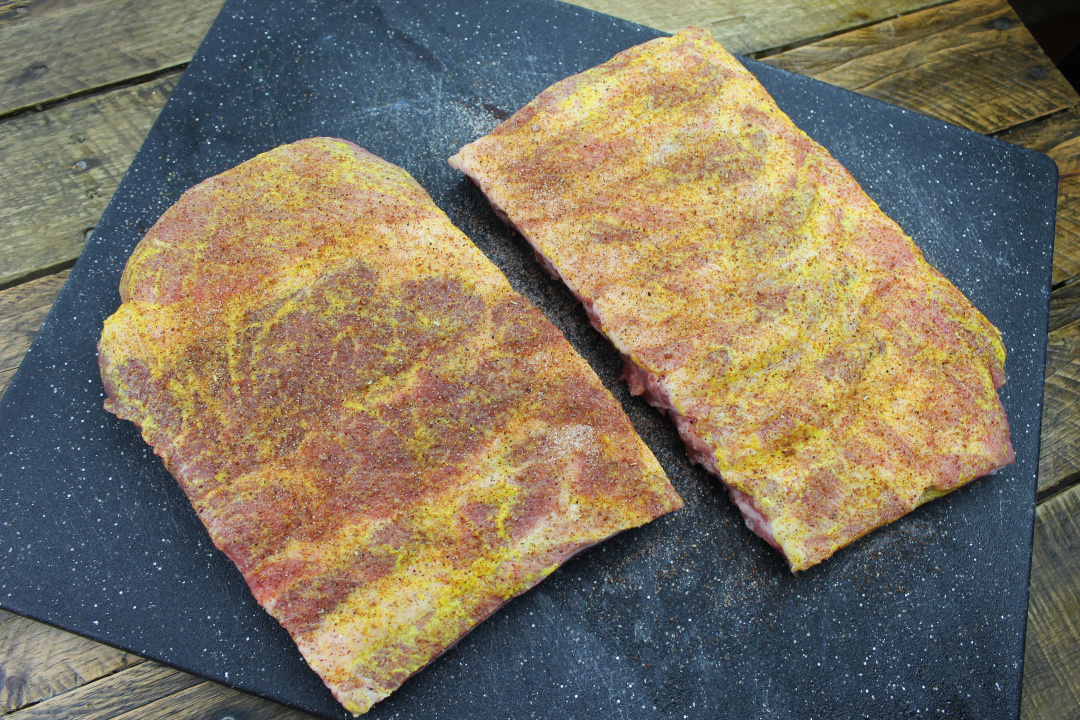
With ribs, you’ll always want to tear away the membrane on the inside curve of the rib. Additionally, with spare ribs or St. Louis ribs, there might be a small flap of extra meat. All I will do is cut that small flap off, but I will still season and then quick grill that meat. I might also cut the smallest rib off the end of the ribs as well. This is just to “square” the ribs up, but it also removes a smaller piece of meat on the end that doesn’t cook evenly. I’ll do the same with the last rib as I do with the flap of meat.
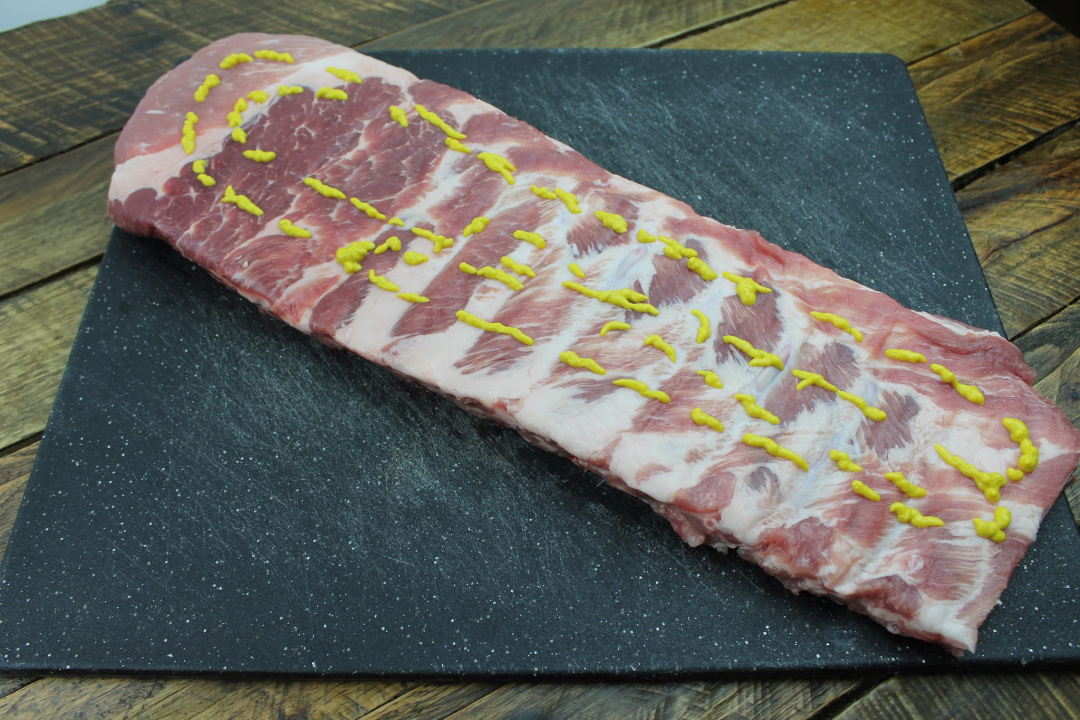
Before applying the rub, I’ll put about 2 tsp of mustard on the ribs. This will just help the rub stick to the ribs. If you don’t like mustard, you can use some kind of cooking oil or even just sprinkle some water on the ribs.
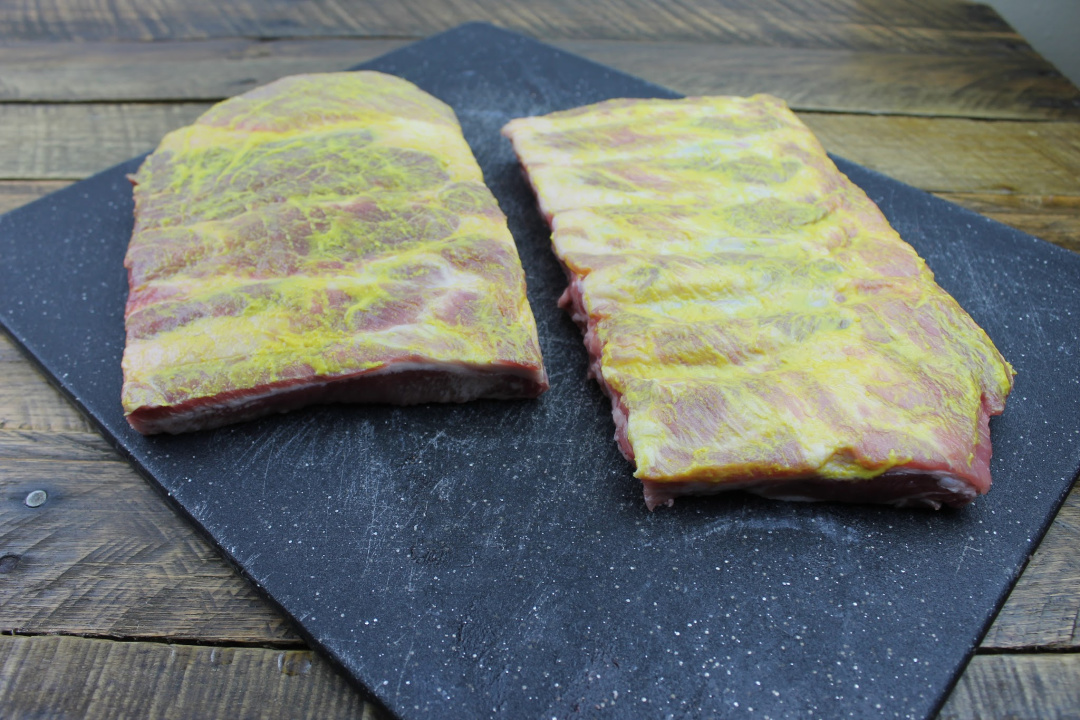
I’ll usually put the rub on the ribs and then wrap them in foil the night before I smoke them. However, you can put the rub on just one hour prior to smoking.
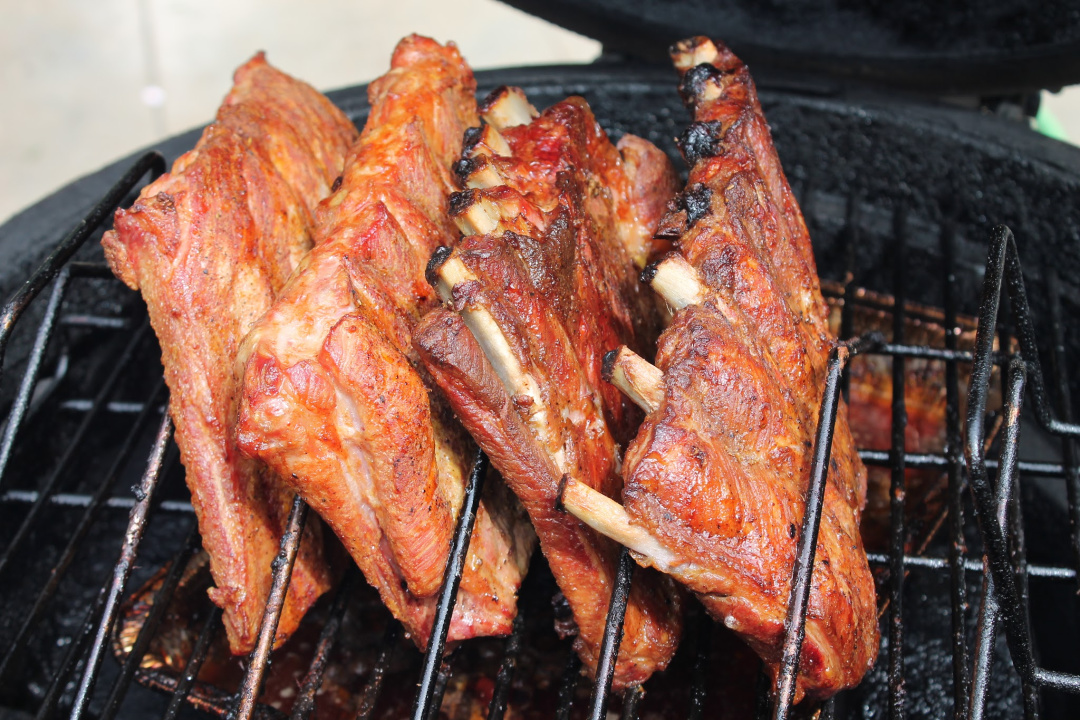
When I smoke ribs, I will also cut the rack of ribs in half. I do this because I have a stand for smoking ribs. That way I can easily fit up to 2 racks of ribs on my smoker instead of laying them flat.
After 3 ½ to 4 hours on the smoker, I’ll take the ribs off the smoker and put barbecue sauce on them. You can choose any kind of sauce that you like. Sometimes other than barbecue sauce, I might put some butter and honey on the ribs and wrap them back up in foil and let them stay on the smoke for another ½ hour to an hour. Or if I don’t want to put them back on the smoker, I’ll just put the ribs wrapped in foil in the oven.
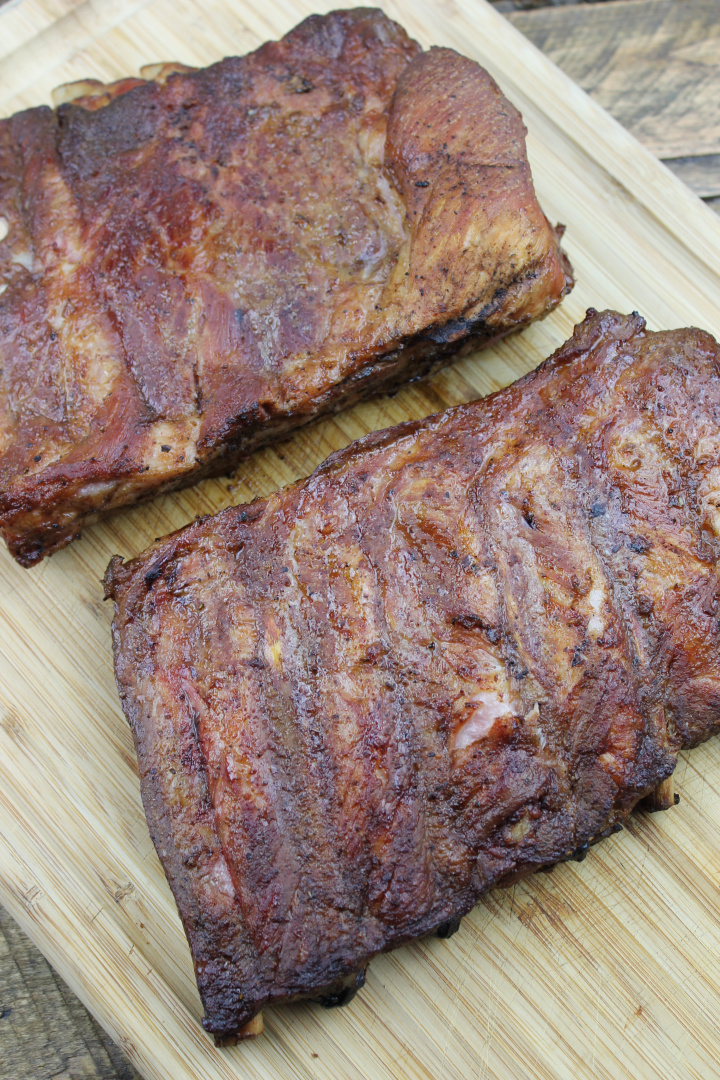
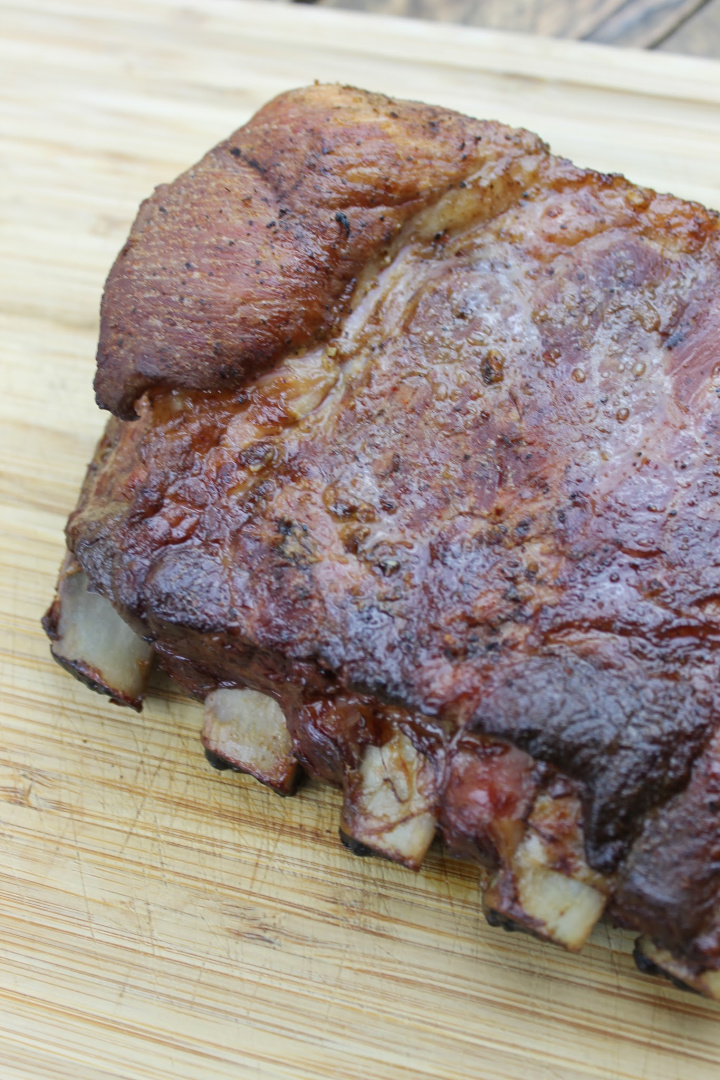
Once I take the ribs out of the smoker or oven. I’ll just let them rest on the counter for an hour still wrapped in foil. Finally, it’s time for the payoff! I’ll unwrap the ribs and slice them up so my family and I can enjoy them.
Print this recipe:
Smoked Ribs
Ingredients
rack of ribs
mustard
¼ cup white sugar
¼ cup brown sugar
¼ tsp cayenne pepper
1 tsp chili powder
1 tbsp salt
1 tbsp pepper
Instructions
Tear away the membrane on the inside curve of the rib.
Put about 2 tsp of mustard on the ribs.
Wrap the ribs in foil the night before you plan to smoke them. (Or, put the rub on just one hour prior to smoking.)
Cut the rack of ribs in half.
After 3 ½ to 4 hours on the smoker, take the ribs off the smoker and put barbecue sauce on them.
Wrap them back up in foil and let them stay on the smoke for another ½ hour to an hour.
Allow ribs to rest on the counter for an hour still wrapped in foil.
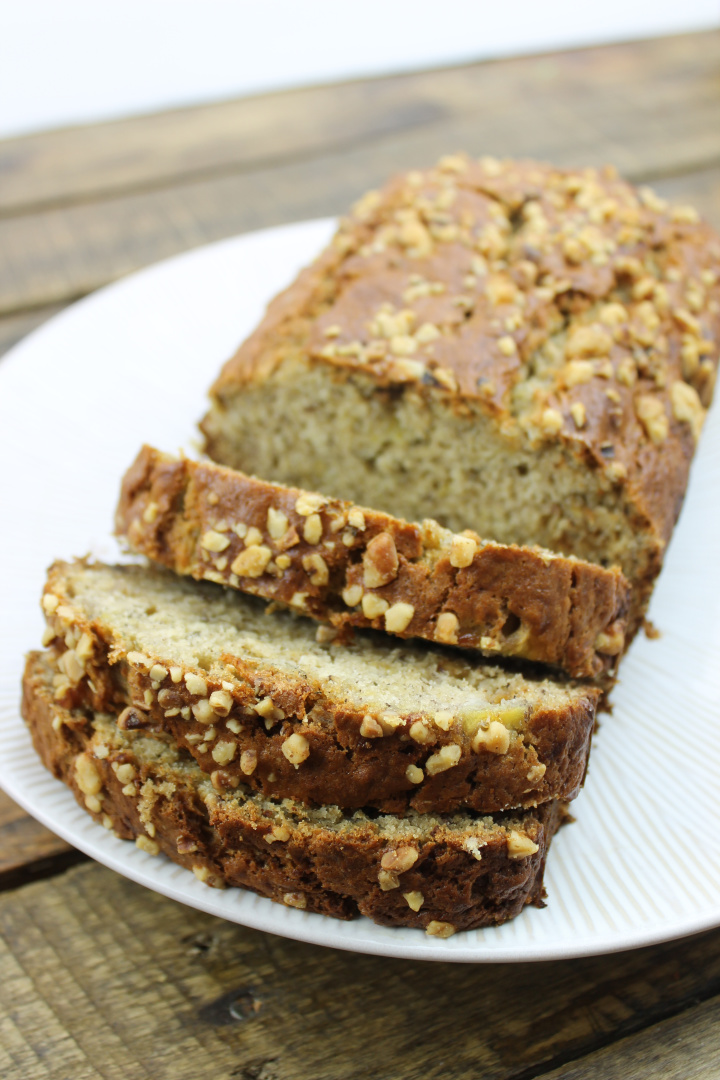
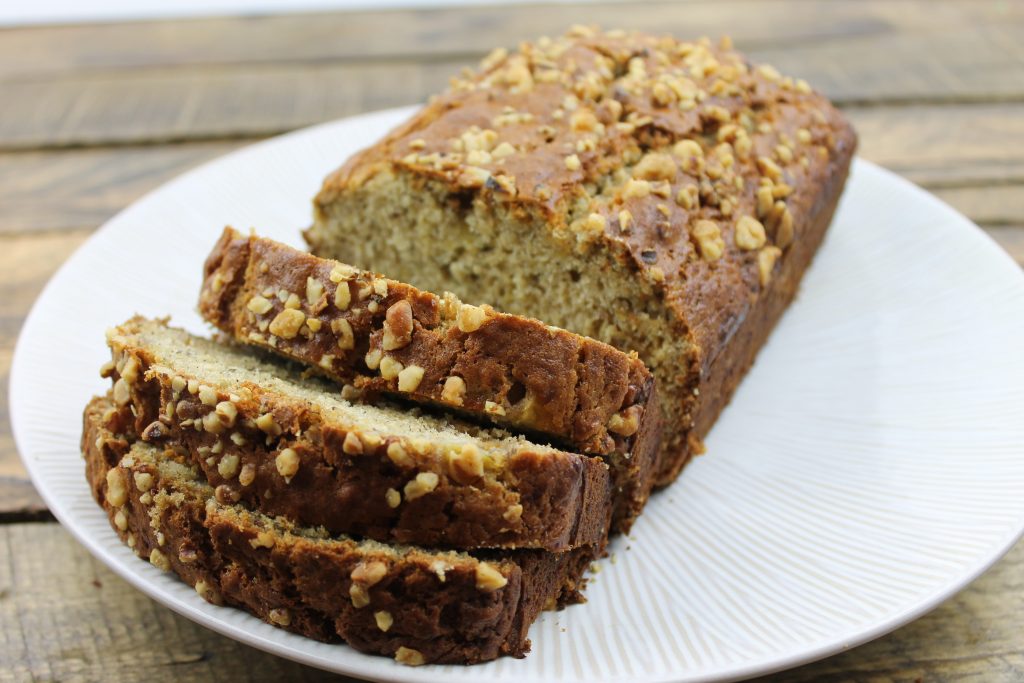
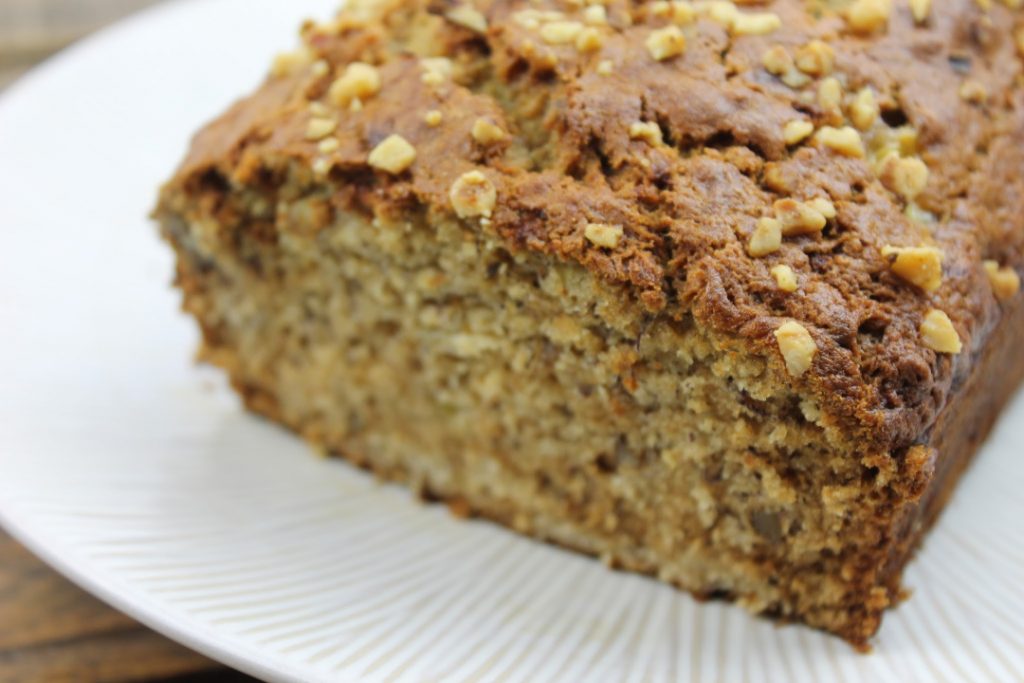
Do you have over-ripe bananas in your home that won’t get eaten? Make Banana Bread with Pecans and Walnuts using the bananas instead of throwing them out!
Banana bread is a great little snack to enjoy with coffee in the morning. It’s sweet, but not too sweet. It’s also a great way to use those bananas that didn’t get eaten. It’s a family friendly dessert that I like to get my children get involved with.
This recipe involves smashing bananas, measuring carefully, and then of course the pay-off of enjoying it later.
My wife was the one who brought this banana bread to our family. I had eaten banana bread before I was married, but it was often given as a gift by a family friend.
She started making banana bread about 10 years ago, mostly because we couldn’t eat all of the bananas we had in the house to feed our young children. It’s a lot of fun to make too!
This is your choice! You can add walnuts or pecans or add both to your banana bread based on your preference! Both provide an additional tasty crunch to your recipe.
Pecans are a bit sweeter and provide more of a crunch. Walnuts are a bit more ‘earthy’ tasting.
This recipe includes pecans and walnuts.
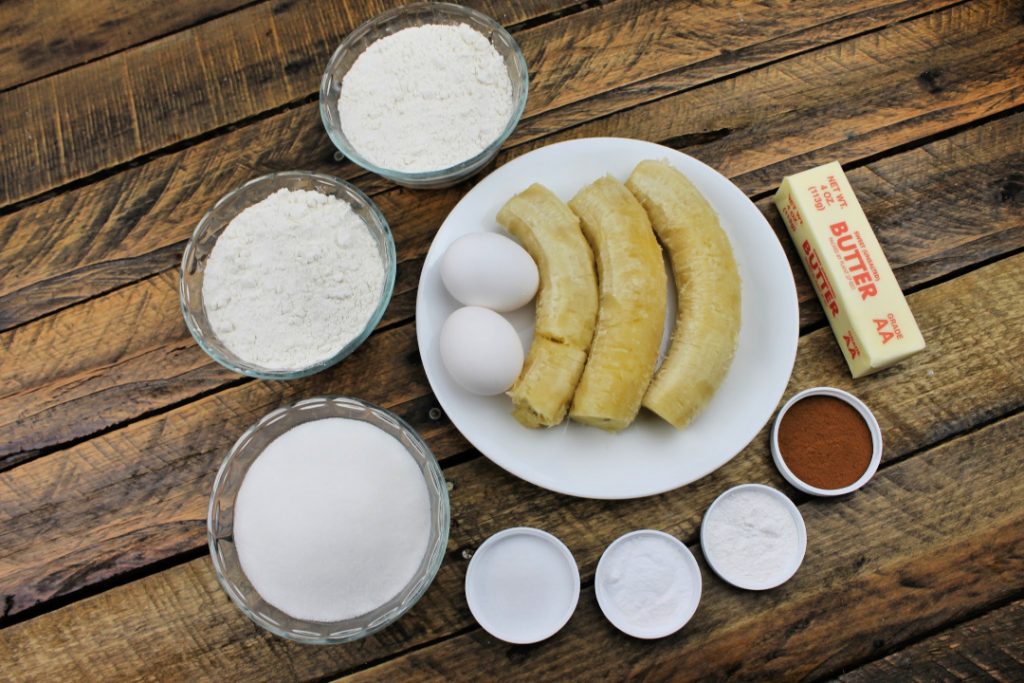
Banana Bread with Pecans and Walnuts
Ingredients:
3 ripe bananas
1 cup granulated sugar
1 stick unsalted butter
2 eggs
1 tbsp. half and half
1 tsp. cinnamon
2 cups flour
1 tsp. baking powder
1 tsp. baking soda
¼ tsp. vanilla extract
1 tsp. salt
¼ cup of pecans
½ cup of walnuts
Directions:
Pre heat an oven to 375 degrees.
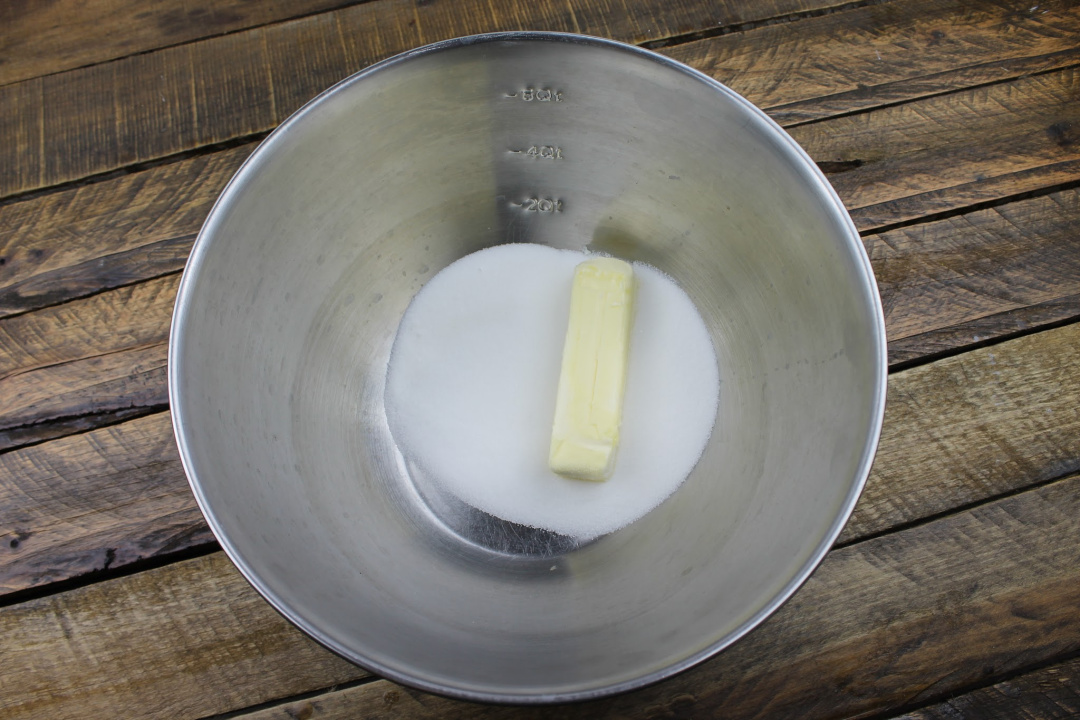
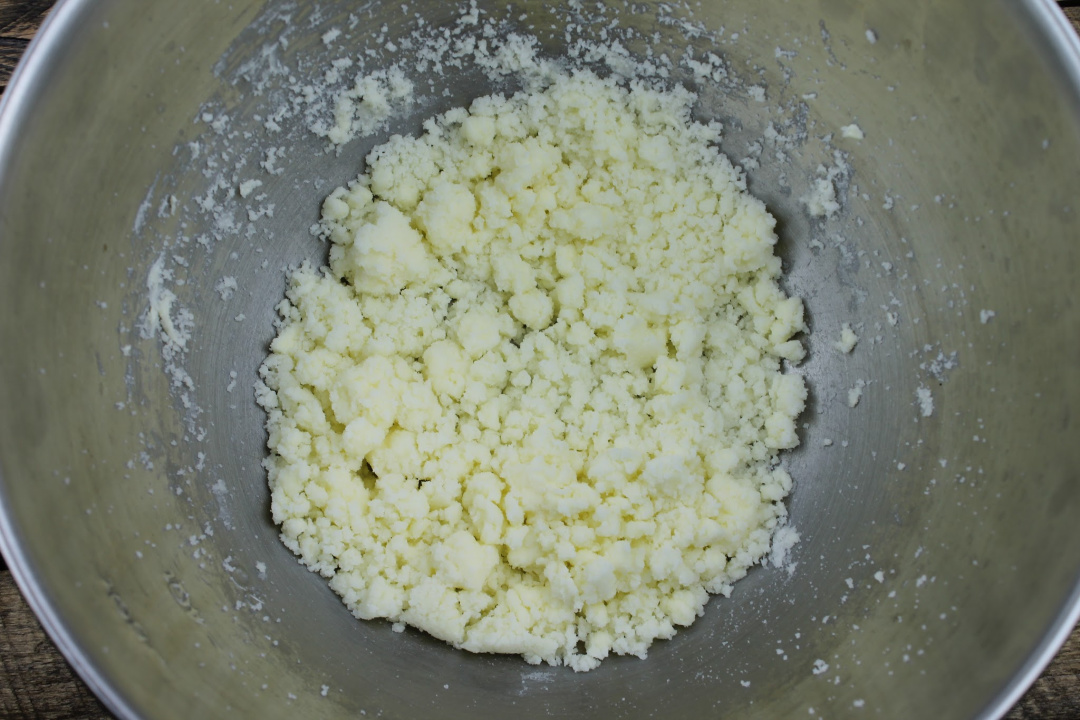
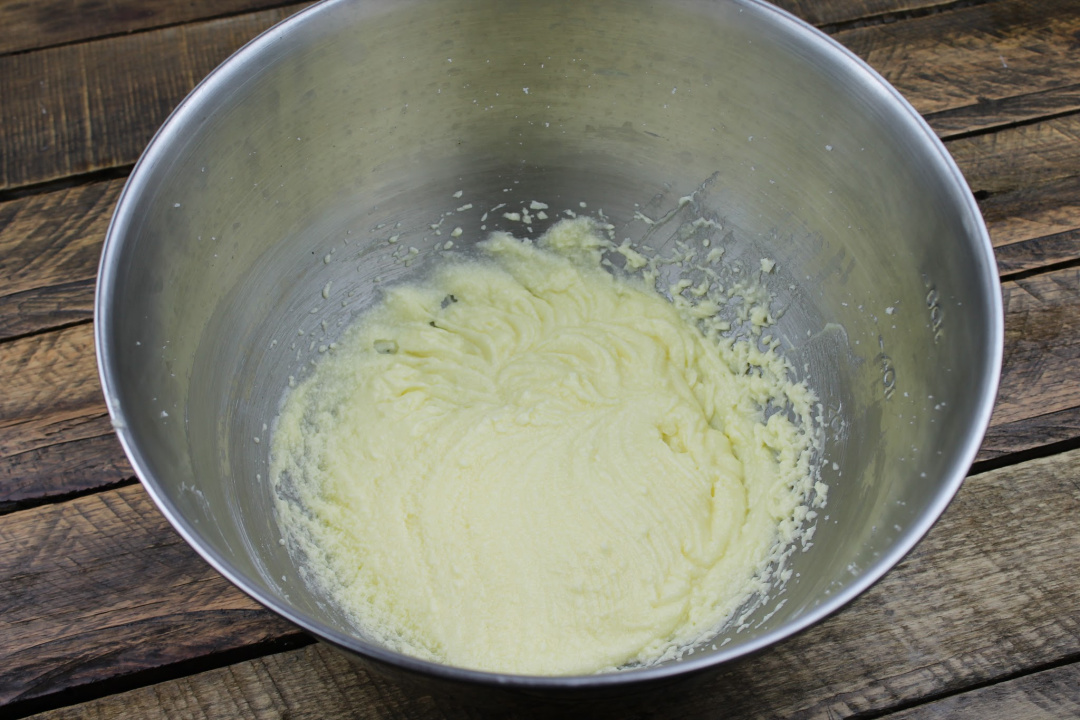
First, combine the sugar and butter into a large mixing bowl.
Mix well.
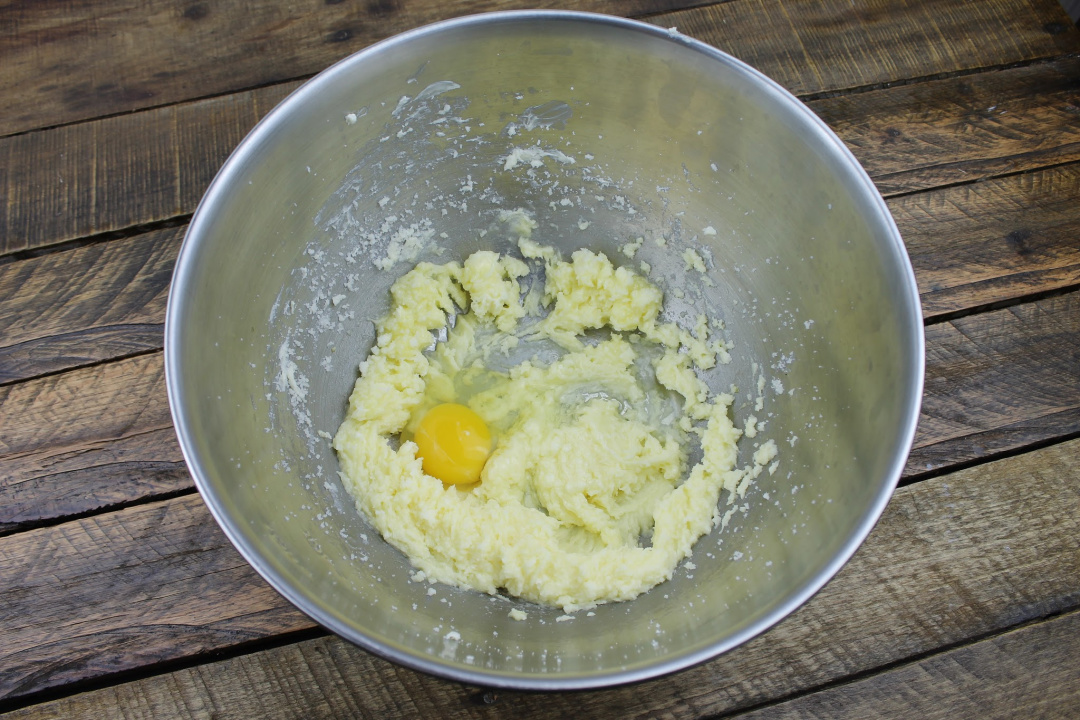
Add the 2 eggs.
Using an electric hand mixer, mix eggs into the butter and sugar mixture.
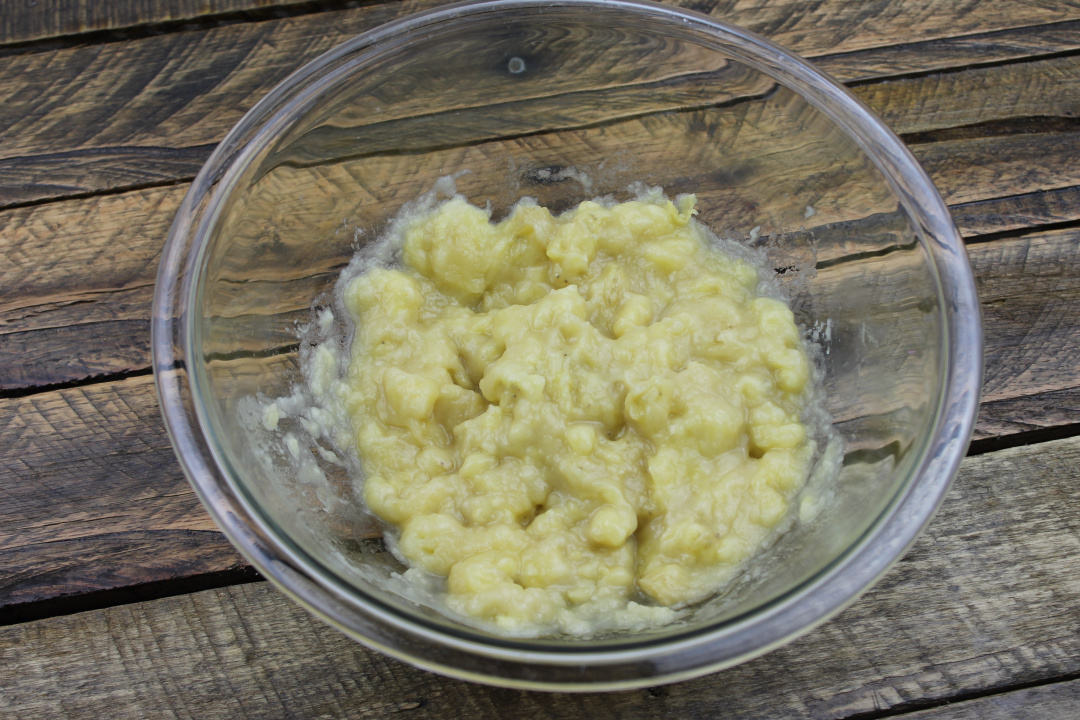
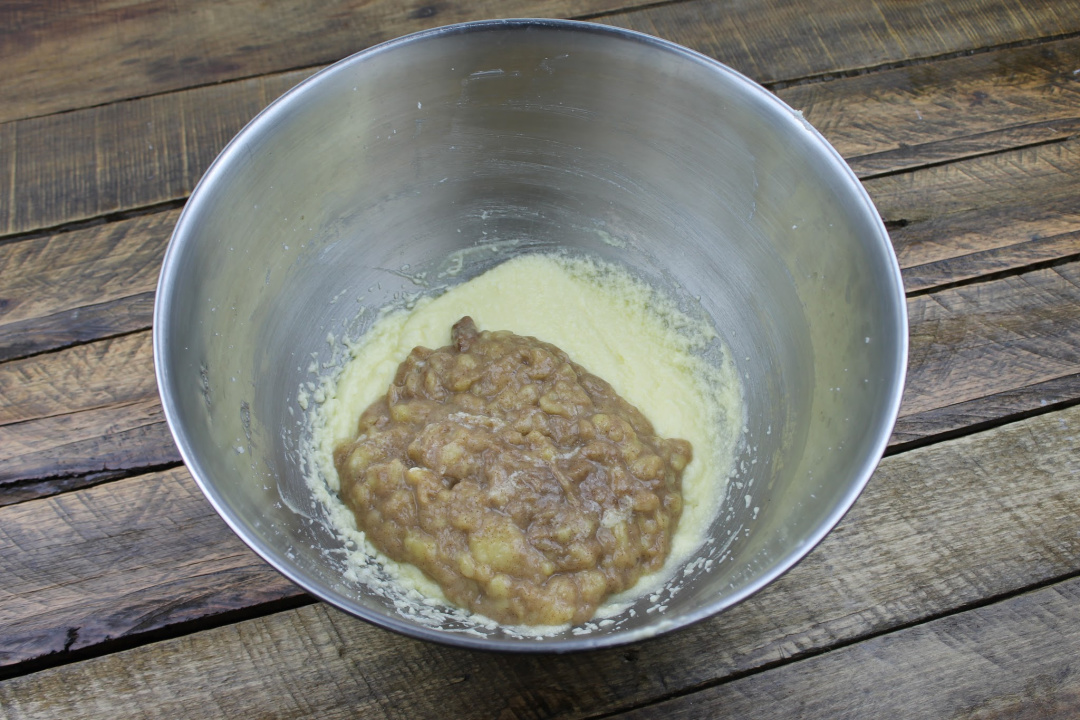
Next, mash up the 3 bananas.
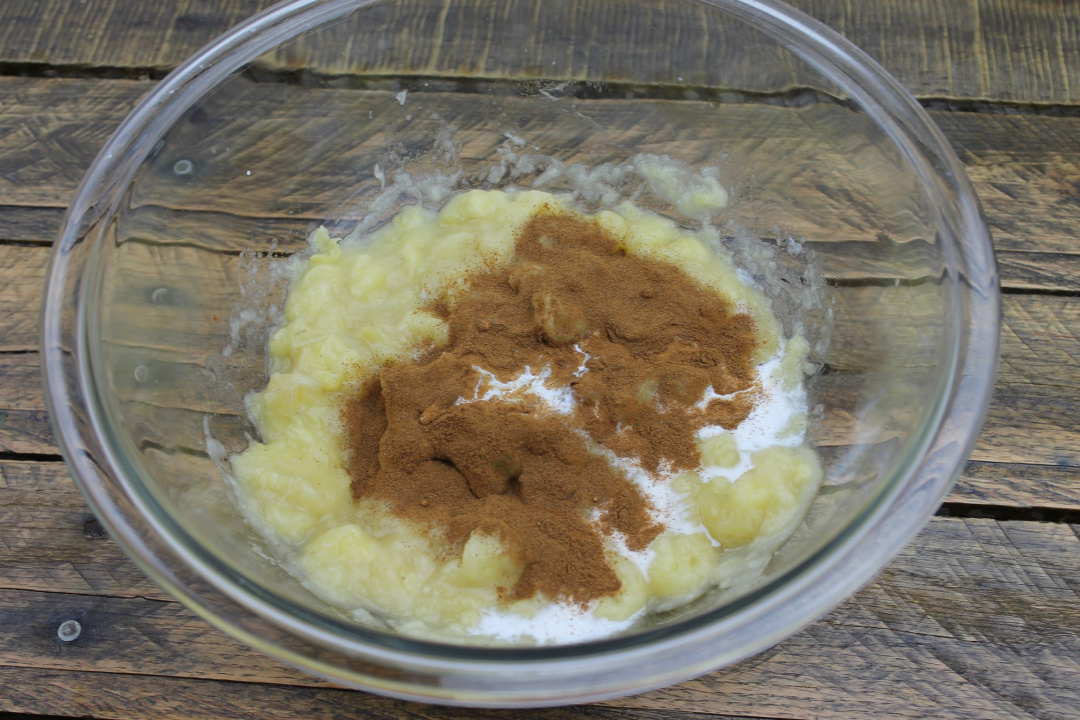
Once well mashed, add the cinnamon, milk, and vanilla.
Mix well.
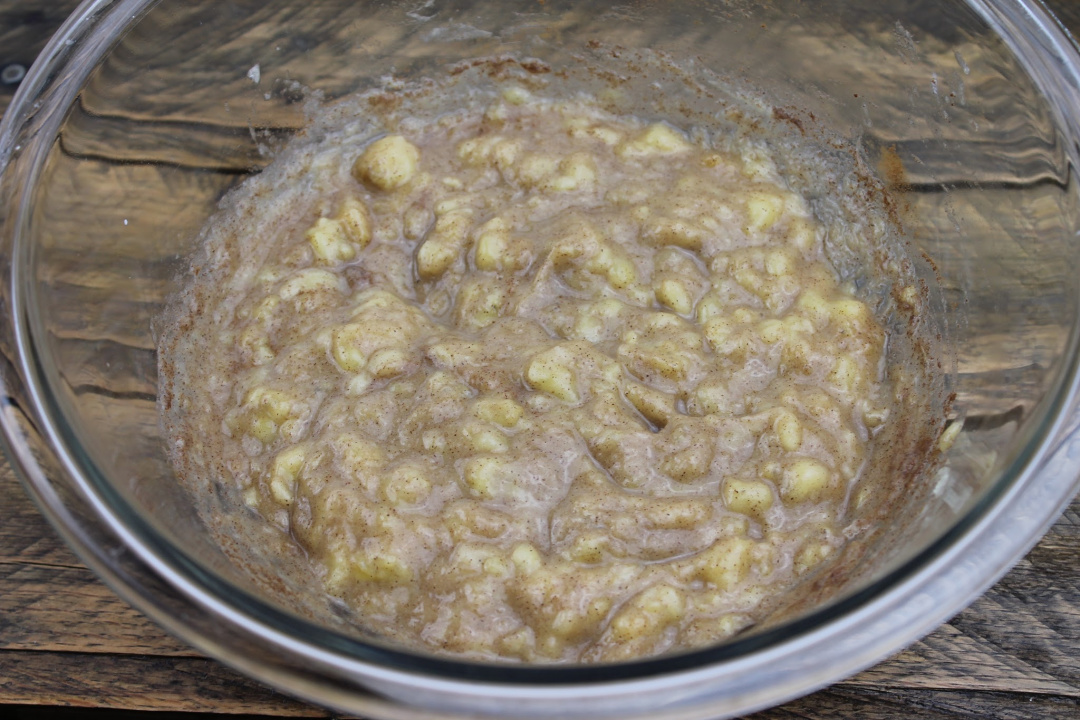
Then, add the banana mixture with the sugar, butter, and egg mixture.
Mix well.
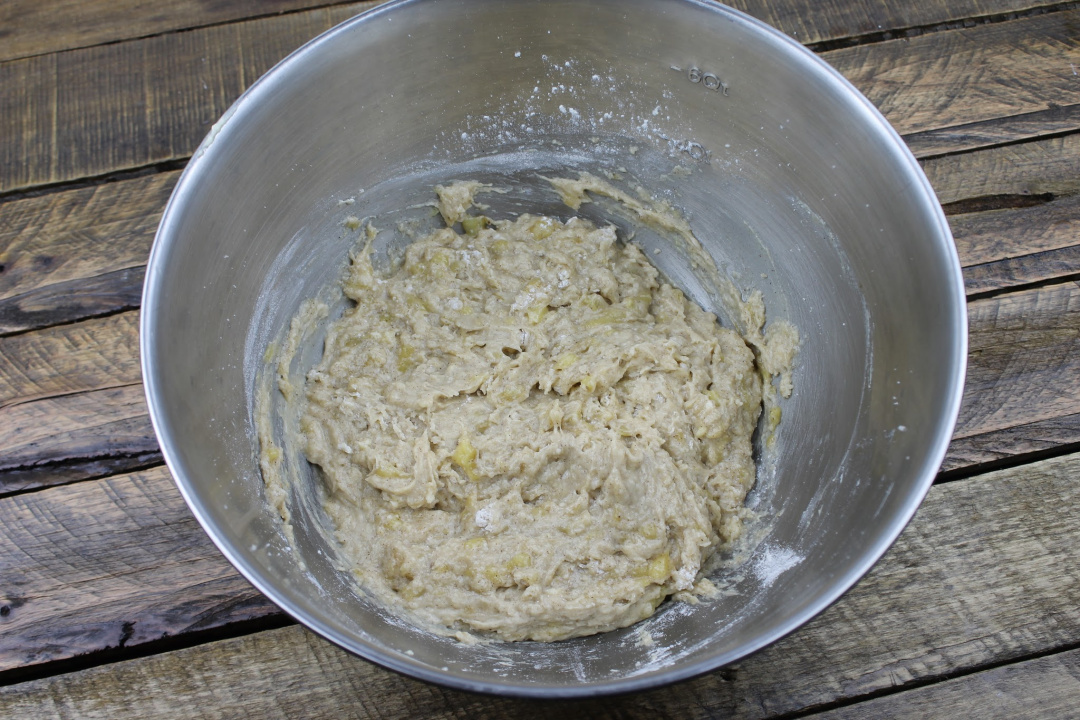
Add all dry ingredients.
Mix the batter just enough until you don’t see any more raw flour. Do not over mix the batter!
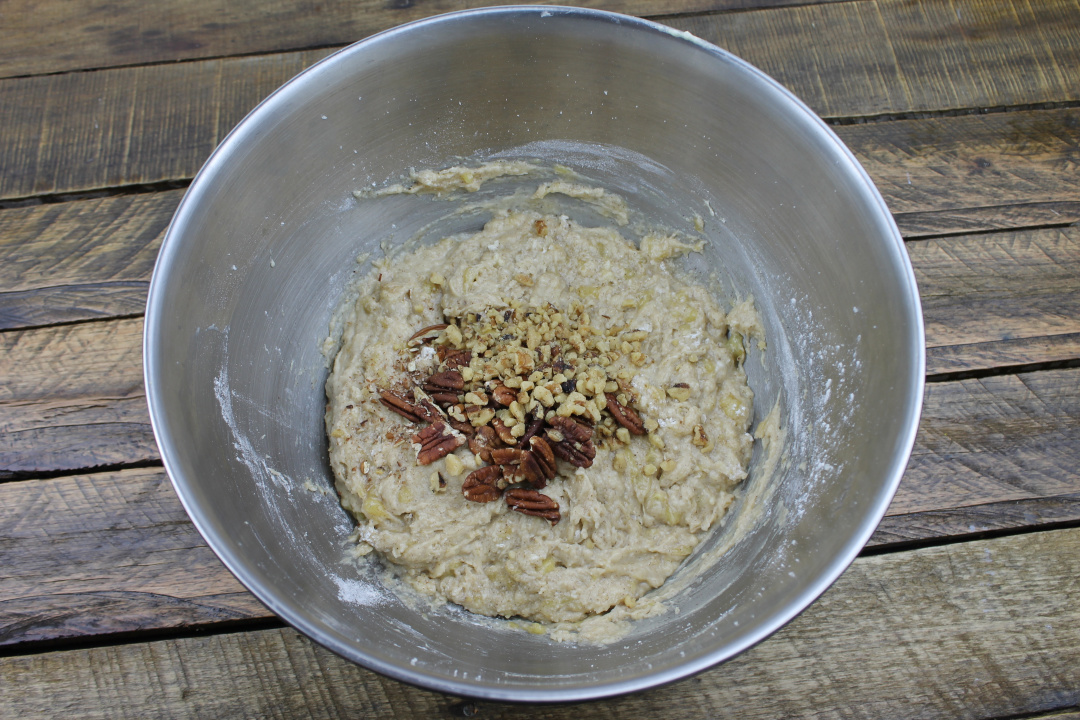
Finally, fold in ¼ cup of pecans and ¼ cup of walnuts (save the other ¼ cup of walnuts for a topping).
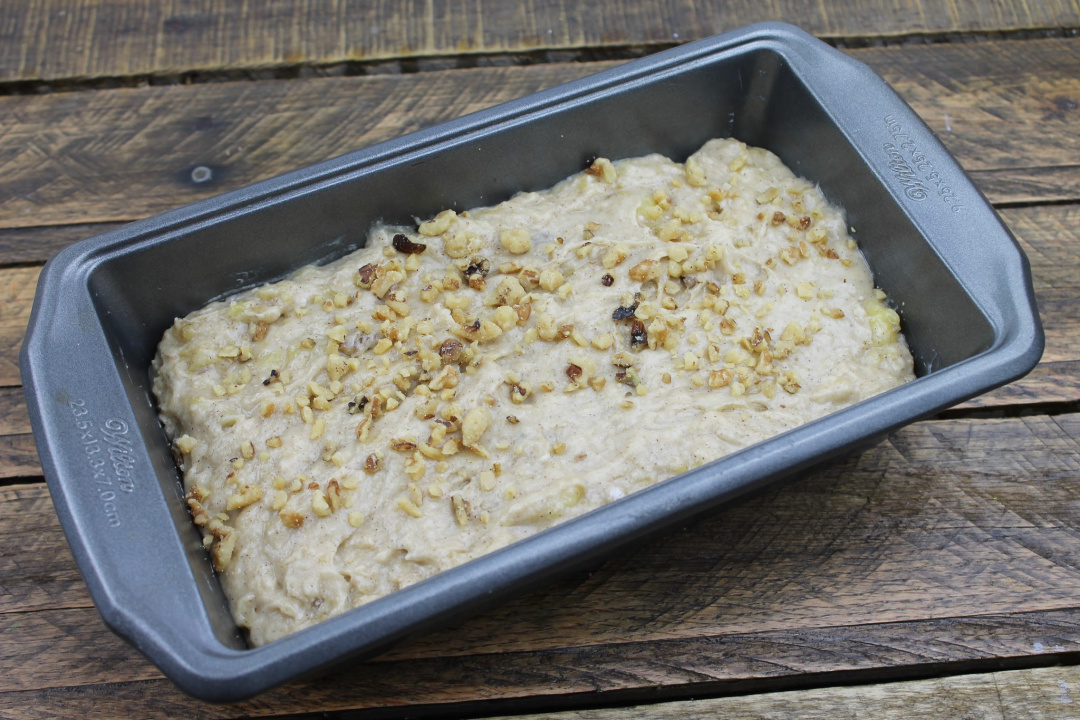
Pour the batter into a 9.25 X 5.25-inch non stick loaf pan, and sprinkle the other ¼ cup of walnuts over the banana bread batter.
Place on the center rack of the oven for 40-50 minutes or until the bread is baked through.
Place on a wire rack for cooling.
Then, cut into slices and serve!
Banana Bread with Pecans and Walnuts
Ingredients
3 ripe bananas
1 cup granulated sugar
1 stick unsalted butter
2 eggs
1 tbsp of half and half
1 tsp cinnamon
2 cups flour
1 tsp baking powder
1 tsp baking soda
¼ tsp vanilla extract
1 tsp salt
¼ cup of pecans
½ cup of walnuts
Instructions
Pre heat an oven to 375 degrees.
First, combine the sugar and butter into a large mixing bowl.
Mix well, then add the 2 eggs, mix into the butter and sugar mixture.
Next, mash up the 3 bananas.
Once well mashed, add the cinnamon, milk, and vanilla. Mix well.
Then, add the banana mixture with the sugar, butter, and egg mixture.
Once well combined, add all dry ingredients.
Mix the batter just enough until you don’t see any more raw flour.
Finally, fold in ¼ cup of pecans and ¼ cup of walnuts (save the other ¼ cup of walnuts for a topping).
Pour the batter into a 9.25 X 5.25-inch bread loaf pan, and sprinkle the other ¼ cup of walnuts over the banana bread batter.
Place on the center rack of the oven for 40-50 minutes or until the bread is baked through.
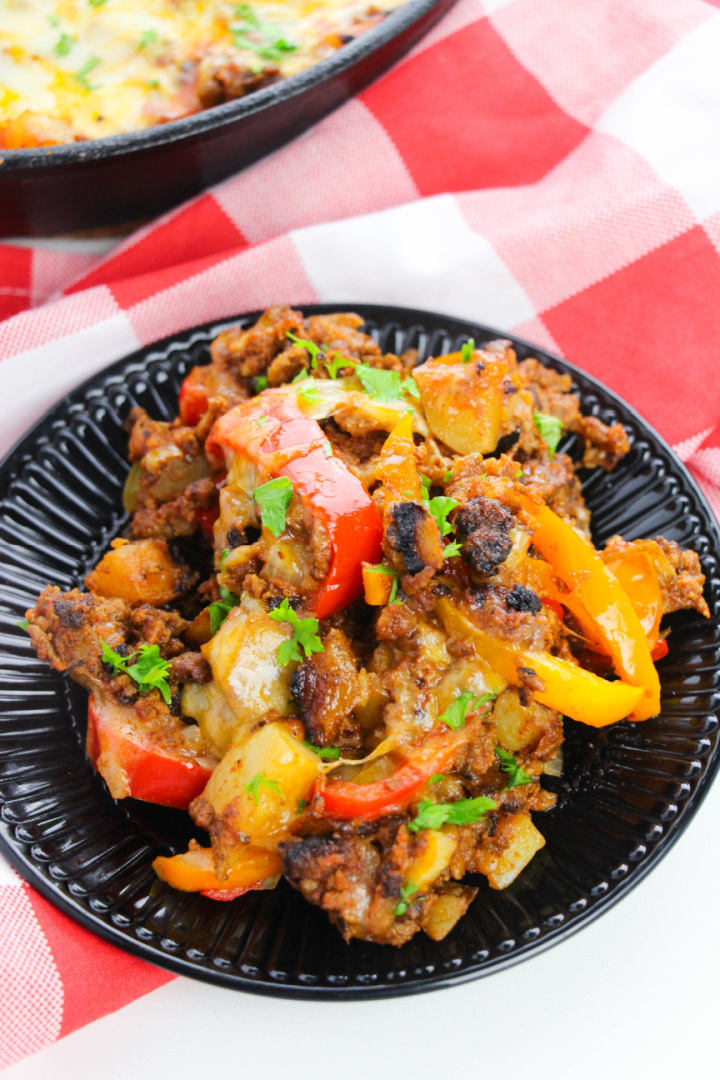
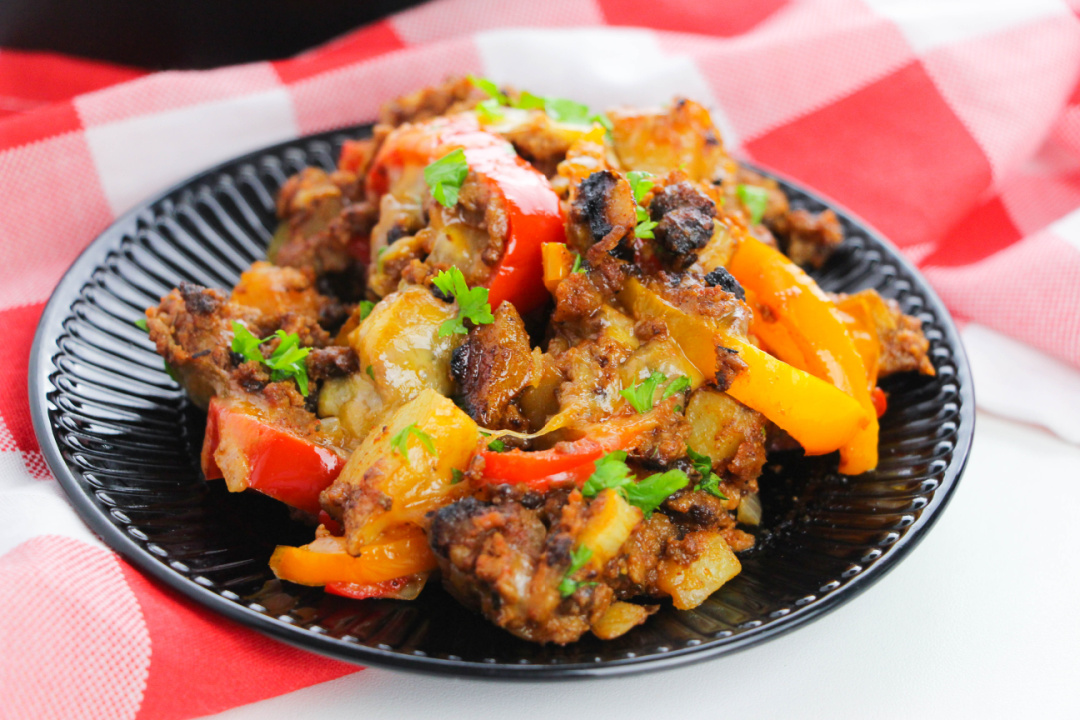
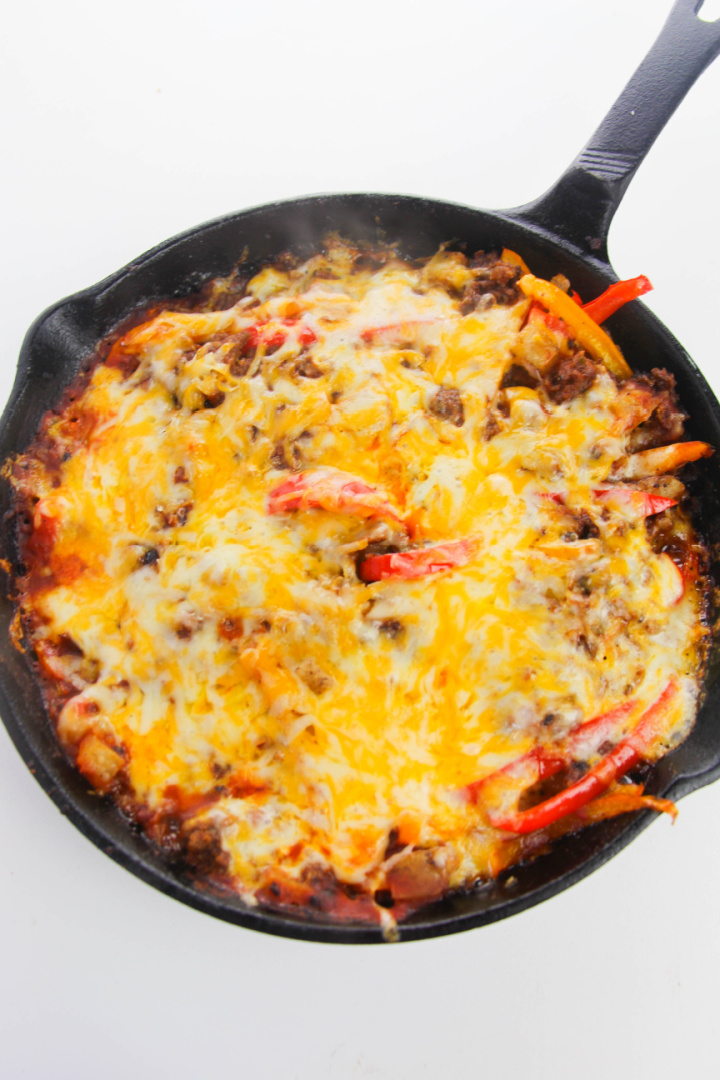
What’s on your menu for tonight? We’ve got you covered. This Sausage and Vegetable Skillet is a hearty meal that will satisfy any appetite. Don’t wait another minute! Start cooking now and get ready to dig in!
Do you have a hearty appetite? If so, this is the perfect dish for you.
This Sausage and Vegetable Skillet meal is full of flavor and meaty goodness. You can whip up this skillet in about 30 minutes or less! Paired with some rice or pasta, it’ll be sure to fill that stomach that needs filling.
Let’s get started!
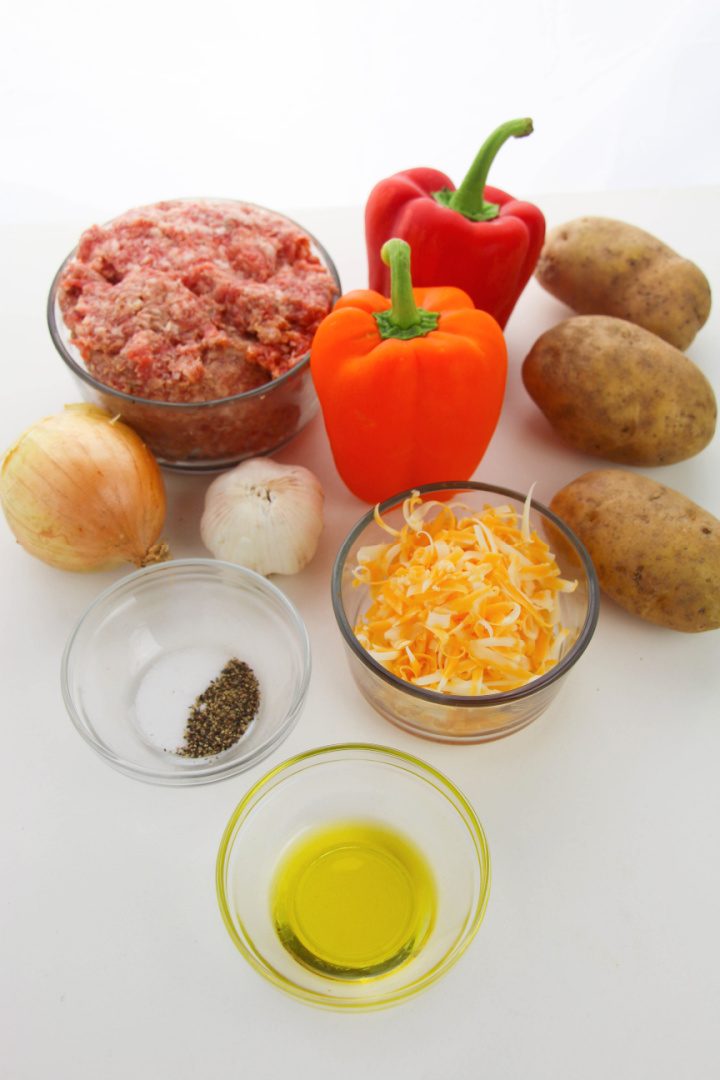
Sausage and Vegetable Skillet
Ingredients:
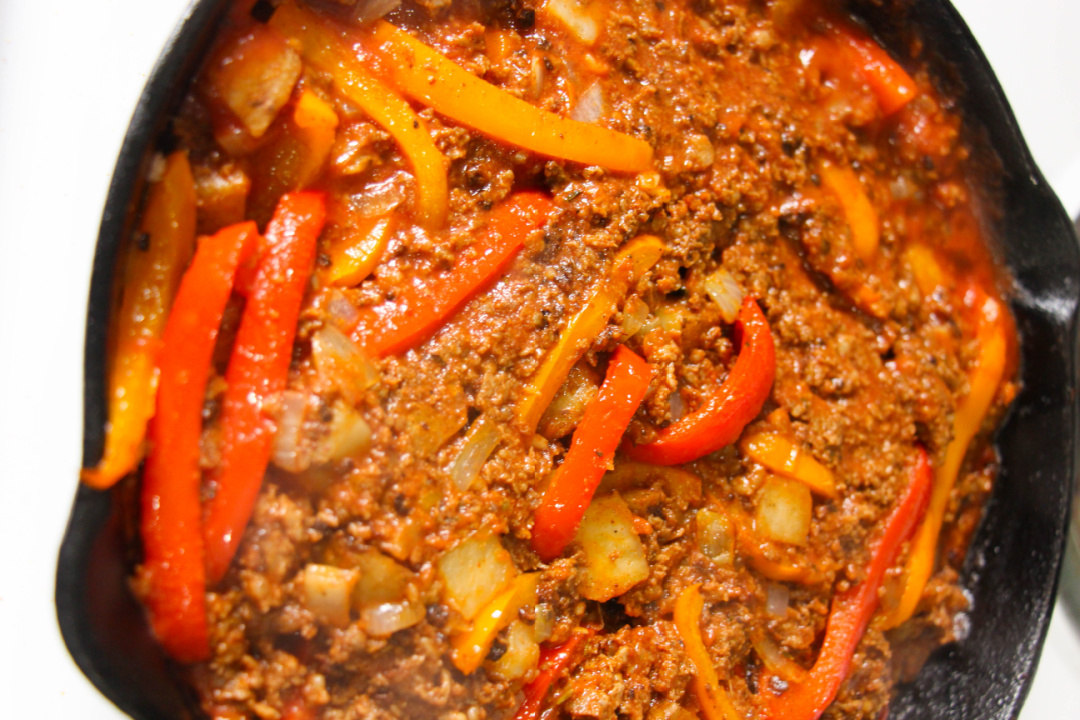
1 lb. ground sausage
salt and pepper, to taste
2 tablespoons olive oil, as needed
2 medium potatoes, scrubbed and diced
1 onion, diced
2 cloves garlic, crushed and sliced
2 sweet bell peppers, sliced and seeded
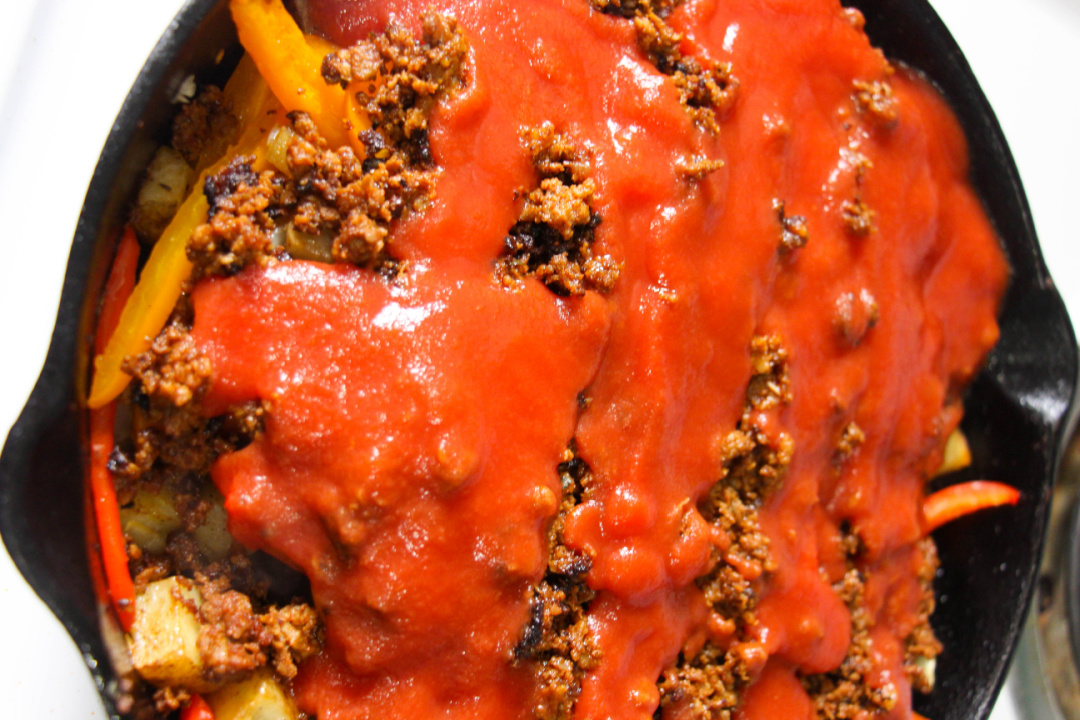
1 cup tomato sauce
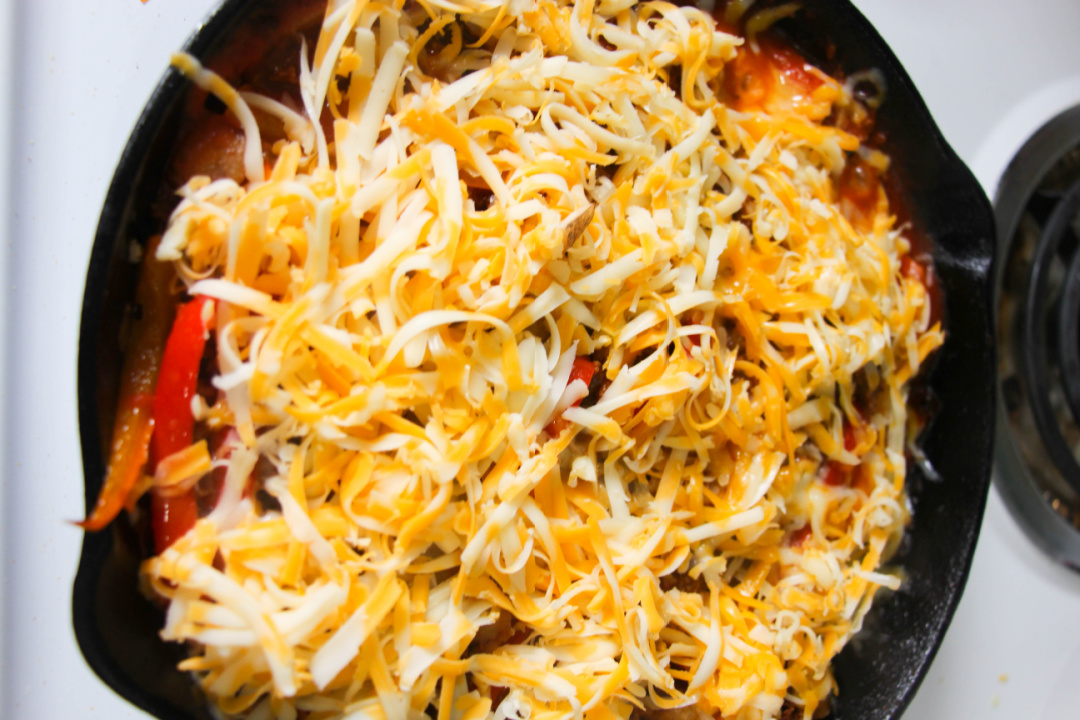
1 1/2 cups shredded cheese
Note: Add your favorite Italian or taco seasoning to make this recipe even more flavorful.
Directions:
Season your sausage as desired with salt, pepper and any favorite seasonings.
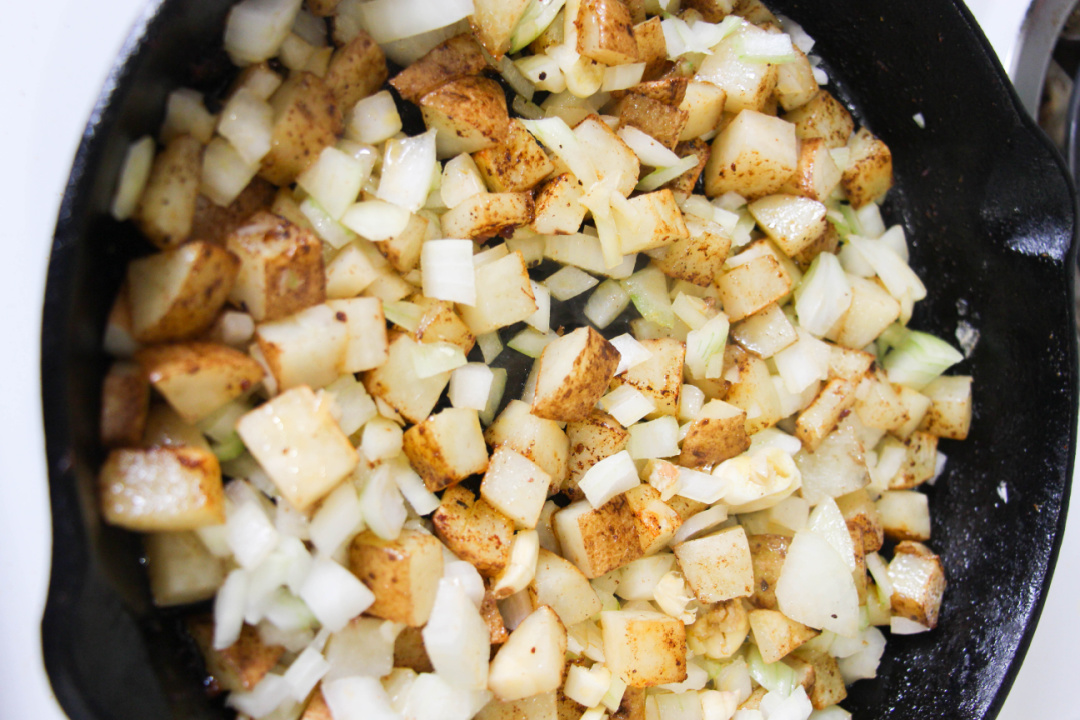
Place 1 tablespoon of olive oil in a cast iron skillet over medium heat.
Once the oil is hot, add the sausage and cook until well-browned, about 8 minutes. Stir occasionally.
Remove the cooked sausage to a clean bowl and add remaining olive oil to the skillet.
Add the chopped potatoes and cook until tender, about 8 minutes, stirring occasionally.
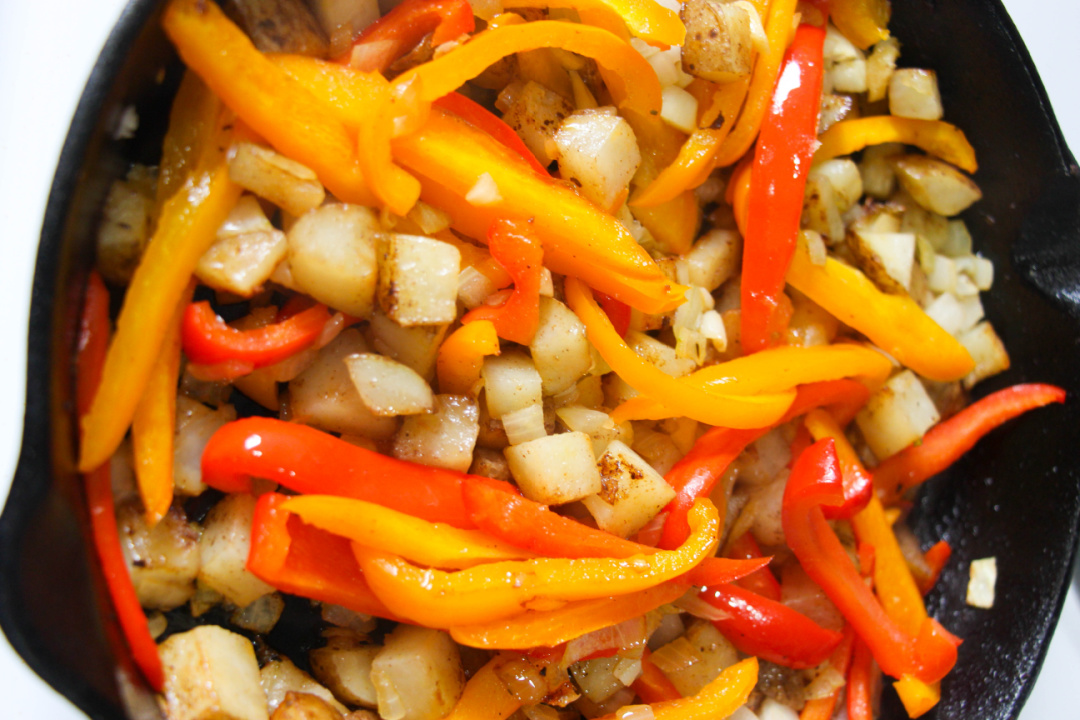
Add the onions, garlic and bell peppers and cook until bell peppers are softened, about 6 minutes.
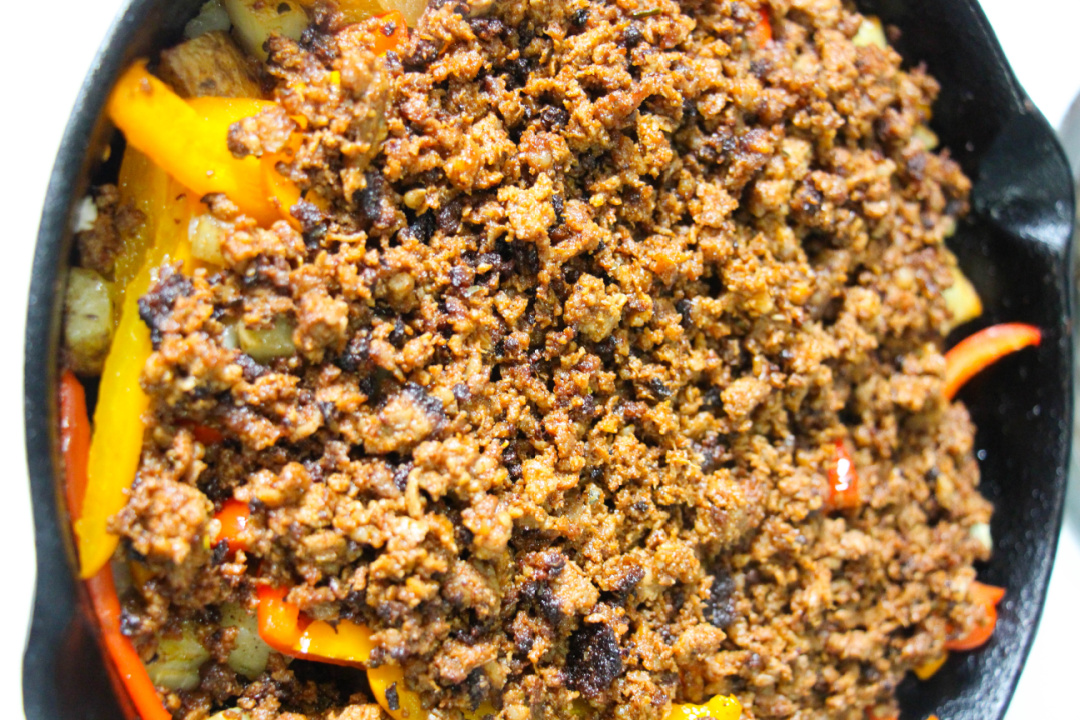
Add the sausage back to the skillet and stir to combine.
Stir in the tomato sauce and top with shredded cheese.