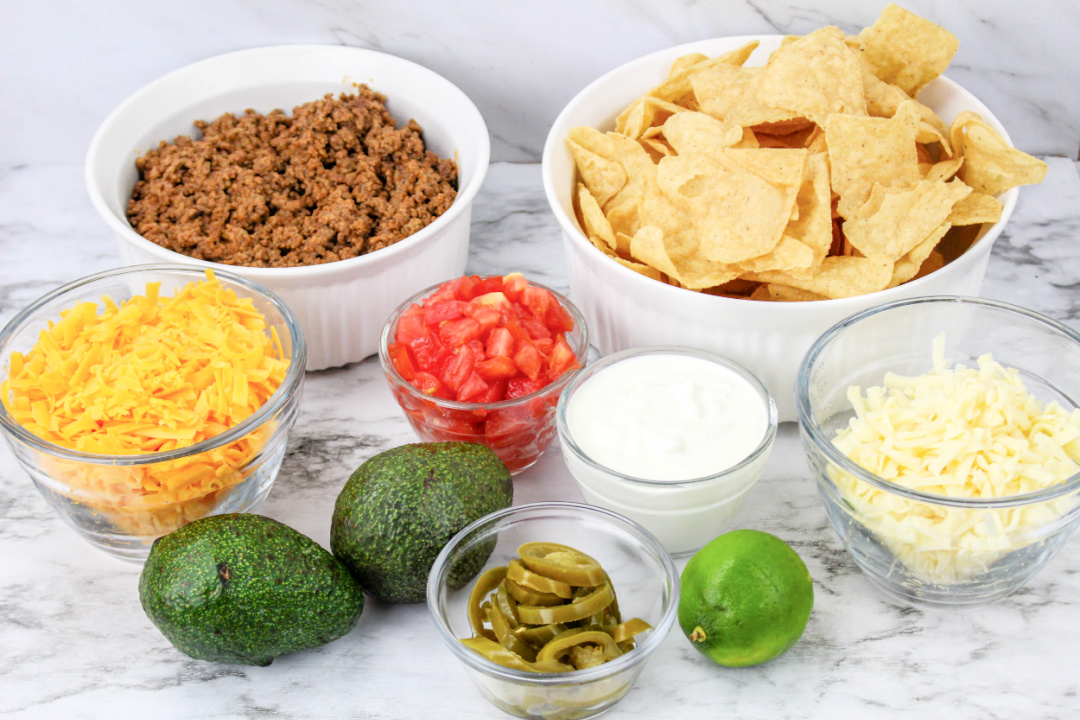
Fire up the grill, (or preheat your oven) gather the ingredients, and let’s get cooking!
If you’re looking for an easy yet delicious meal option for your next cookout or camping trip with friends, look no further than these budget-friendly Beef Nacho Foil Packets.
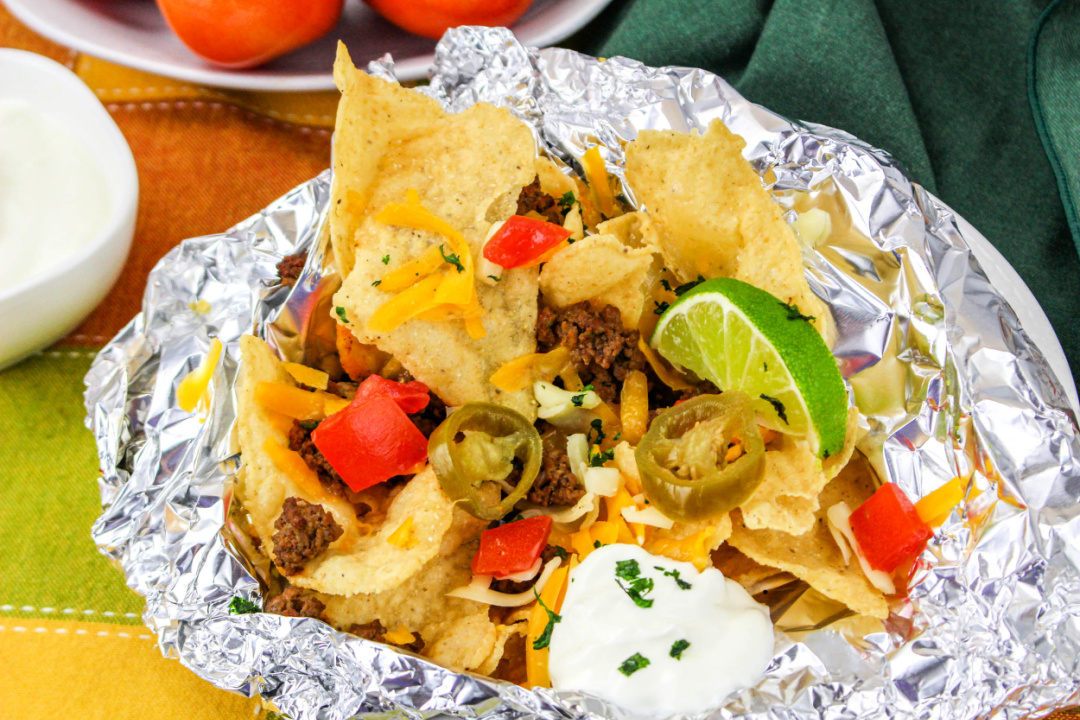
Perfectly seasoned ground beef is wrapped in individual foil packets and grilled until juicy and tender.
Top it off with melted cheese and all your favorite nacho toppings—it’s sure to be a hit at your next gathering.
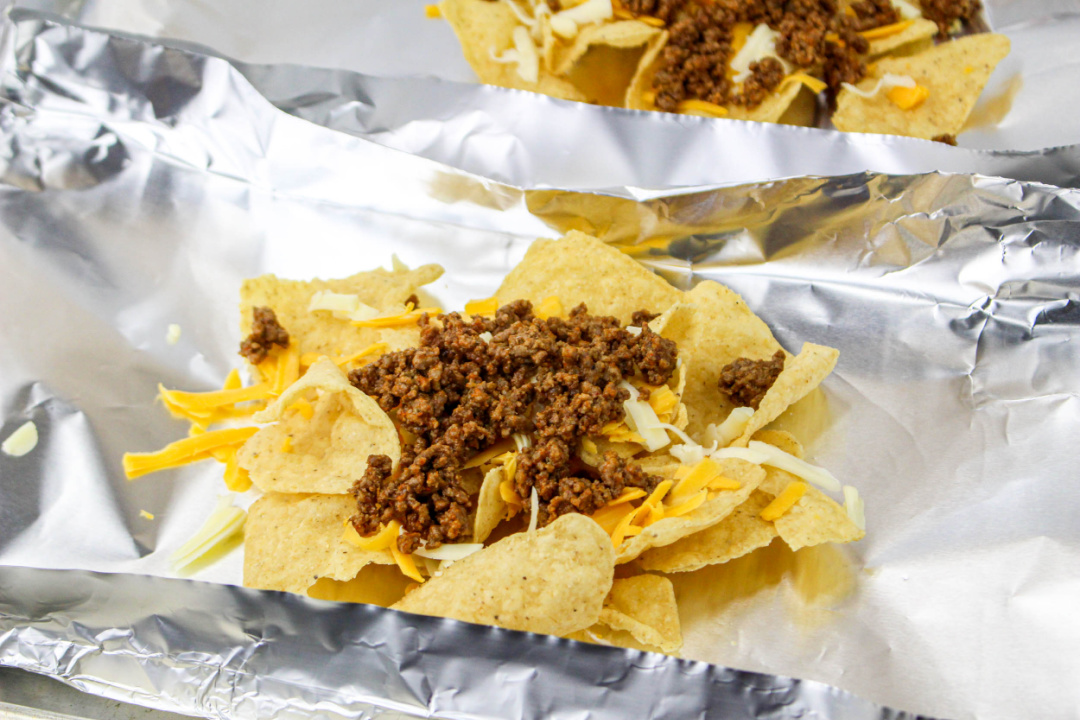
In the middle of the square, place a mound of tortilla chips. Top the chips with cheese and beef.
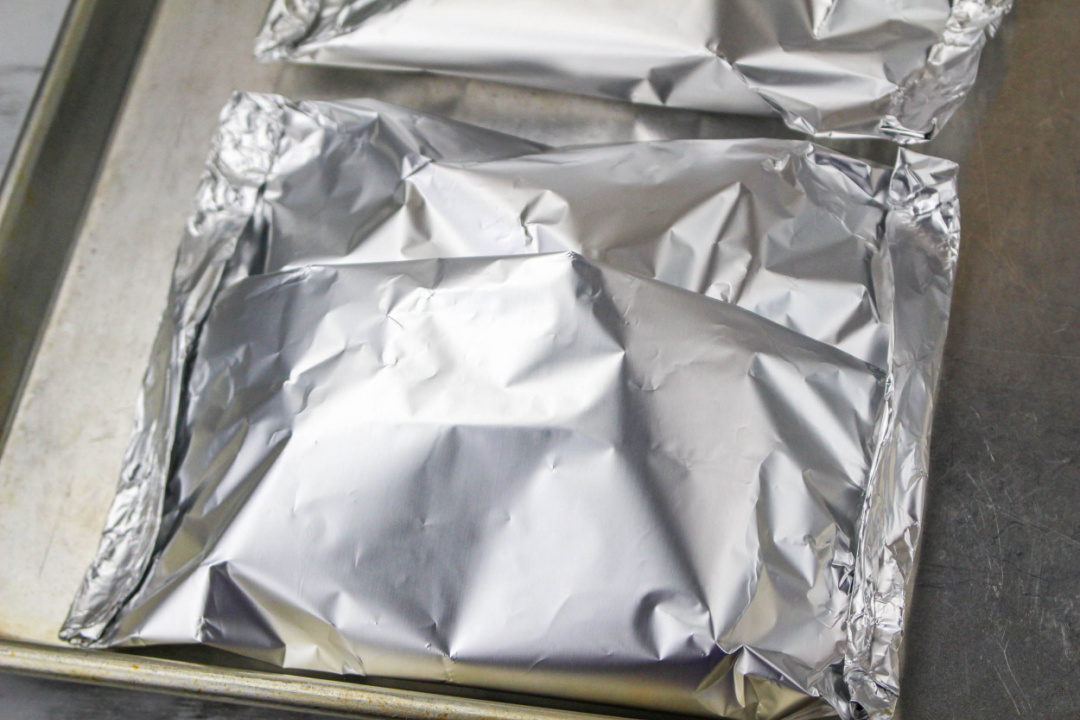
Fold the aluminum foil over the chip and beef creating a pocket.
Roll up any open edges to seal the pocket.
For the oven:
Preheat the oven to 350 degrees. Place the foil packets on a large rimmed baking sheet. Bake for 15 minutes or until the ingredients are heated through and the cheese is melted.
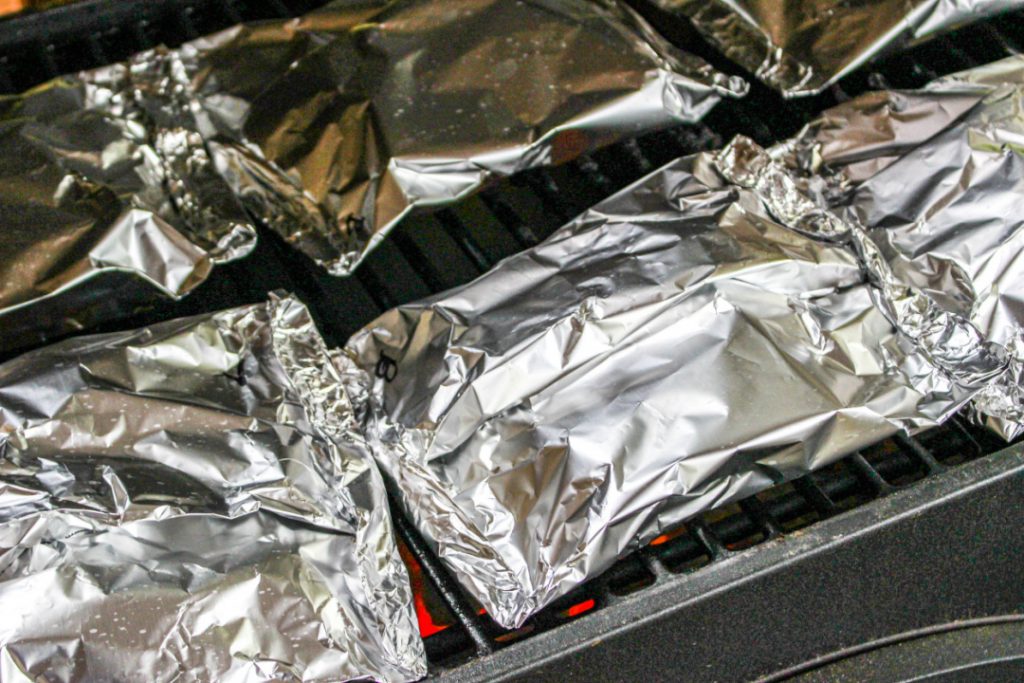
For grilling:
Prepare the grill for medium heat (about 350 degrees.) Place the foil packets on the grill and cook for about 10 minutes or until the ingredients have warmed through and the cheese has melted.
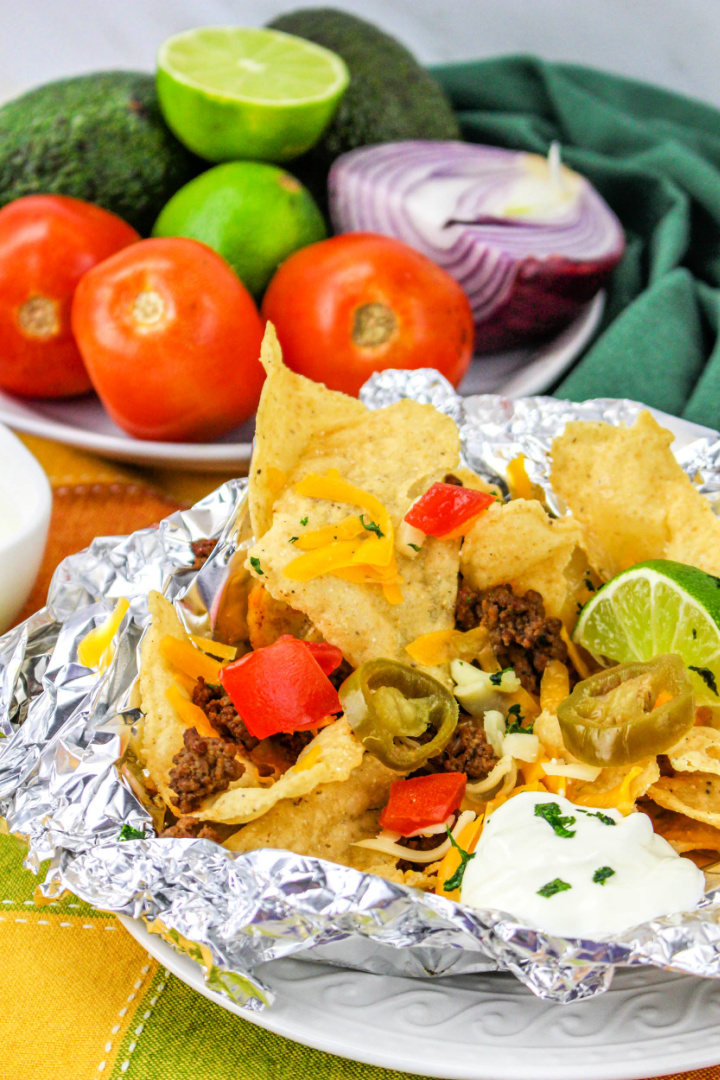
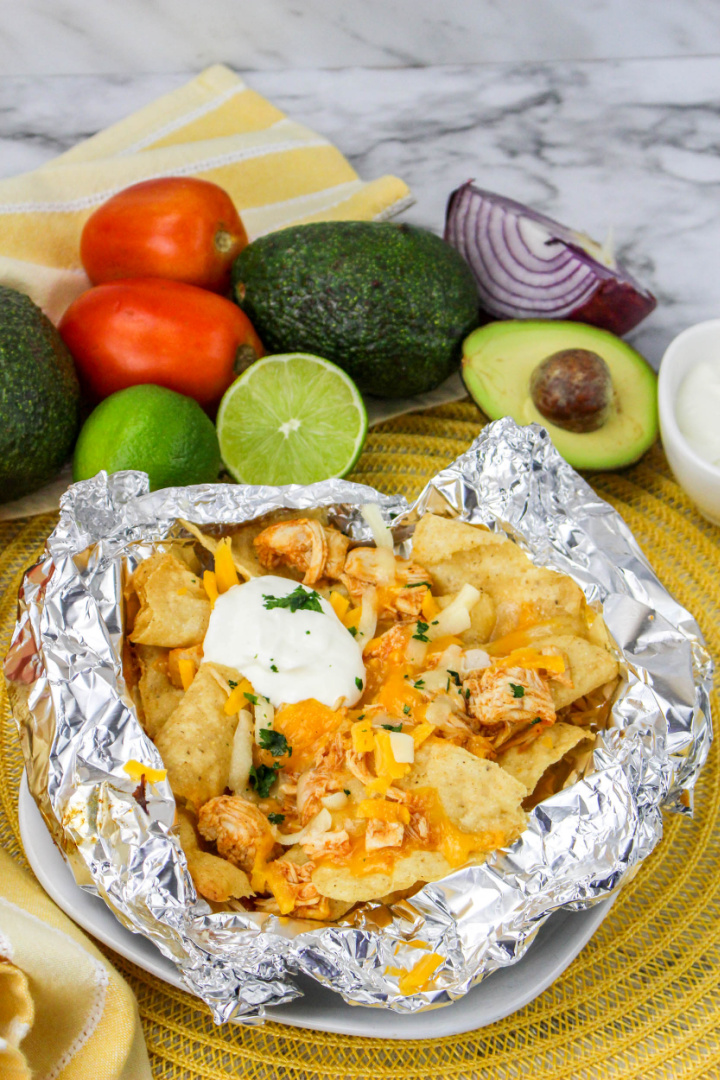
To serve, place the open packet on a plate or in a bowl. Carefully open the foil packets. Top the nachos with additional toppings as desired.
Notes: I used restaurant-style tortilla chips but any style can be used. These nachos can be personalized based on preference. Set up the ingredients like a taco bar and then prepare the nachos on the grill or in the oven.
1.Cut aluminum foil into squares. 2.In the middle of the square, place a mound of tortilla chips. Top the chips with cheese and beef. Fold the aluminum foil over the chip and beef creating a pocket. Roll up any open edges to seal the pocket. 3.For grilling: Prepare the grill for medium heat (about 350 degrees.) Place the foil packets on the grill and cook for about 10 minutes or until the ingredients have warmed through and the cheese has melted. 4.For the oven: Preheat the oven to 350 degrees. Place the foil packets on a large rimmed baking sheet. Bake for 15 minutes or until the ingredients are heated through and the cheese is melted. 5.To serve, place the open packet on a plate or in a bowl. Carefully open the foil packets. Top the nachos with additional toppings as desired.
Notes: I used restaurant-style tortilla chips but any style can be used. These nachos can be personalized based on preference. Set up the ingredients like a taco bar and then prepare the nachos on the grill or in the oven.
Tired of your typical weeknight dinner? Spice it up with Chicken Nacho Foil Packets – the perfect, easy meal for anyone that’s hungry!
Easy Chicken Nacho Foil Packets – A Simple Southern Recipe with Big Flavor
If you’re looking for a no-fuss dinner that’s packed with flavor and easy cleanup, these Chicken Nacho Foil Packets are the way to go.
Whether you’re feeding a hungry family, cooking outdoors, or need something quick on a busy weeknight, this easy foil packet meal is a solid solution that delivers every time.
A Family-Friendly Chicken Nacho Recipe Everyone Can Customize
One of the best parts of this chicken nacho foil packet recipe is how flexible it is. Got picky eaters? No problem.
These nachos can be built individually, meaning every person gets what they want—no onions for one, extra jalapeños for another.
You can set out the ingredients like a nacho bar and let everyone assemble their own foil packet before grilling or baking.
This makes it a fun and easy dinner for kids and adults alike.
Quick and Easy Dinner for Busy Nights
With just 15 minutes of prep time, this easy chicken nacho recipe is perfect for those hectic evenings when time is tight and appetites are big.
Using pre-cooked chicken speeds things up, and everything cooks right in the foil—no extra dishes to wash.
Whether you’re coming home from work or feeding a crowd on game night, you can get this on the table fast.
Perfect for Backyard Cookouts or Oven-Baked Comfort
This recipe shines whether you’re cooking outside on the grill or inside in the oven. On warmer evenings, fire up the grill and keep the heat out of the kitchen.
When the weather turns cool, toss these foil packets on a baking sheet and pop them in the oven.
It’s the same great taste either way, and the cleanup stays easy no matter where you cook.
Great for Tailgates, Camping Trips, and Casual Gatherings
Chicken nacho foil packets also work great beyond the kitchen.
They’re ideal for tailgating since you can prep everything ahead of time and heat them up right on the grill.
Heading out on a camping trip? These foil packets are perfect for tossing on the fire.
They’re also a hit at casual get-togethers—just set up a toppings bar, prep the foil packs, and let everyone make their own.
Why This Chicken Nacho Foil Packet Recipe Works
This recipe hits all the marks for an easy, flavorful, and crowd-pleasing meal. It’s:
Made with simple ingredients
Quick to assemble
Customizable for any taste
Great for indoor or outdoor cooking
Easy to clean up—just toss the foil
And since the base is chips, cheese, chicken, and taco sauce, you’ve already got the foundation of a hearty, satisfying dish that everyone loves.
How to Serve Chicken Nacho Foil Packets
Once the foil packets come off the grill or out of the oven, the fun part begins—adding all the toppings.
Fresh cilantro, diced tomatoes, jalapeños, sour cream, avocado—you can go as simple or as loaded as you like.
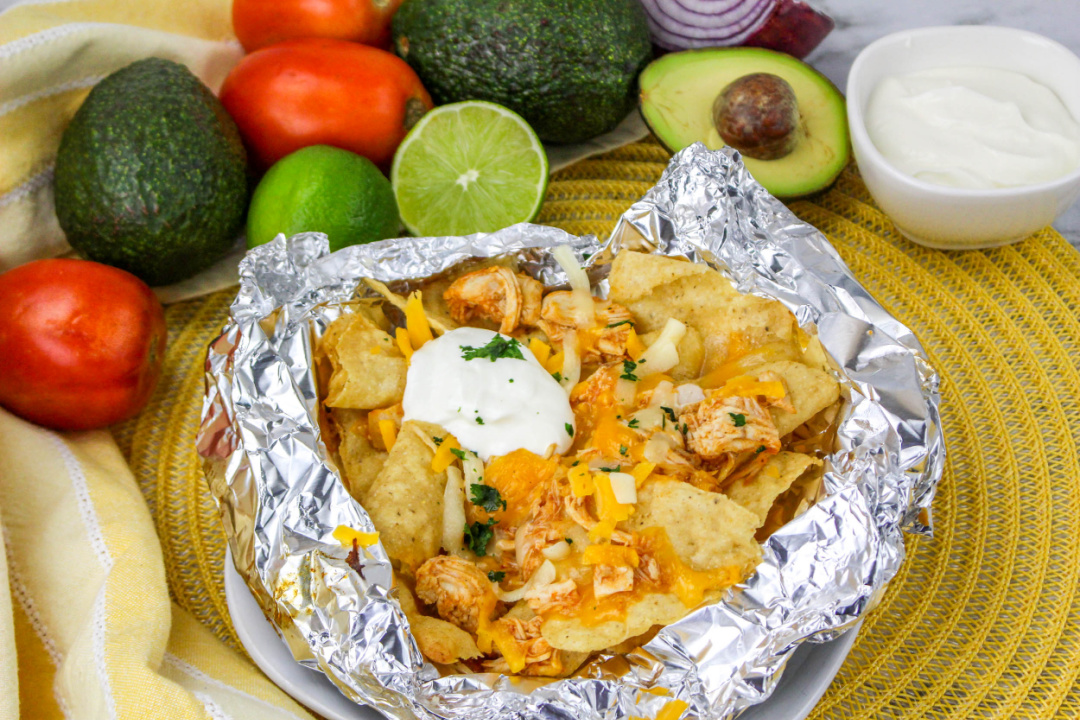
Serve the open foil packets right on a plate or place them in a shallow bowl.
They’re great on their own, or you can pair them with a side of black beans, grilled corn, or a fresh green salad.
This easy chicken nachos in foil packets recipe is one of those go-to meals that works anytime—weeknights, weekends, summer cookouts, or even rainy day dinners inside.
It’s flavorful, adaptable, and low-stress, which is exactly what every home cook needs in their back pocket.
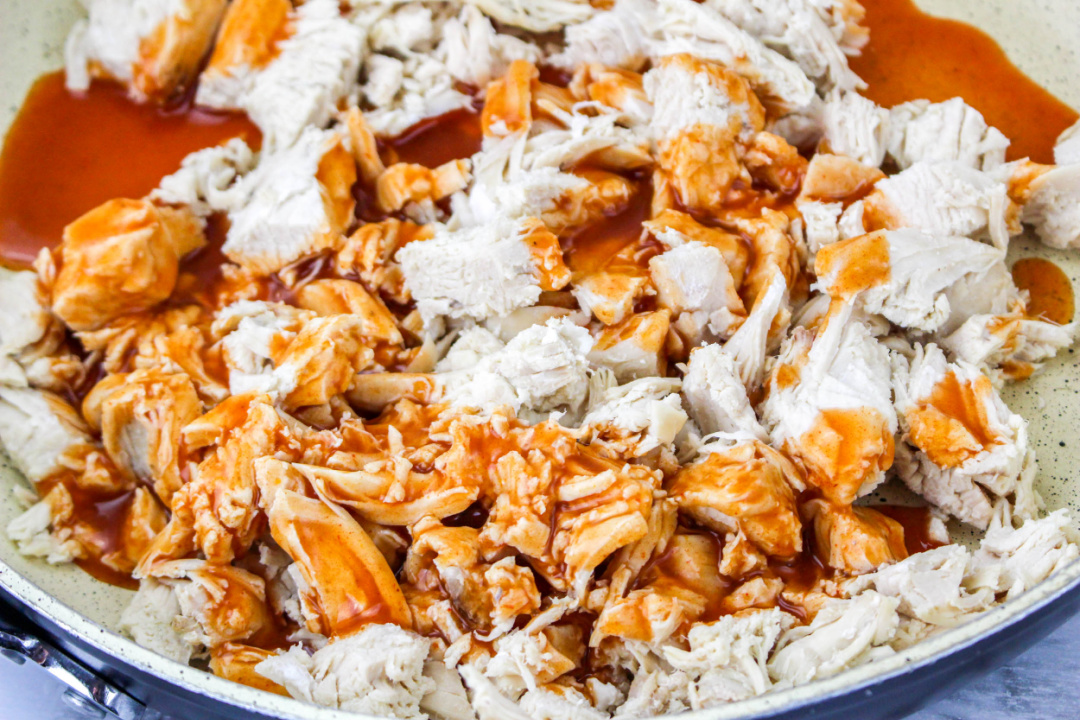
In a medium skillet over medium-high heat, add the chicken and taco sauce. Stir to combine and heat for 5 to 8 minutes or until the chicken has heated through.
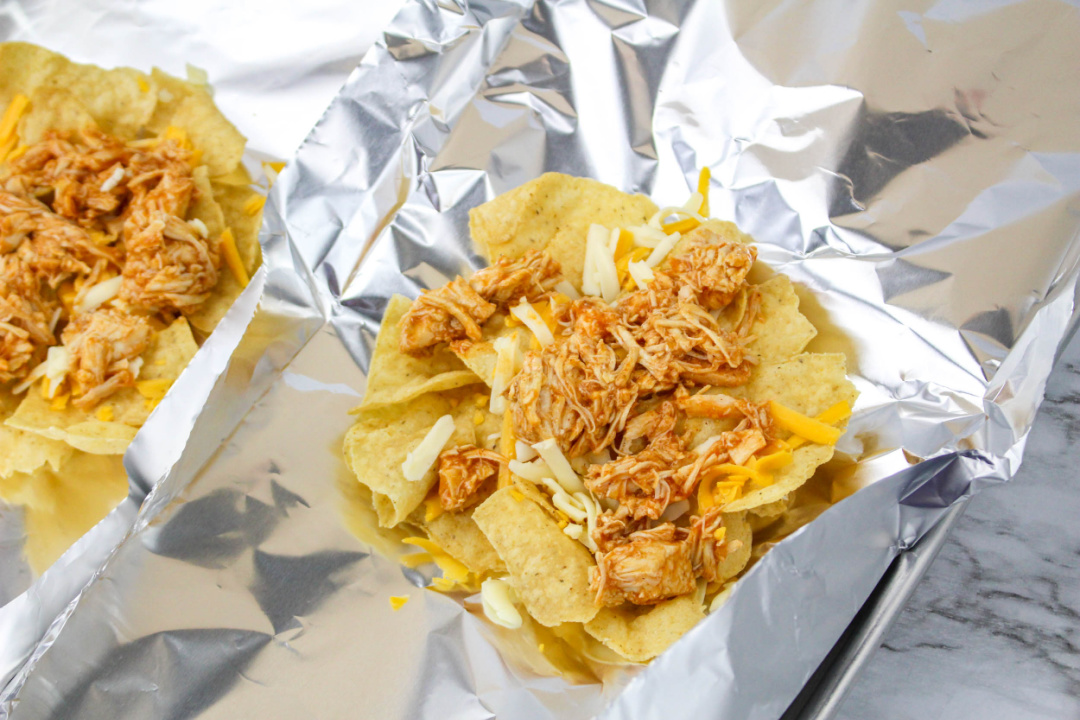
Cut aluminum foil into squares.
In the middle of the square, place a mound of tortilla chips. Top the chips with cheese and chicken. Fold the aluminum foil over the chip and chicken creating a pocket. Roll up any open edges to seal the pocket.
For the oven:
Preheat the oven to 350 degrees. Place the foil packets on a large rimmed baking sheet. Bake for 15 minutes or until the ingredients are heated through and the cheese is melted.
For grilling:
Prepare the grill for medium heat (about 350 degrees.) Place the foil packets on the grill and cook for about 10 minutes or until the ingredients have warmed through and the cheese has melted.
To serve, place the open packet on a plate or in a bowl. Carefully open the foil packets. Top the nachos with additional toppings as desired.
Notes: I used restaurant-style tortilla chips but any style can be used. These nachos can be personalized based on preference. Set up the ingredients like a taco bar and then prepare the nachos on the grill or in the oven.
Frequently Asked Questions About Chicken Nacho Foil Packets
1. Can I make chicken nacho foil packets ahead of time? Yes, you can prep everything in advance. Assemble the foil packets with chips, cooked chicken, taco sauce, and cheese. Keep them in the fridge for a few hours before grilling or baking. Wait to add fresh toppings like tomatoes, sour cream, or avocado until after cooking.
2. What kind of chicken works best for nacho foil packets? Rotisserie chicken, grilled chicken, or leftover shredded chicken all work great. You want something that’s already cooked so the prep is quick and the foil packets heat evenly.
3. Can I bake chicken nacho foil packets in the oven instead of grilling? Absolutely. Preheat your oven to 350°F and place the foil packets on a rimmed baking sheet. Bake for about 15 minutes or until the cheese is melted and everything is heated through.
4. What kind of tortilla chips should I use? Restaurant-style tortilla chips hold up well, but you can use your favorite kind. Thicker chips tend to stay crisp longer when heated in the foil.
5. How do I keep the chips from getting soggy in the foil packet? To help keep the chips crisp, avoid adding too much moisture inside the foil. Use a slotted spoon when adding the chicken and don’t overload the packet with sauces. Serve fresh toppings after cooking to avoid extra moisture.
6. What toppings go best with chicken nacho foil packets? Popular nacho toppings include diced tomatoes, sliced jalapeños, chopped onions, cilantro, avocado, sour cream, and even a squeeze of lime juice. These should be added after cooking for the best flavor and texture.
7. Can I cook foil packet nachos over a campfire? Yes! Foil packet chicken nachos are great for camping. Wrap the foil packets tightly and place them near the hot coals (not directly in the flames) for 10–15 minutes, checking often to avoid burning.
8. Can I use ground beef or another meat instead of chicken? Definitely. This recipe is very flexible. Swap the chicken for cooked ground beef, pulled pork, or even black beans for a meatless option.
9. Is this foil packet nacho recipe good for kids? Yes, it’s a kid-friendly recipe. Let kids help build their own foil packets with the ingredients they like. It’s a fun, hands-on meal that even picky eaters enjoy.
10. How should I serve the nacho foil packets? You can open the foil packet and serve it directly on a plate or in a shallow bowl. Add your favorite toppings after opening, and serve with a fork (or eat them straight off the foil—up to you!).
Chicken Nacho Foil Packets
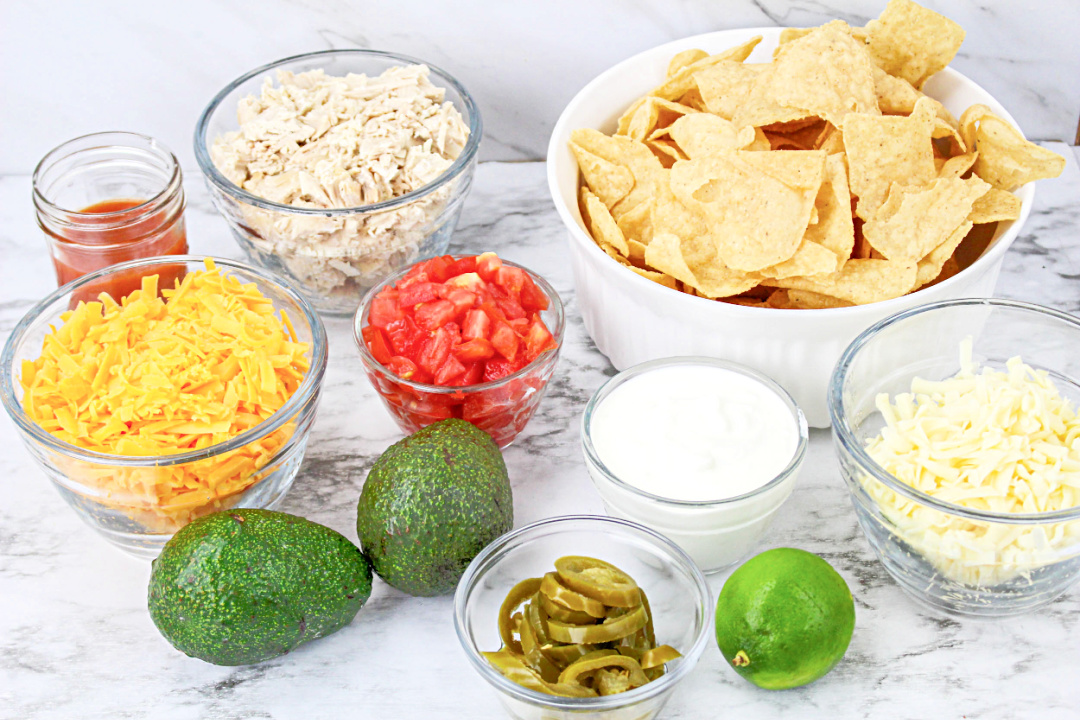
Ingredients
1 bag tortilla chips
2 cups shredded or chopped cooked chicken
½ cup taco sauce
1 ½ cup shredded sharp cheddar cheese
1 ½ cup shredded Monterey Jack cheese
Instructions
In a medium skillet over medium-high heat, add the chicken and taco sauce. Stir to combine and heat for 5 to 8 minutes or until the chicken has heated through.
Cut aluminum foil into squares.
In the middle of the square, place a mound of tortilla chips. Top the chips with cheese and chicken. Fold the aluminum foil over the chip and chicken creating a pocket. Roll up any open edges to seal the pocket.
For the oven:
Preheat the oven to 350 degrees. Place the foil packets on a large rimmed baking sheet. Bake for 15 minutes or until the ingredients are heated through and the cheese is melted.
For grilling:
Prepare the grill for medium heat (about 350 degrees.) Place the foil packets on the grill and cook for about 10 minutes or until the ingredients have warmed through and the cheese has melted.
To serve, place the open packet on a plate or in a bowl. Carefully open the foil packets. Top the nachos with additional toppings as desired.
Notes: I used restaurant-style tortilla chips but any style can be used. These nachos can be personalized based on preference. Set up the ingredients like a taco bar and then prepare the nachos on the grill or in the oven.
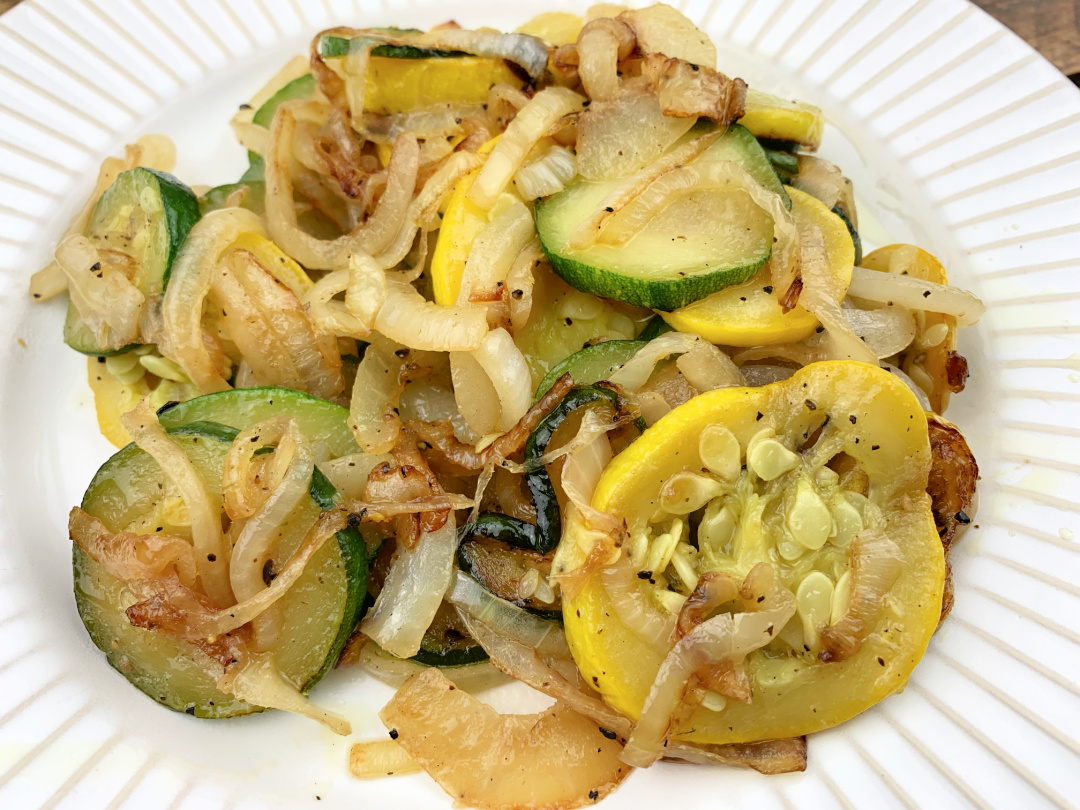
If you’re looking for a quick and easy way to spruce up your veggies, then look no further than this Sauteed Zucchini and Squash with Onions dish.
As a passionate home cook, I’m always on the lookout for simple yet delicious recipes that bring a taste of the South to the dinner table.
One of my go-to favorites is Sauteed Zucchini and Squash with Onions, a dish that has become a beloved staple in my kitchen.
This easy side dish, featuring a delightful combination of fresh zucchini, yellow squash, and sweet onions, is not only a testament to the rich, comforting flavors of Southern cuisine but also to the joy of cooking with simple ingredients.
The beauty of this dish lies in its simplicity and the freshness of its ingredients.
The zucchini and yellow squash, key components of this delightful recipe, are sourced straight from my father-in-law’s garden in Texas.
There’s something incredibly special about using fresh vegetables that have been grown with care and love – it adds an unbeatable flavor to the dish.
Using a large skillet, the sliced zucchini and squash are sautéed to perfection on medium heat.
This method ensures that the vegetables attain a golden brown color, bringing out their natural sweetness and a hint of caramelization that is absolutely mouth-watering.
The onions, when sautéed, add a layer of richness and depth to the dish, making it a perfect side dish for a variety of main meals.
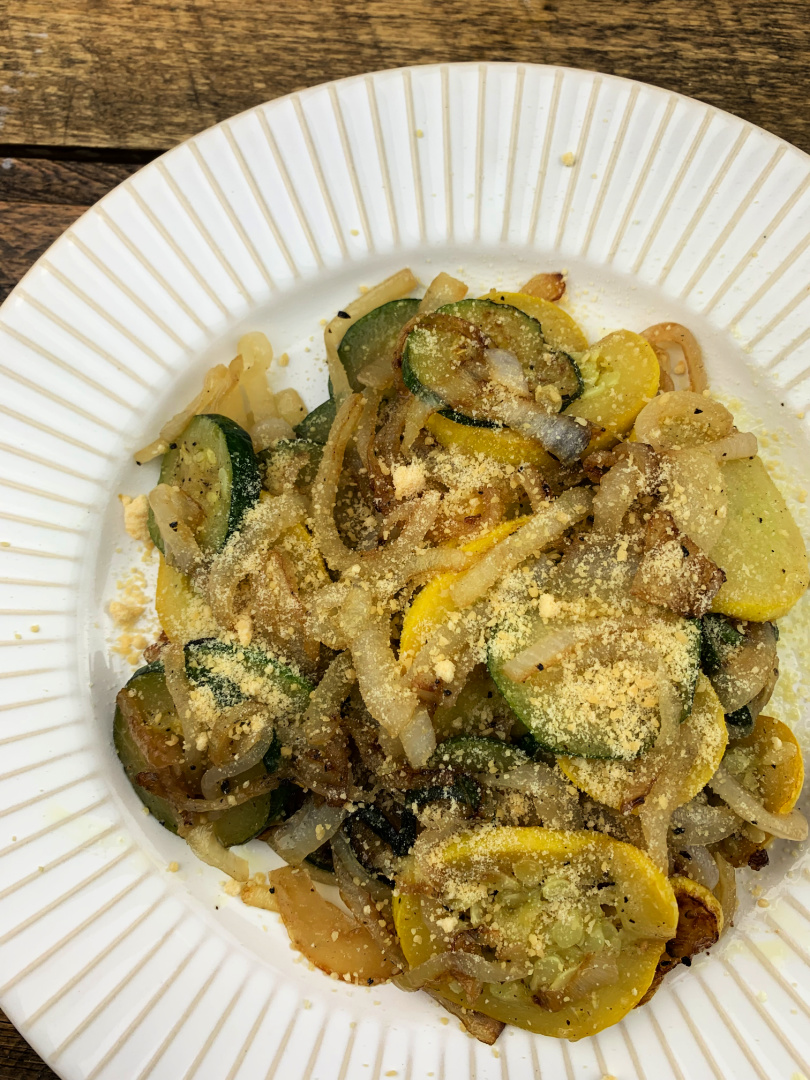
For those who enjoy a bit of cheese in their meals, a sprinkle of parmesan cheese is the perfect finishing touch, adding a nutty, salty flavor that complements the vegetables beautifully.
This dish is incredibly versatile – it can be served alongside your favorite protein, be it pork chops or a vegetarian option, making it a great summer side dish or a healthy twist to your everyday meals.
One of the best parts about this recipe is its adaptability. Whether you prefer your vegetables with a little butter for richness or with a sprinkle of red pepper flakes for some heat, it’s all about personal preference.
The high water content of zucchini and squash also makes this a healthy side option, ideal for those on a calorie-conscious diet.
For those who are fans of zucchini in different forms, this recipe can easily be modified. Think zucchini noodles for a low-carb alternative or zucchini boats for a fun, kid-friendly meal.
The key is to maintain the simplicity of the dish while exploring new ways to enjoy these versatile vegetables.
In summary, Sauteed Zucchini and Squash with Onions is not just a simple side dish; it’s a celebration of fresh, wholesome ingredients and the joy of creating something delicious and comforting in your kitchen.
It’s a testament to the fact that sometimes, the most straightforward recipes are often the best.
So, next time you’re looking for an easy, nutritious, and utterly satisfying dish, give this recipe a try – it might just become one of your favorite ways to enjoy the bounty of the summer months.
Helpful Product Recommendations:
Jumbo Skillet – A large, high-quality jumbo skillet is perfect for sautéing a large batch of vegetables. It offers plenty of cooking surface and ensures even heat distribution, making it ideal for this recipe.
Vegetable Peeler – A sharp and efficient vegetable peeler for preparing zucchini and squash.
Chef’s Knife – An essential tool for slicing vegetables evenly and efficiently.
Sauteed Zucchini and Squash with Onions
Ingredients:
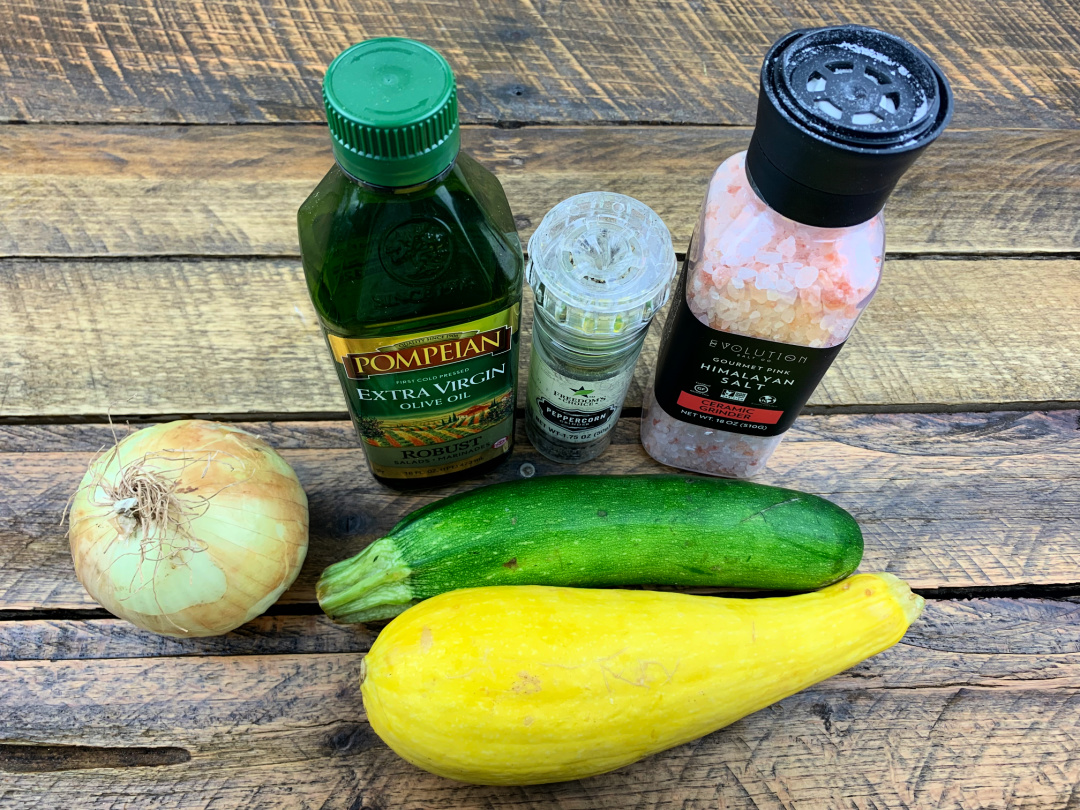
1 large zucchini
1 large yellow squash
1 large onion
salt and pepper
4-5 tbsp. olive oil
Optional: grated parmesan cheese
About 2-4 servings. Double the recipe for more servings.
Directions:
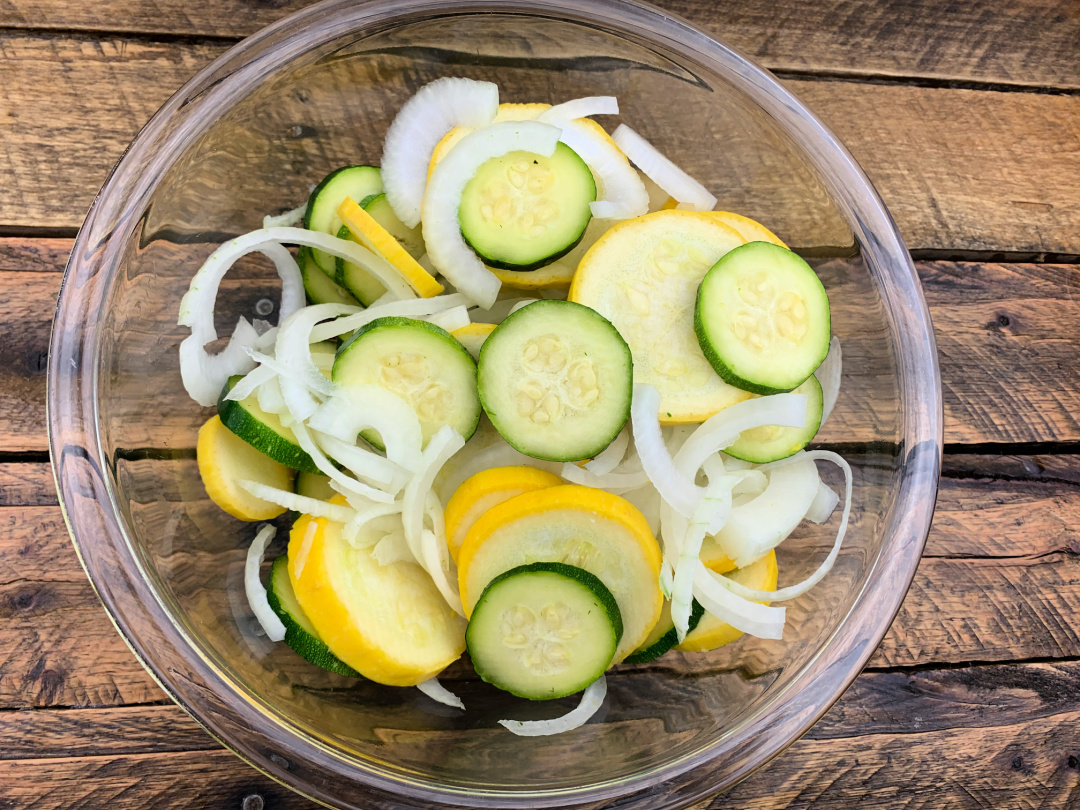
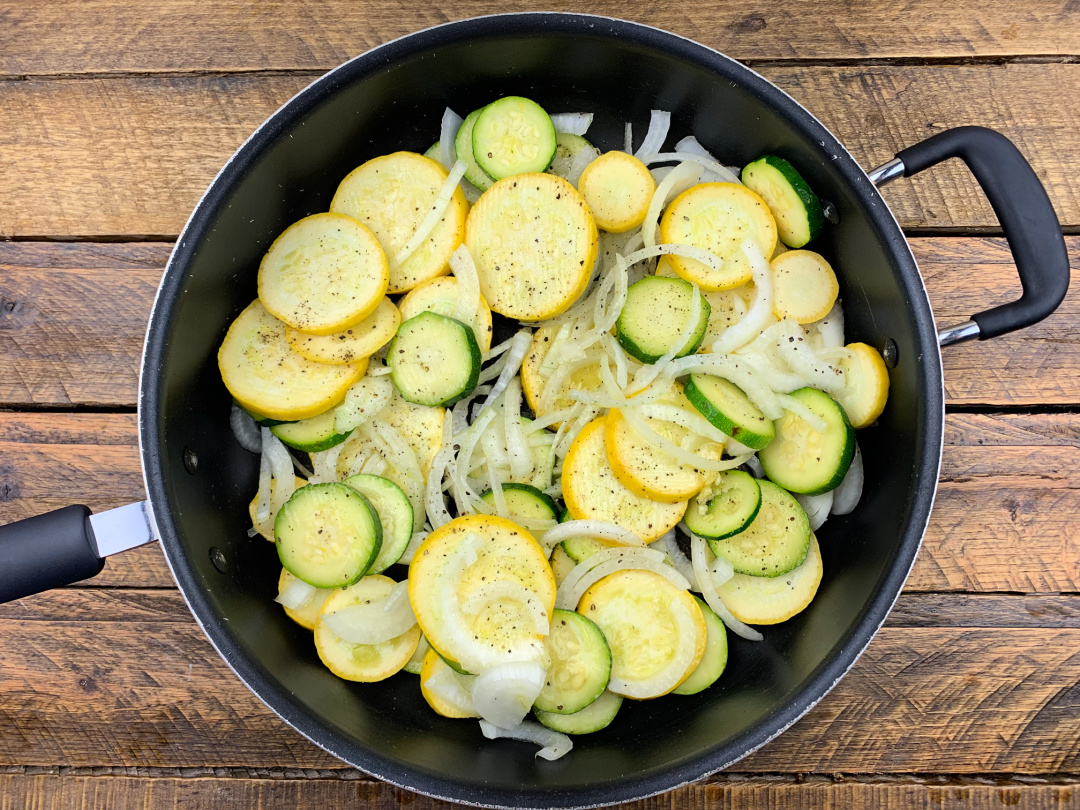
Thinly slice the zucchini, squash, and onions. Place the cut up vegetables in a mixing bowl.
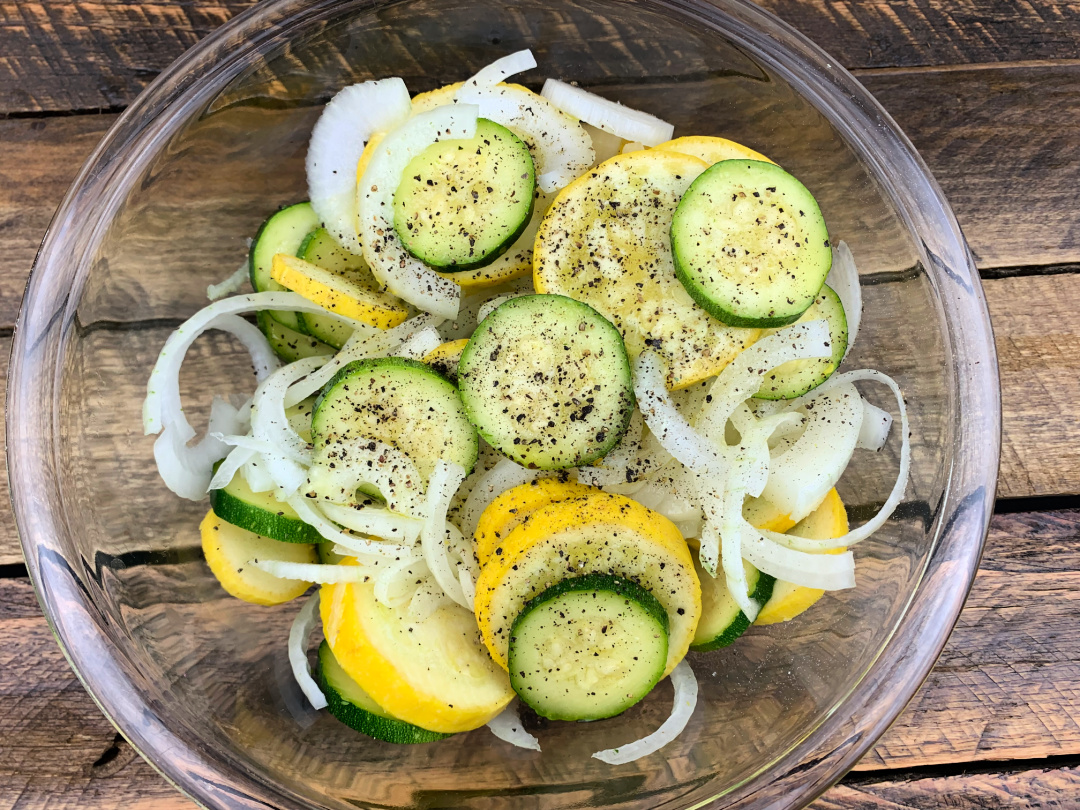
Add desired amount of salt and pepper. Toss the vegetables and mix well.
Add the vegetable mix to the skillet.
Add 1-2 tablespoons of olive oil at a time.
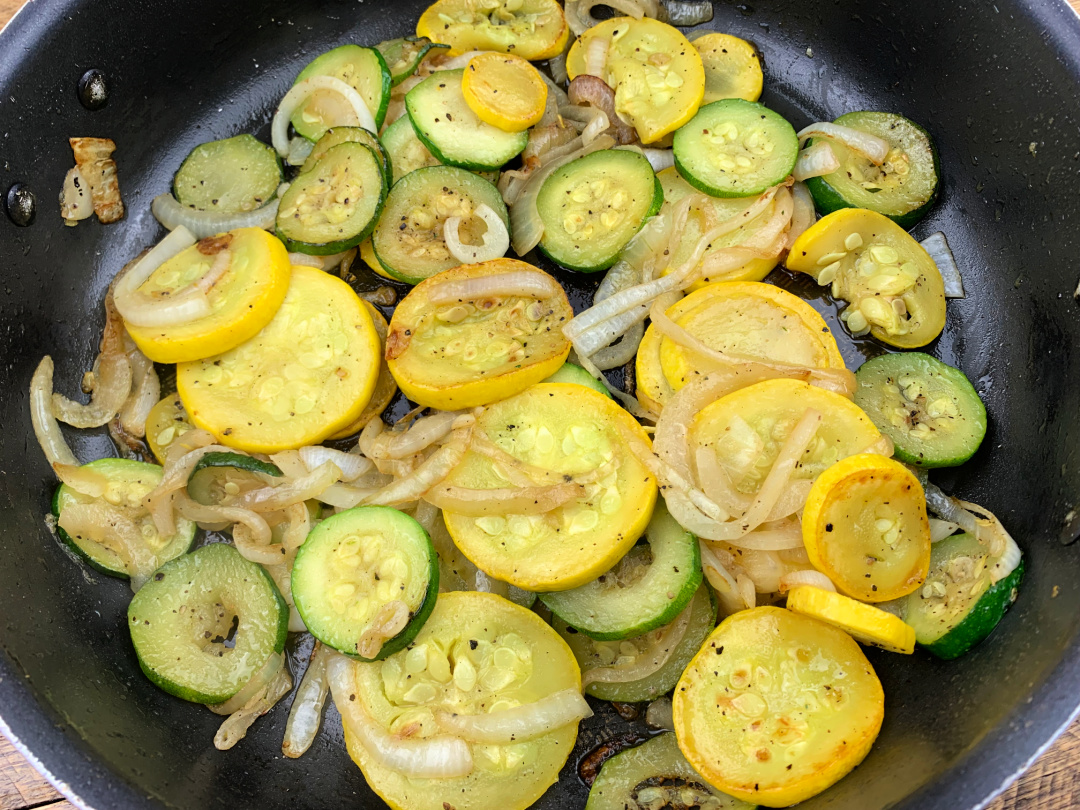
Saute the vegetables on medium heat. As the vegetables cook down, add more olive oil if needed.
For this recipe, I used about 4-5 tablespoons of olive oil.
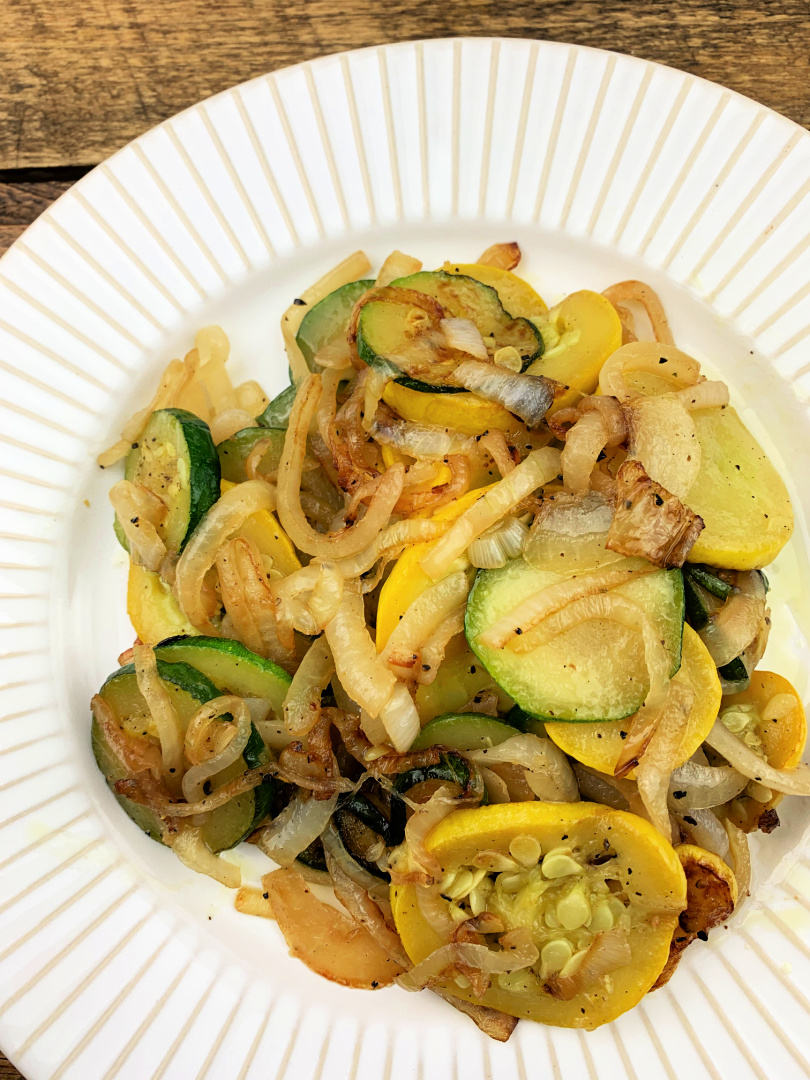
Continue to saute the zucchini, squash, and onions until you get the desired consistency and the vegetables are slightly browned.
Top with grated parmesan cheese if desired!
Sauteed Zucchini and Squash with Onions
Ingredients
1 large zucchini
1 large yellow squash
1 large onion
salt and pepper
4-5 tbsp. olive oil
Optional: grated parmesan cheese
Instructions
Thinly slice the zucchini, squash, and onions. Place the cut up vegetables in a mixing bowl.
Add desired amount of salt and pepper. Toss the vegetables and mix well.
Add the vegetable mix to the skillet.
Add 1-2 tablespoons of olive oil at a time.
Saute the vegetables on medium heat. As the vegetables cook down, add more olive oil if needed. For this recipe, I used about 4-5 tablespoons of olive oil.
Continue to saute the zucchini, squash, and onions until you get the desired consistency and the vegetables are slightly browned.
Top with grated parmesan cheese if desired!
Frequently Asked Questions
Can I use different types of zucchini and squash in this recipe?
This recipe is versatile and works well with different types of zucchini and squash. Whether you have a bounty of yellow summer squash or a mix of medium zucchini and squash, the dish will still turn out delicious. Experimenting with various types adds a nice variety to this simple dish.
How can I adjust the recipe for a calorie-restricted diet?
For those on a calorie diet, you can reduce the amount of olive oil used or substitute it with a low-calorie cooking spray. Also, opting for less sodium by reducing salt or using sea salt can make this dish more diet-friendly without compromising on taste.
Is there a way to make this dish using an air fryer?
Air fryer zucchini is a great alternative cooking method. Place zucchini slices in a single layer in the air fryer basket and cook until they’re golden brown. This method reduces the use of oil, making it a healthier option.
Can I add more flavors to this zucchini and squash recipe?
Adding fresh herbs like basil, Italian seasoning, or minced garlic can enhance the flavor. For those who enjoy a bit of heat, a pinch of red pepper flakes can be a great addition. Experimenting with different seasonings is a great way to personalize this dish.
What are some other zucchini recipes I can try?
There are tons of zucchini recipes to explore. Zucchini casserole, zucchini noodles (for a low-carb option), and zucchini boats are just a few delicious ways to enjoy zucchini. Each recipe offers a unique way to appreciate this versatile vegetable.
How long should I cook the vegetables in the skillet?
The cooking time varies depending on how you like your vegetables. Typically, sautéing on medium-high heat for 5-7 minutes will give you tender yet firm zucchini and squash. The goal is to achieve a golden brown color while maintaining some crunch.
Can I add other vegetables to this dish?
Adding vegetables like bell pepper, red onion, or even onion slices can create a more robust and colorful vegetable side dish. It’s a great way to use up any vegetables you have on hand and add extra nutrients to your meal.
Is this recipe suitable for those on a medically restrictive diet?
This easy sautéed zucchini and squash recipe can be suitable for various diets with minor changes. For instance, using less oil or salt can make it appropriate for those with dietary restrictions. However, it’s always best to consult with a healthcare provider if you have specific dietary needs.
Can I store leftovers of this dish?
Leftovers can be stored in an airtight container in the refrigerator for up to 3 days. It’s a great way to have a ready-to-eat, healthy side dish available. You can also reheat it in a hot pan or cast iron pan to refresh the flavors.
Remember, this recipe is all about simplicity and enjoying the natural flavors of fresh vegetables. Whether you’re a fan of zucchini or trying it for the first time, this dish is a delightful way to incorporate more veggies into your meals.
8 chicken thighs (or chicken breasts) (bone-in or boneless)
2 Cajun Style Andouille Sausage links
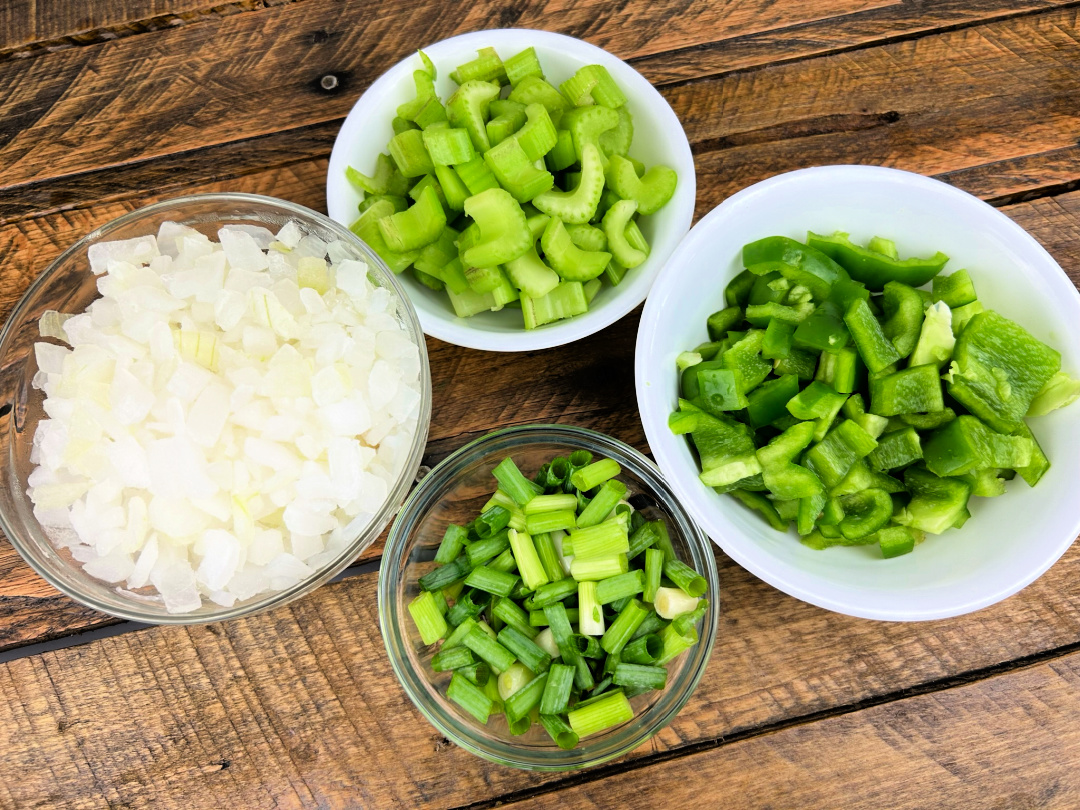
1 cup celery, diced
4 green onions (2 for gumbo, 2 for topping), diced
2 medium onions, diced
green bell pepper, diced
4 (14.5 oz.) cans of chicken broth
3 okra (for thickening)
1 (10 oz.) can diced tomatoes
Bay leaves
Jar of Roux (I prefer to use Savoie’s Old Fashioned Roux – stir well to avoid clumping) *You can find a homemade recipe below.
Tony’s Creole Seasoning
pinch of garlic powder
pinch of salt and pepper
2 tbsp. olive oil
Directions:
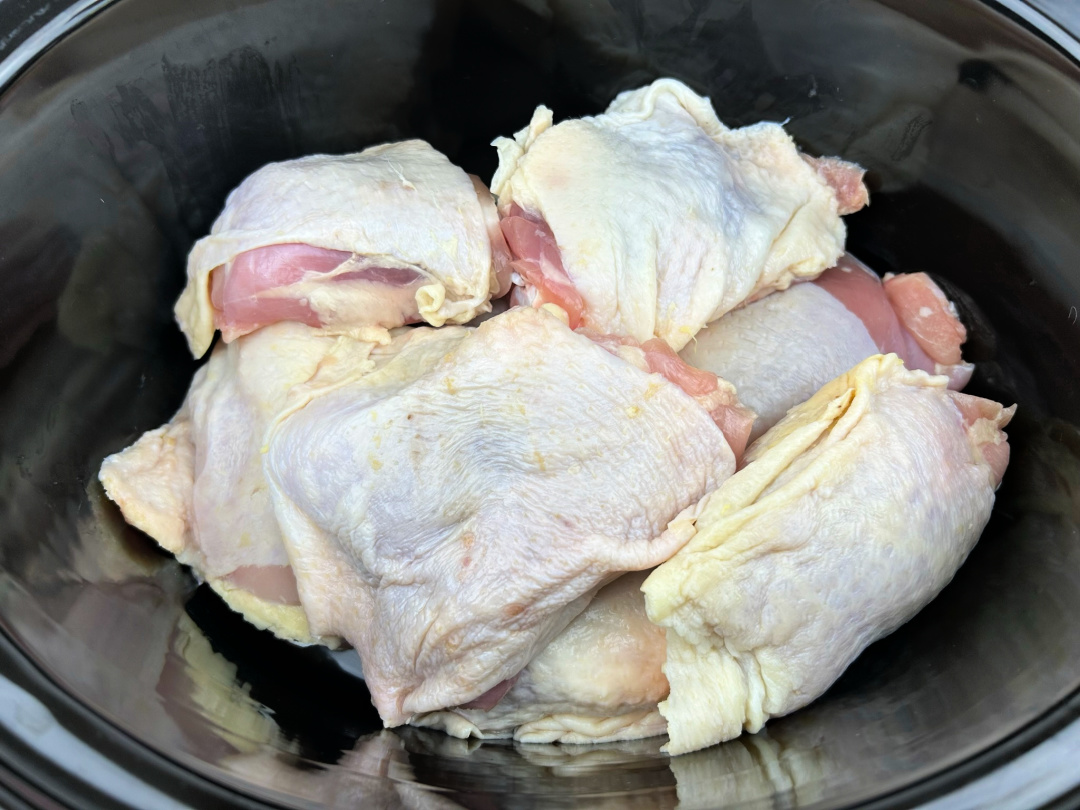
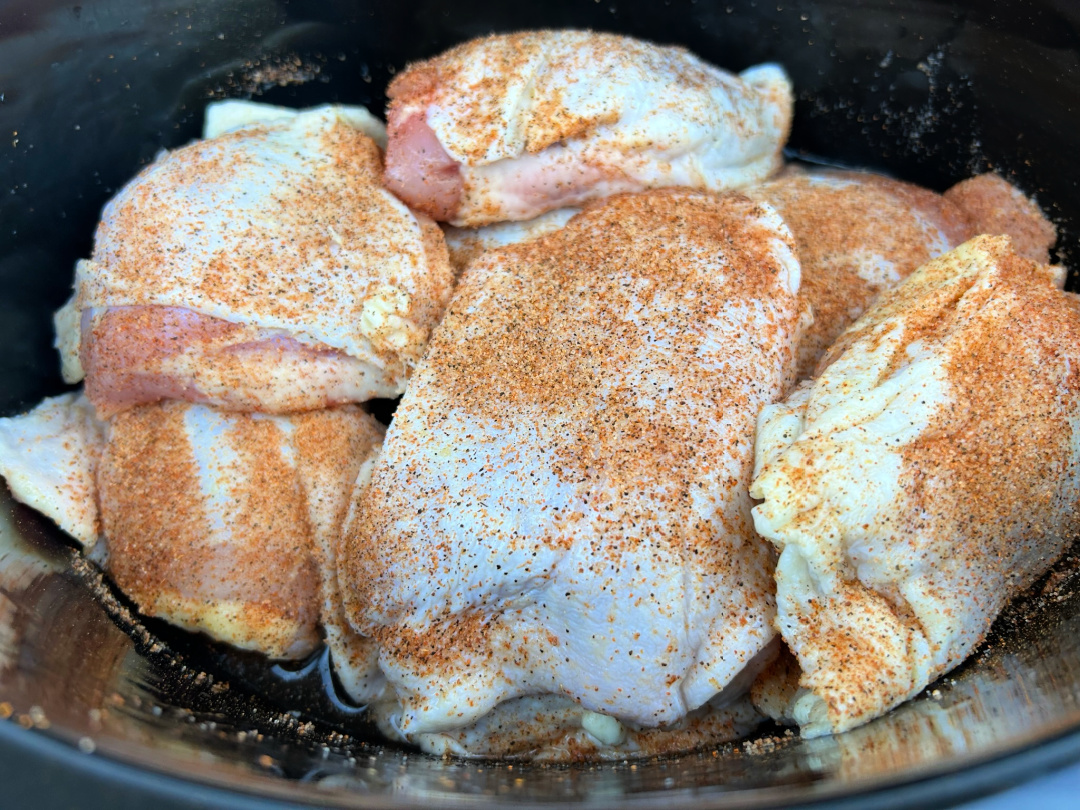
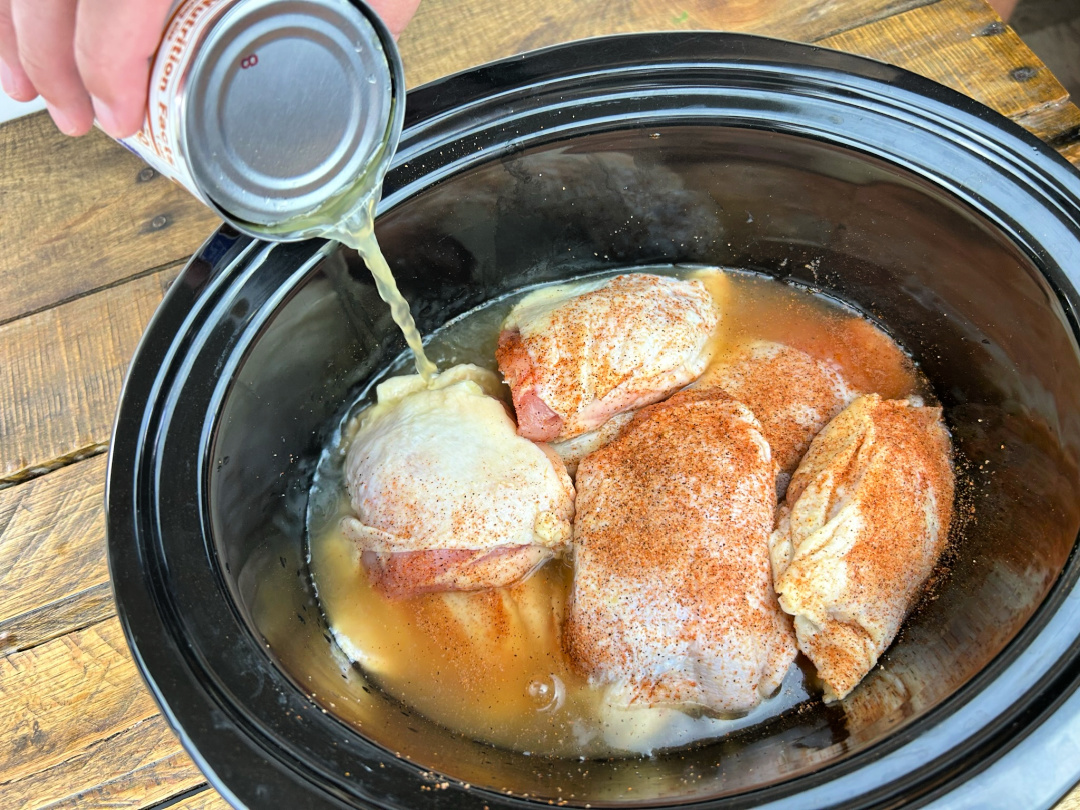
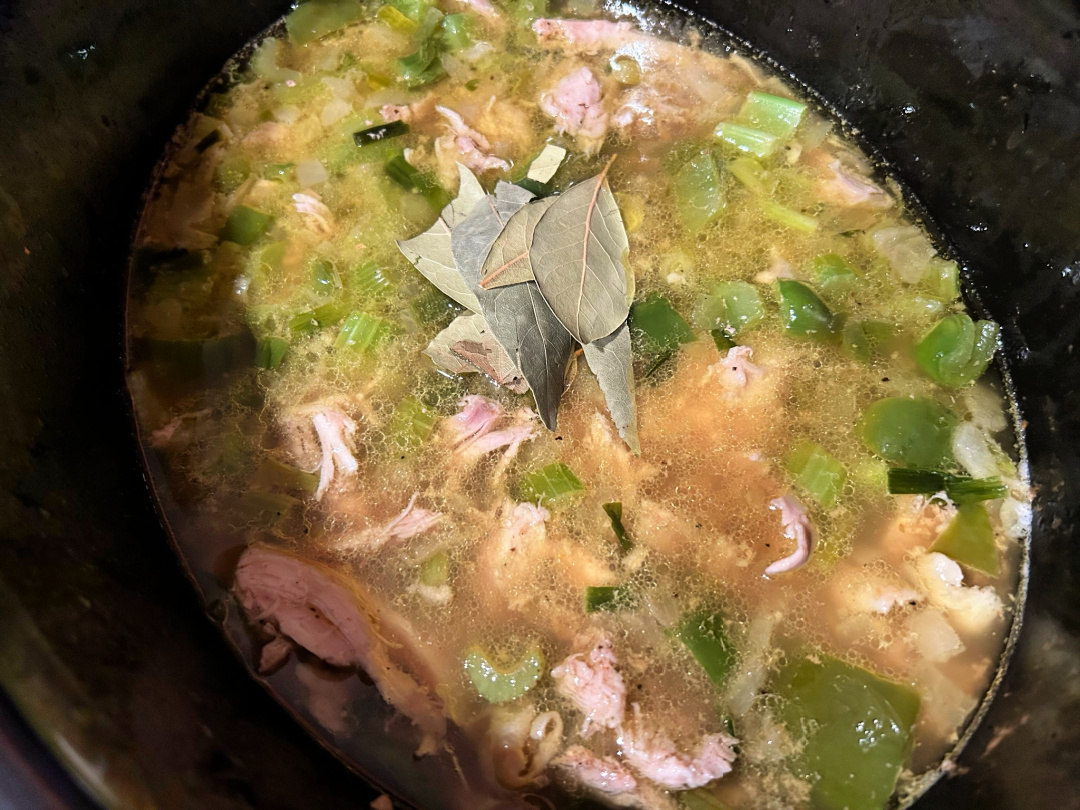
Place the chicken in the Crockpot. Sprinkle Tony’s desired amount of Tony’s seasoning onto the chicken thighs.
Add the cans of chicken broth.
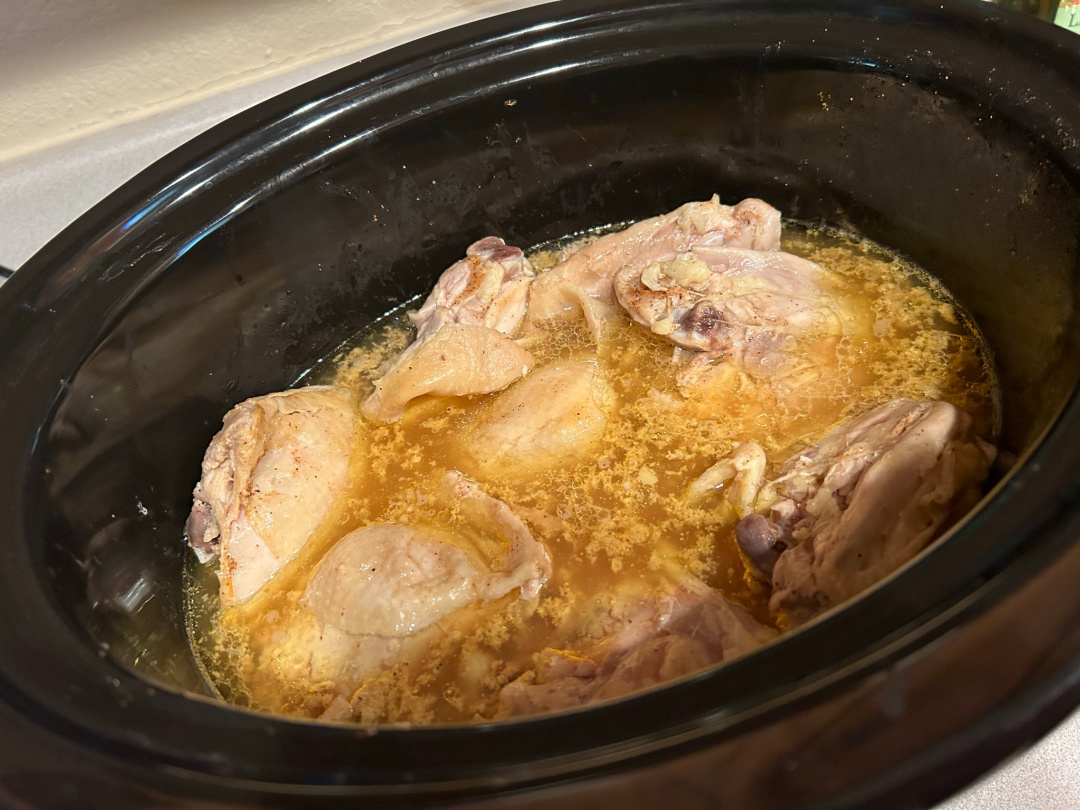
Cover in Crockpot for two hours on high.
After two hours, check temperature of chicken to 165 degrees to ensure it’s cooked properly.
Take the chicken out of the Crockpot and set aside for 10 minutes to cool.
When chicken is cooler, shred the chicken off the bone (for bone-in chicken) or dice/shred chicken for boneless chicken.
Place the chicken back in the Crockpot with the broth.
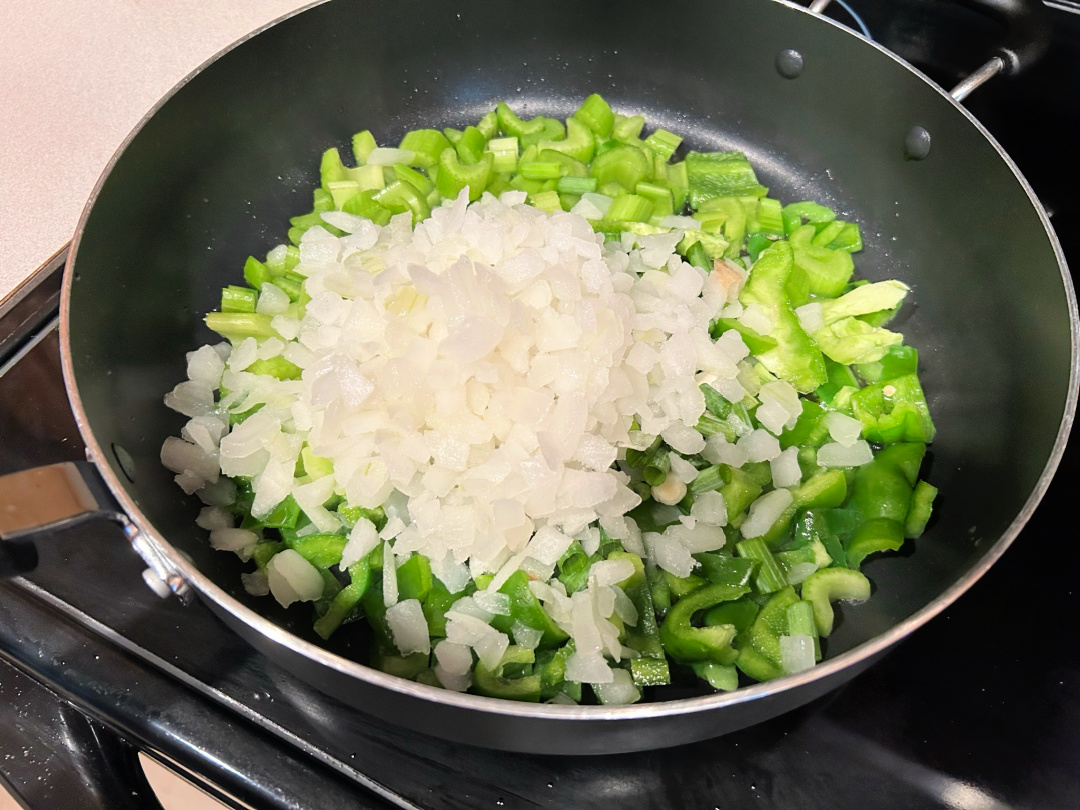
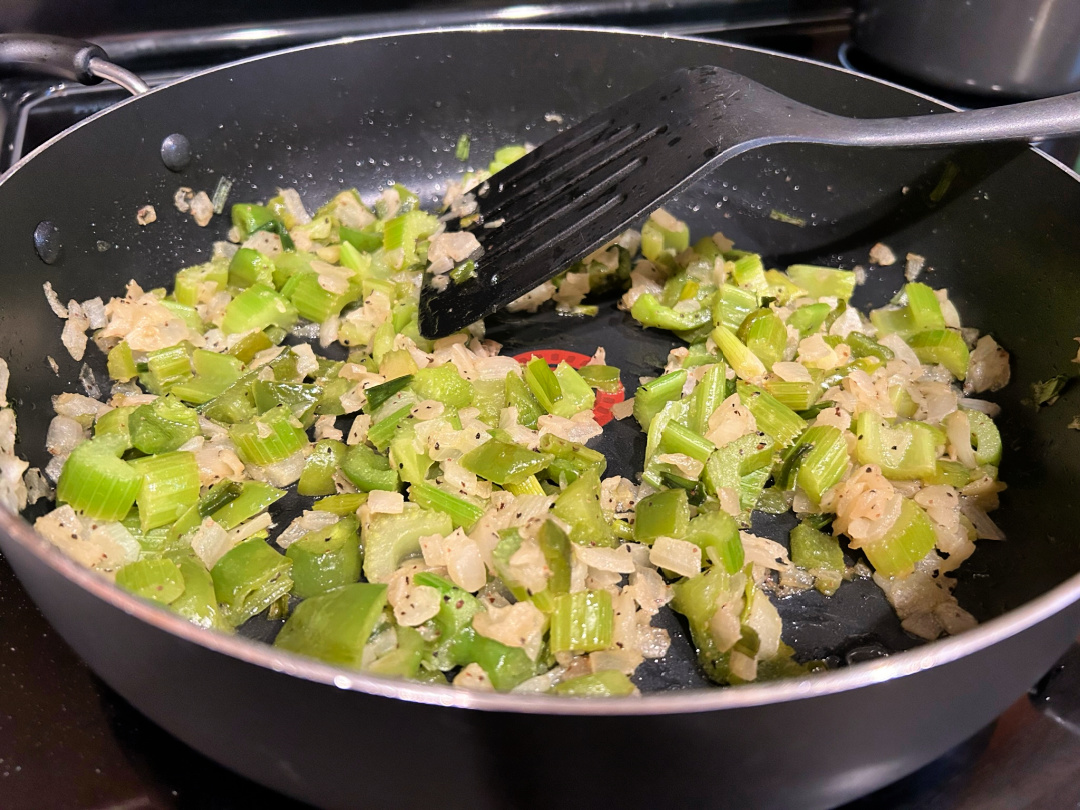
In a frying pan, add 2 tbsp. olive oil. Add in the onion, 2 stalks of green onions, celery, and bell pepper. Add desired amount of salt, pepper, and garlic powder and saute until vegetables are tender.
Add cooked vegetables to the Crockpot and stir with the chicken.
Add the contents from the jar of roux and stir well.
You will want the roux to dissolve into the mixture, so a lot of stirring to do this may be necessary so that the roux isn’t clumpy.
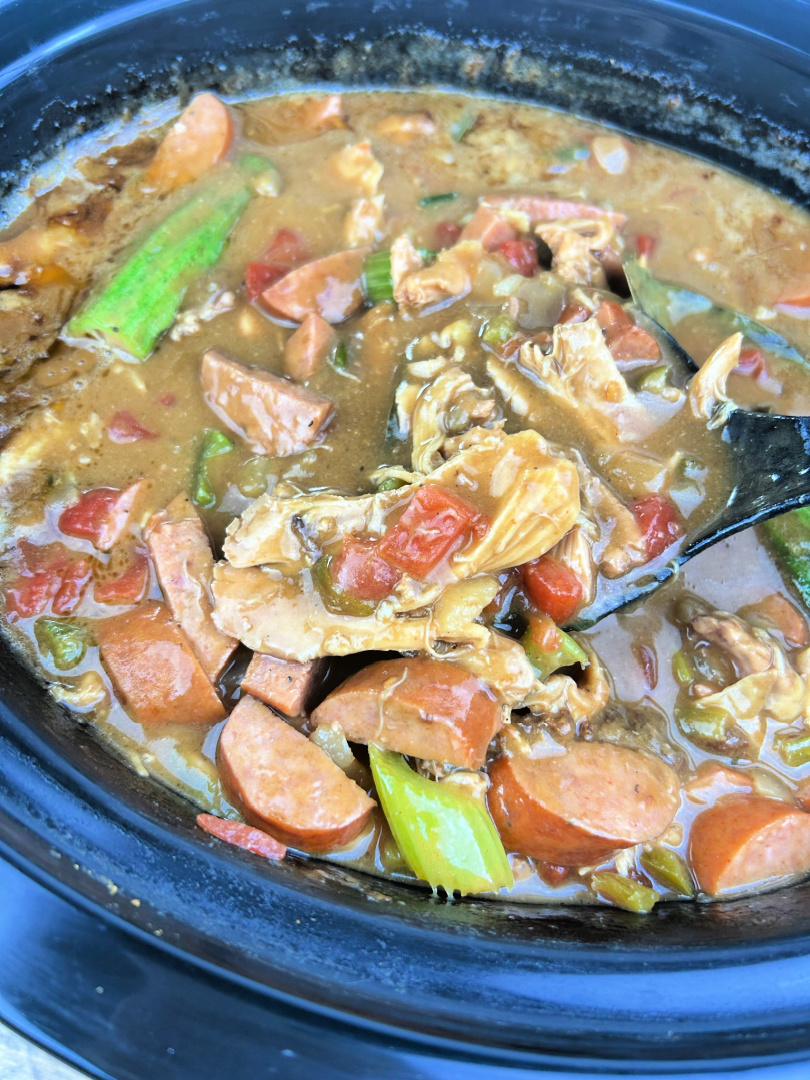
Chop up the sausage into bite sized pieces. Add to the Crockpot and stir well.
How to make roux from scratch
Note: If you want to make your own roux, the process is simple but does take some time standing at the stove! You only need 1 cup of flour and 1/2 cup of vegetable oil. Pour the vegetable in a large frying pan on medium heat. Then, add the flour and stir, stir, stir! You will want to create a dark, rich colored roux (almost like the color of cocoa). To get the correct color for the roux, this can take a good 15+ minutes of stirring, but it’s well worth it! Once complete, add the roux by the spoonful to the gumbo. You may notice a quick sizzle when adding, that’s ok. Stir the roux into the gumbo well.
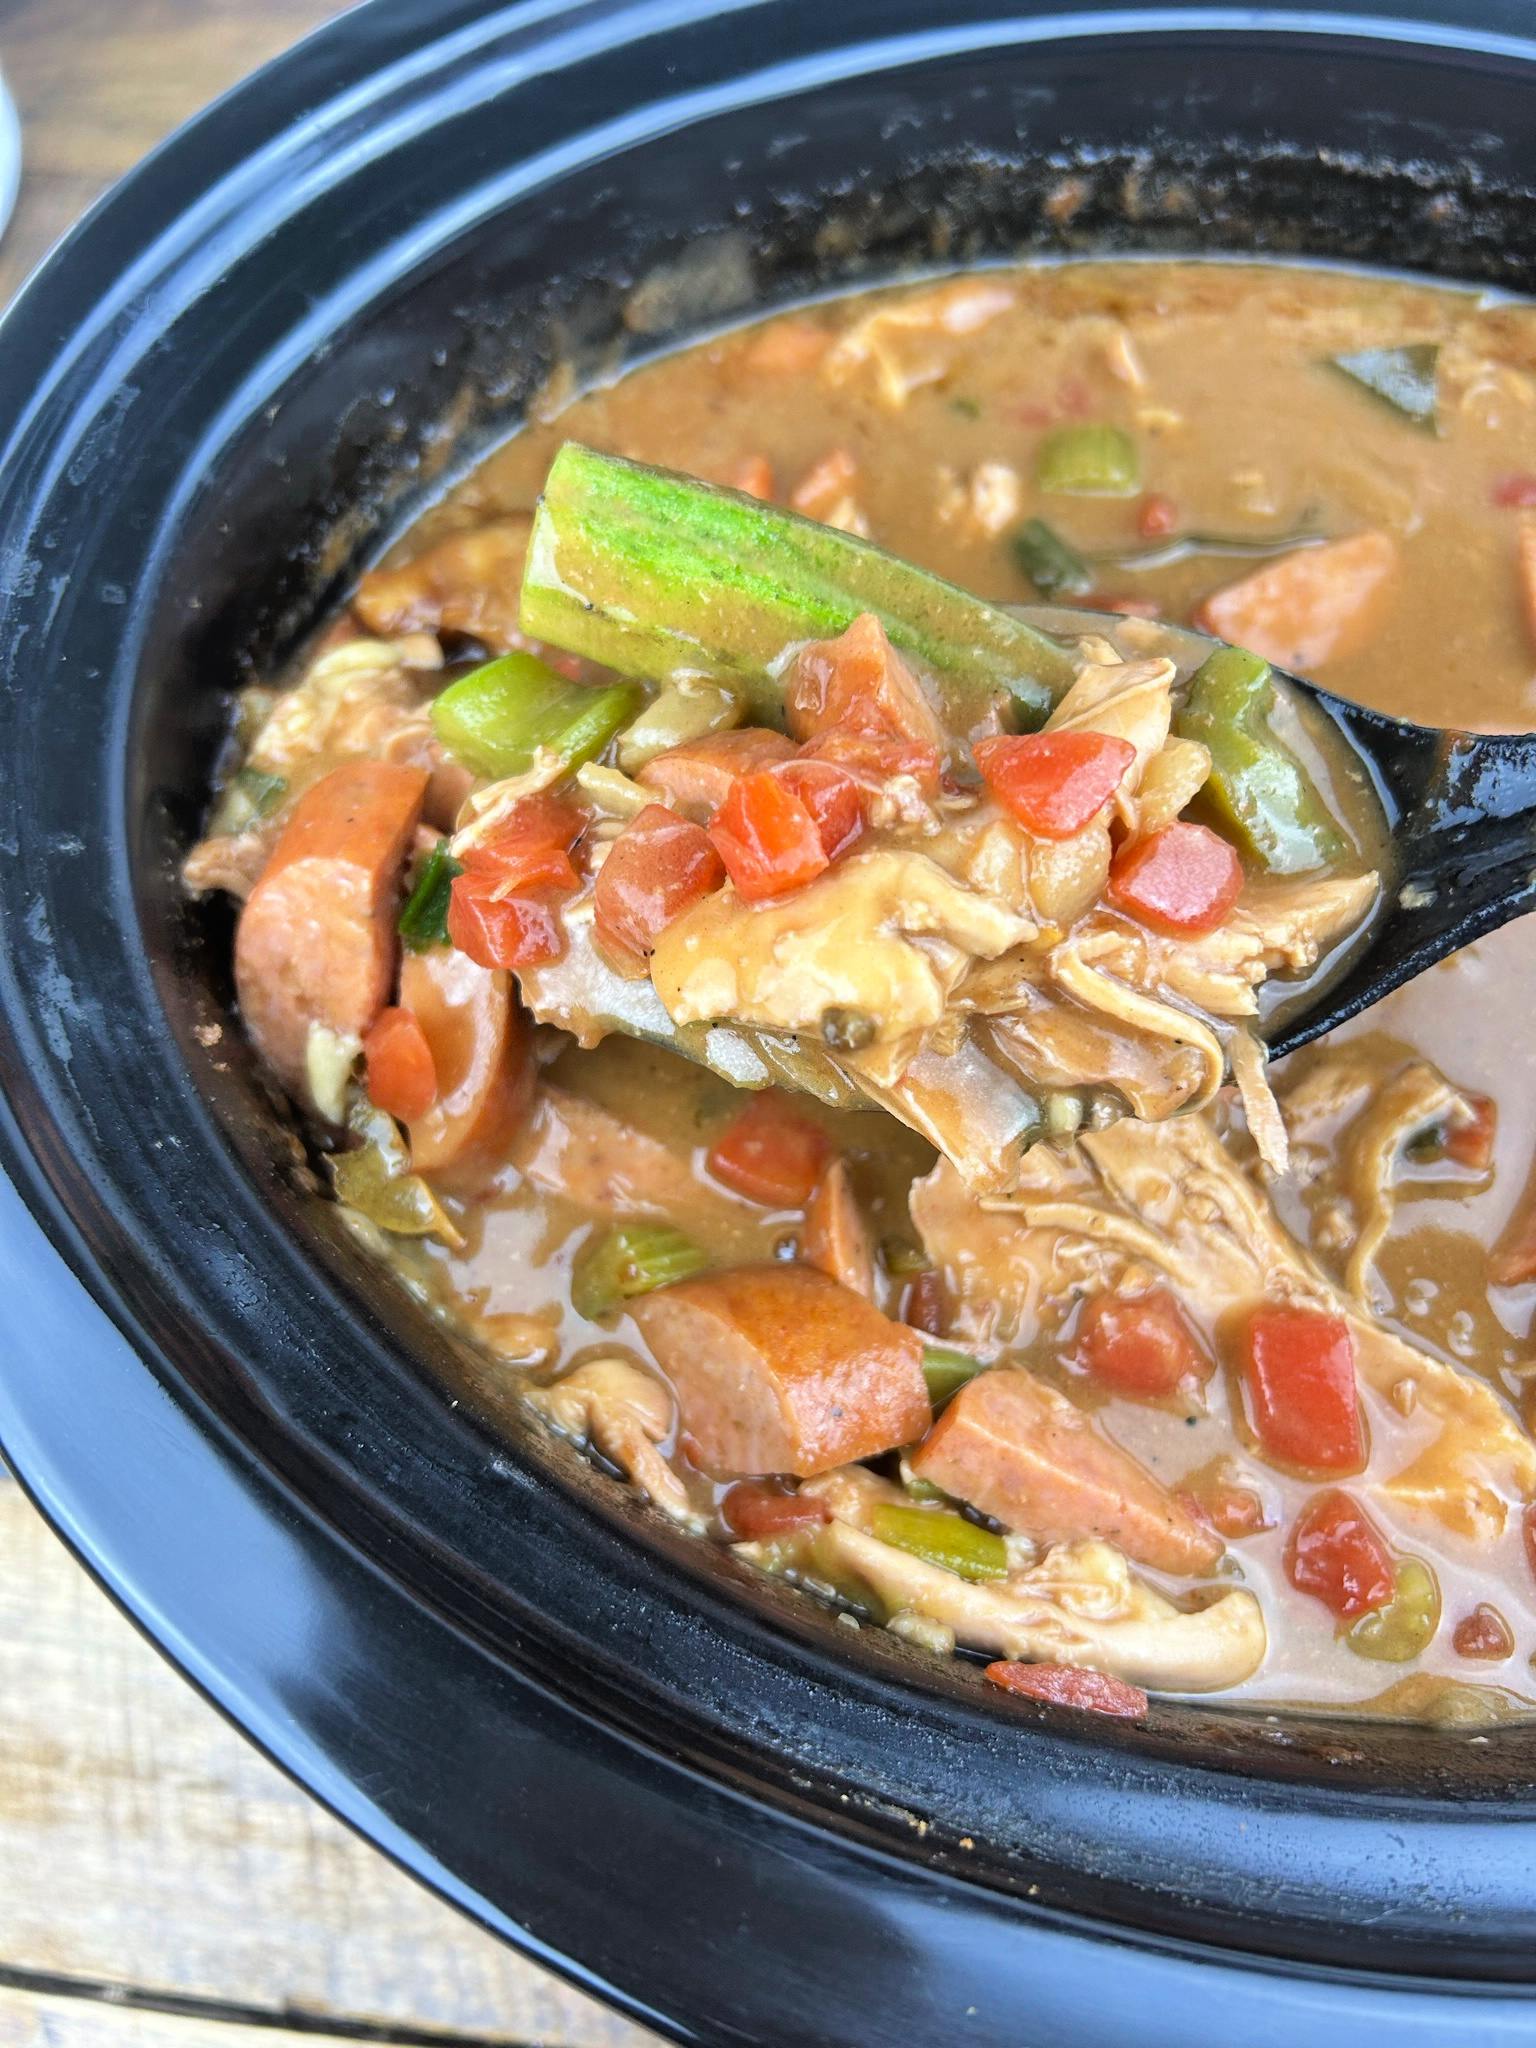
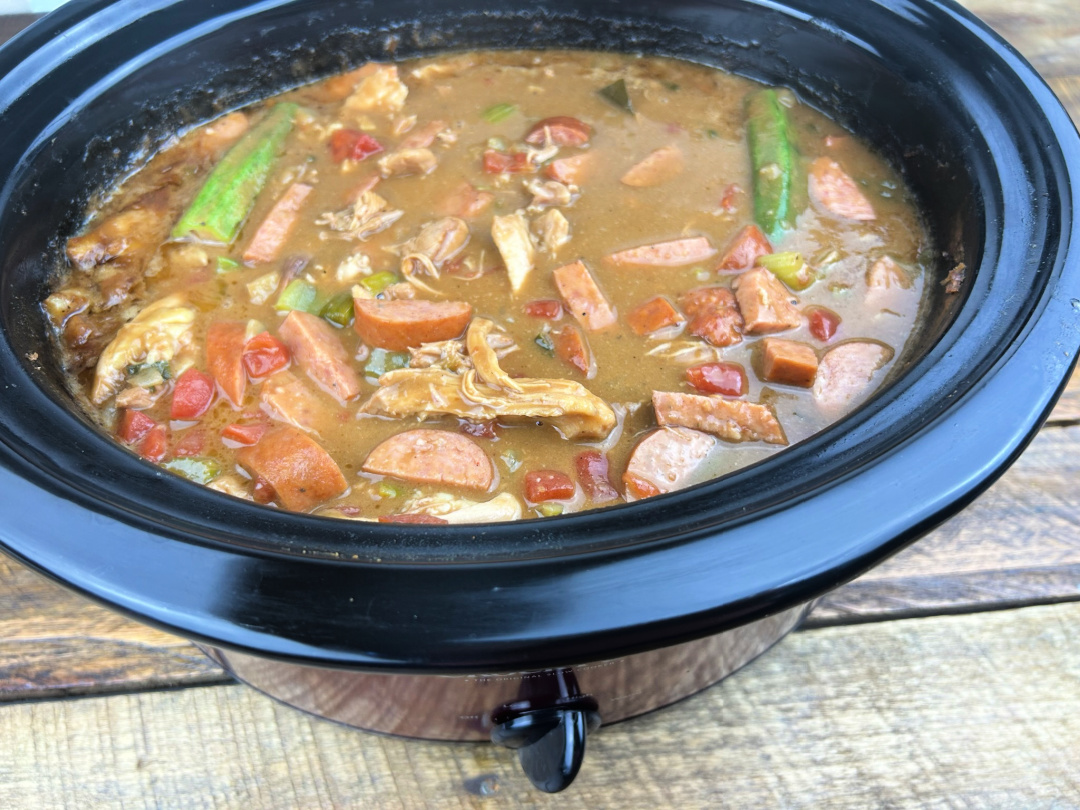
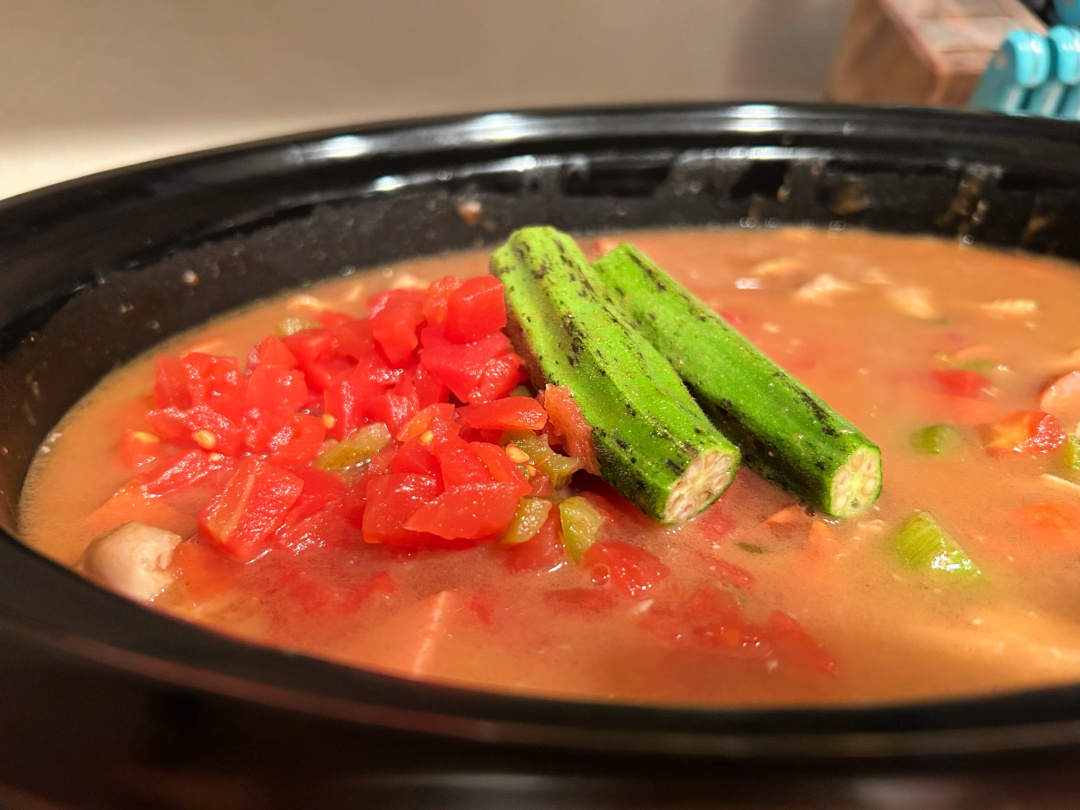
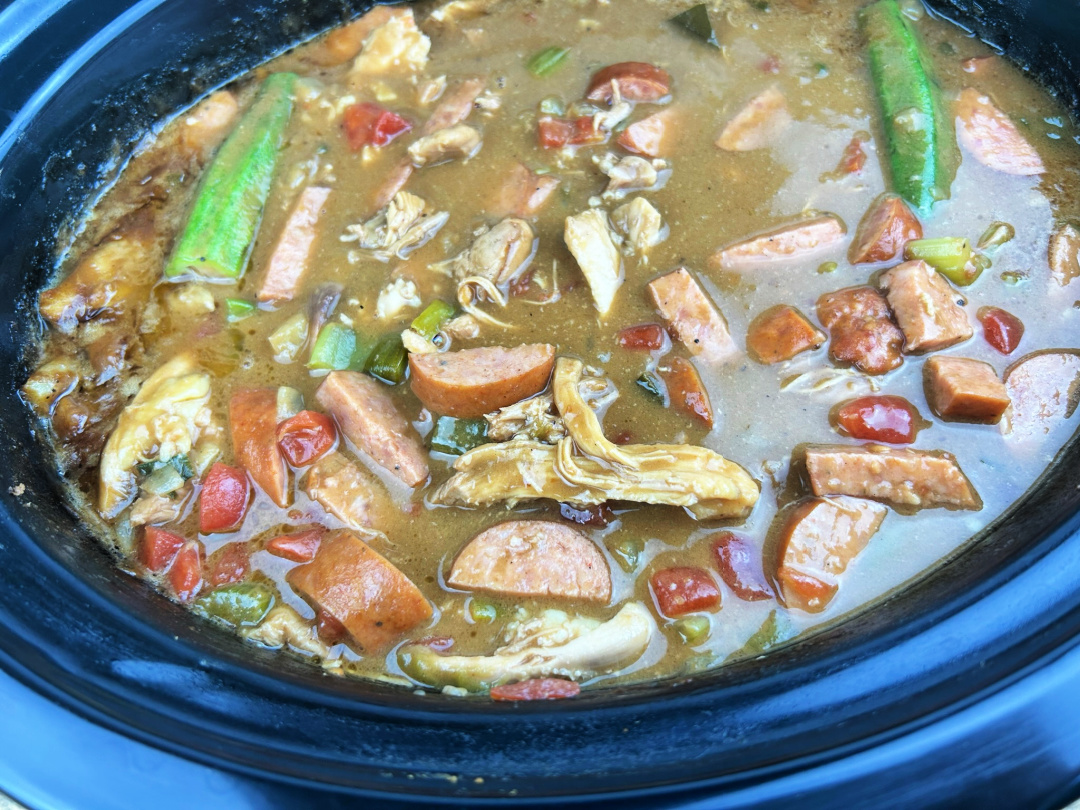
Add the can of diced tomatoes. Add the Bay leaf and okra. (Note: You can chop up the okra for this recipe, but I left the okra whole for thickening purposes. You can discard or eat if desired.) Stir well.
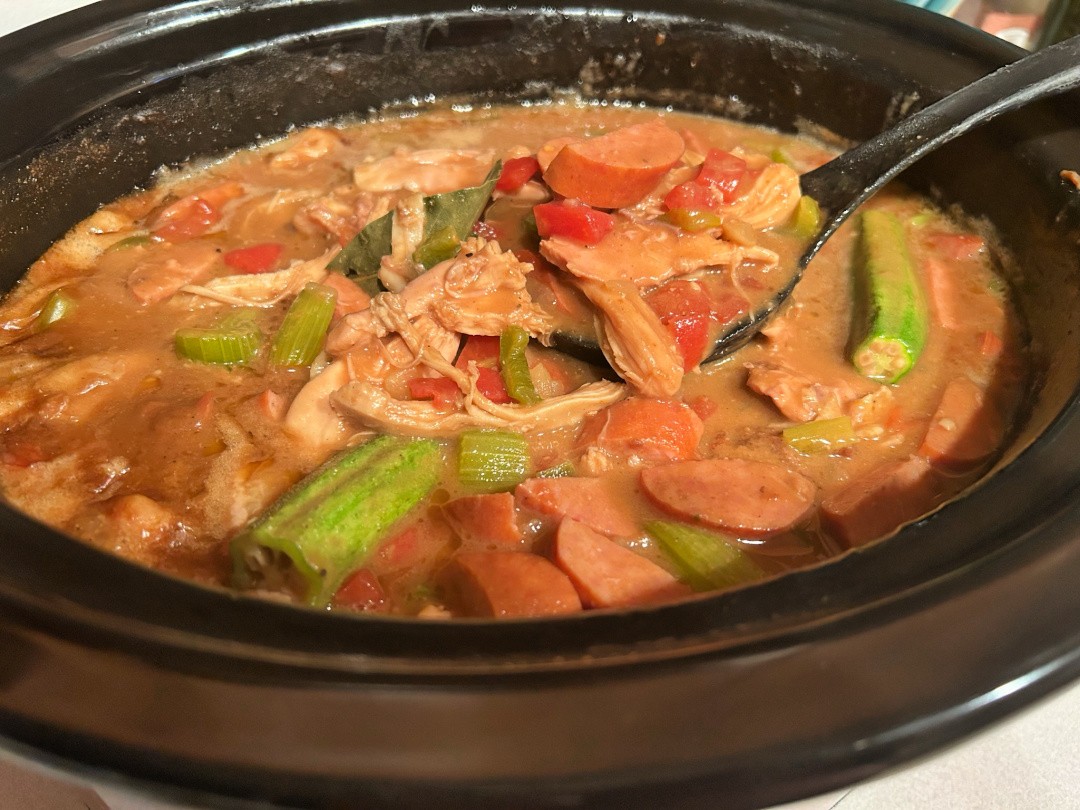
Allow to simmer on low heat for two hours. Stir every 30 minutes. Take out the okra if desired.
Serve with rice! Top with hot sauce if desired.
Crockpot Gumbo
Ingredients
8 chicken thighs (or chicken breasts) (bone-in or boneless)
2 Cajun Style Andouille Sausage links
1 cup celery, diced
4 green onions (2 for gumbo, 2 for topping), diced
2 medium onions, diced
green bell pepper, diced
3 (14.5 oz.) cans of chicken broth
3 okra (for thickening)
1 (10 oz.) can diced tomatoes
Bay leaves
Jar of Roux (I prefer to use Savoie’s Old Fashioned Roux!)
Tony’s Creole Seasoning
garlic powder
salt and pepper
2 tbsp. olive oil
Notes
Place the chicken in the Crockpot. Sprinkle Tony's desired amount of Tony's seasoning onto the chicken thighs.
Add one can of chicken broth.
Cover in Crockpot for two hours on high.
After two hours, check temperature of chicken to 165 degrees to ensure it's cooked properly.
Take the chicken out of the Crockpot and set aside for 10 minutes to cool.
When chicken is cooler, shred the chicken off the bone (for bone-in chicken) or dice/shred chicken for boneless chicken.
Place the chicken back in the Crockpot with the broth.
In a frying pan, add 2 tbsp. olive oil. Add in the onion, 2 stalks of green onions, celery, and bell pepper. Add desired amount of salt and pepper, and saute until vegetables are tender.
Add cooked vegetables to the Crockpot and stir with the chicken.
Add the Roux and stir well.
Chop up the sausage into bite sized pieces. Add to the Crockpot and stir well.
Add the can of diced tomatoes.
Add the Bay leaf and okra. Stir well.
Allow to simmer on low heat for two hours. Stir every 30 minutes.