Category: Recipe

  • Homemade BBQ Sauce for Pork Ribs

    Are you smoking or grilling spare ribs or baby back ribs this weekend? Learn how to make homemade BBQ sauce for pork ribs!

    Homemade BBQ Sauce for Pork Ribs

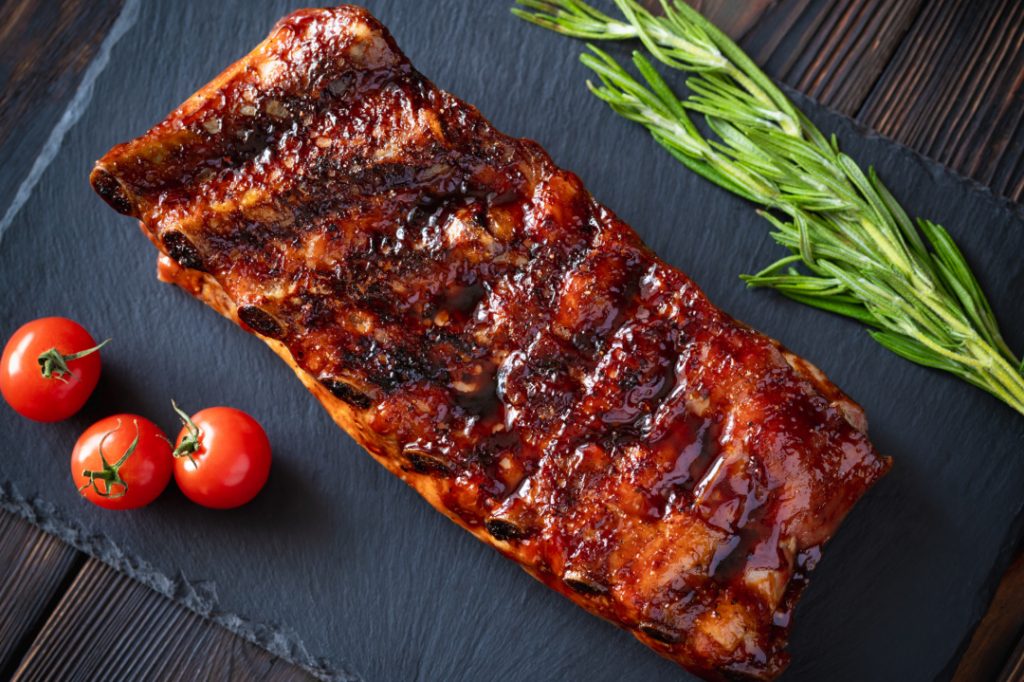
    This recipe works for either spare ribs or baby back ribs. After cooking these ribs, stand back and listen to the compliments. Food, glorious food.

    Food is good, and it’s good for you; just think where you would be without it. Cooking can be almost as much fun as eating, especially when the cooking is done outdoors in a BBQ pit. One of America’s all-time favorite BBQ foods is pork ribs. This recipe will produce ribs that will rival any of a BBQ restaurant.

    Try my Smoked Rib recipe! This recipe uses a different sauce as another option for you!

    Homemade BBQ Sauce

    This sweet, smoky sauce works well on ribs and other cuts of pork:

     2 cups ketchup
     1 cup molasses
     1/2 cup white vinegar
     1 tablespoon paprika
     1 tablespoon garlic powder
     1 teaspoon onion powder
     1/2 teaspoon cinnamon
     1/2 teaspoon allspice
     1/2 teaspoon black pepper

    Combine all of the above in a non-stick saucepan and simmer until all ingredients are dissolved. The product may be stored in a clean, plastic ketchup bottle in the refrigerator.

    Dry Rub

    While that is simmering, make this dry rub. It works well with pork ribs and shoulder, but might not be as good on beef:

     1/2 cup table salt
     1/2 cup white sugar
     1/4 cup brown sugar
     1 tablespoon garlic powder
     1 1/2 tablespoons onion powder
     1 1/2 tablespoons paprika
     3 tablespoons chili powder
     1 1/2 tablespoons black pepper
     1 tablespoon cayenne pepper
     1 tablespoon thyme
     1 tablespoon cumin
     1 tablespoon nutmeg

    Combine all of the above and store in a plastic soda pop bottle with a lid.

    Here’s another great recipe for rib rub to try! The best part about making your own rib rub is that you can get creative with the ingredients and try different spices.

    Cooking BBQ Pork Spare Ribs

    1. Preheat smoker to 225 degrees. Walnut, cherry, or other nut-bearing woods work well for pork, but other hardwoods may be used. While the smoker is warming, remove the paper-thin membrane from the bone side of the ribs. To do this, ‘scratch’ your fingernail against a rib bone till the membrane starts to peel off. When partially removed, grab the membrane with your fingers and pull off as much as you can. Place slabs on the cooking grate with the bones down. Close the lid and keep it closed. Monitor smoker temperature and add wood as needed. Every hour, rotate slabs. Move the slab from the hottest side of the smoker to the opposite side and slide all other slabs over a notch.
    2. Total smoking time will be 4 hours. After three hours and 20 minutes, slather each slab with sauce (use a food-safe brush or knife) and sprinkle a liberal amount of rub. Repeat this 20 minutes later. Remember, whenever you open the smoker lid, some of the heat will escape. Be sure to monitor the smoker’s temperature carefully during this final hour.

    Shop Best Smokers

    One Recipe for Two Types of Pork Ribs

    There are differences between the baby’s back and spare ribs, but this recipe will work for either. After making this recipe a time or two, the diner’s tastes might dictate more or less sauce/rub, but avoid putting the sauce on the slabs until the final hour of cooking. The sugar in the sauce and rub can burn if applied earlier. Enjoy!

    If you don’t have time to create your own homemade sauce or rib rub, you can always save time and purchase these to help!

  • How to Cook Scallops

    Are you interested in learning how to prepare and cook scallops? Here are my tips for How to Cook Scallops!

    how to cook scallops

    When cooking scallops – as with any form of shellfish – there are two inherent dangers. Firstly, and most importantly, we must make sure that they are fresh and have not “turned.”

    How to Cook Scallops

    Eating shellfish, which has gone bad, can make us very seriously ill or worse. Fresh seafood should smell faintly of the sea, not of what we would associate as fish. Buying from a reputable supplier and eating the scallops on the same day as the purchase is probably the best way in which to tackle this potential problem.

    Tips for Buying Seafood

    The second thing we have to be aware of is that if we overcook the scallops to the slightest extent, they will assume a texture similar to that of rubber and be quite unpalatable. Most of us are familiar with the unpleasant sensation of chewing upon a piece of overly tough steak; with shellfish, the experience is even more unpleasant.

    Bearing the second point particularly in mind, I would recommend that any novice cook – or even anyone cooking scallops for the first time – prepare them in a fashion where the cooking time is definable.

    By that, I mean by a method where there is no discretionary judgment required as to when they are ready. A specific occurrence should tell us when the cooking time is over.

    The way in which I cook them within the above parameters is by poaching them in milk. Simply put the scallops into a pan and add enough cold milk to ensure they are all covered. Put the pan on to the stove or hob, over medium heat. As soon as the milk reaches a gentle simmer, the scallops are cooked and may be drained and served.

    Try using a little of the warm milk to make creamy mashed potatoes as a subtly flavored bed upon which to serve the shellfish. It is also, of course, an option to add some fresh herbs to the milk in which you will poach the scallops but be very careful not to add anything which will overpower the extremely delicate, sweet flavor of your main ingredient! Try instead adding a little dill to the mash only.

    If we are considering searing scallops, the best way to do this is on a smoking hot griddle pan. Gently place the scallops onto the pan and cook for twenty to thirty seconds before turning them over to cook on the other side for a similar period of time.

    This method gives them an attractive, almost rustic appearance but also naturally carries a far greater risk of cooking them for too long. Fresh scallops are expensive enough without wasting any in preparation. Try serving them on a bed of fresh green salad leaves, perhaps with a very little and subtle herb and extra virgin olive oil dressing.

    In conclusion, there is always a difference of opinion as to whether the coral should be eaten as part of the scallop or discarded. The “coral” is basically the orange “tail” attached to the circular main body of the shellfish.

    I do eat it, as although it is not quite so flavorsome as the scallop itself, it is far from unpleasant and offers a little bit of variety in the overall eating experience.

    How to Cook Oysters

    How to Cook Clams

    How to Cook Mussels

    Easiest Way to Open Oysters

    How to Butterfly A Lobster Tail

  • How to Cook Oysters

    Oysters, like any other mollusk, can be cooked in a variety of ways depending on how you like to eat them. In general, you don’t have to fear cooking and eating oysters. If cooked properly, oysters can be the stars of delicious dishes and meals. Here are some suggestions and tips on how to cook oysters.

    how to cook oysters

    How to Cook Oysters

    Fried oysters

    In order to fry the oysters, you will need to shuck them. It is a bit laborious to shuck oysters, especially if you have not cooked the oysters yet. Wear thick gloves, oven mitts, or put any cloth over and around your hands to protect them from the oyster shells and from the knife. Here are a few oyster shucking knife sets with gloves available for purchase.

    Easiest Way to Open Oysters

    How to Shuck an Oyster with a Butter Knife

    Shuck the oyster by running the tip of the knife along with the opening. Using a blunt knife like a butter knife is possible, especially since you will want to twist the knife in order to pry the shell open. Make sure that you have a good grip on the oyster and that you twist the knife slowly. 

    Once you have all of the oysters out of their shells, you can start frying them. You have some options for the coating. You can use regular flour, panko (or Japanese breadcrumbs), Italian breadcrumbs, homemade breadcrumbs, or cornstarch. You may use egg in order to make the coating thicker, but it is not necessary. A light coating of these dry ingredients will result in a “lighter” oyster snack.

    Add some salt and pepper to the flour or breadcrumbs or cornstarch if they are not seasoned already. Then, dredge each oyster and fry in hot oil for a minute or two or until the coating is cooked and the outside is golden brown. Do not cook for longer than is necessary. If you used oil that was 400 degrees F, a minute or two of frying is enough to completely cook the oysters.

    Grilled oysters

    This is perhaps an easier way of serving oysters. They cook in their own juices, and you can shuck them once the oysters are cooked (which makes shucking easier!). Prepare your grill. Using charcoal is a great idea because it imparts a nice smoky flavor to the oysters. Once your grill is hot, place the oysters onto the grill.

    Grill for about 8 minutes or slightly longer until the oysters begin to pop open slightly. Think of this process as similar to cooking clams. Shuck the oysters and enjoy with fresh-squeezed lime or lemon juice.

    Does Cooking Oysters Destroy the Zinc

    According to CarolinaCoastline.com, “most people can get enough zinc from food. Cooked oysters are an excellent source of zinc with fifty-two milligrams in three ounces.”

    How to Cook Scallops

    How to Cook Clams

    How to Cook Mussels

    How to Butterfly a Lobster Tail

    Tips for Buying Seafood

  • Chicken Livers Peri Peri

    Are you wondering, “What can I make with chicken livers?” Try this Chicken Livers Peri Peri recipe!

    Chicken Livers Peri Peri

    When you think that chicken is the most eaten meat in the world, you realize just how many chicken livers there must be! The days of finding a little plastic bag inside the chickens we buy tend to be a thing of the past, but when we did have them, how many of us utilized those little delicacies within the bag – the liver of the chicken?

    All our supermarkets sell chicken livers, either fresh or frozen. These are so cheap, but they are ignored by so many people simply because they don’t really know how to use them.

    However, chicken livers are an excellent meat product to include in your diet – apart from the fact that they are really, really inexpensive – they are low in fat and calories but high in protein, iron, and vitamins – especially vitamin A.

    There are so many people who have never tried chicken livers, some because they just can’t imagine eating them and some because they just don’t know how to use them; but they really are very easy to use and make a really quick meal – either as a starter or a main course.

    They are perfectly quickly fried and lovely with bacon – just wash and drain the livers, season well and fry in a hot frying pan (skillet) in oil (or preferably bacon fat) for a few minutes until all the pinkness is gone – how easy is that! What is very important to remember when cooking chicken livers is that they WILL taste dry and bland if you cook them too long, serve them when they are still lovely and moist inside.

    It is as a starter or appetizer where chicken livers really come into their own; they make an excellent, quick and easy pate, they are delicious cooked wrapped in bacon, they make a perfect mousse – the list is virtually endless.

    If you are looking for a REALLY tasty and oh-so-cheap appetizer recipe that is both low fat and delicious, do try this excellent little recipe – you won’t be disappointed!

    Chicken Livers Peri Peri

    Serves 4 as a starter or appetizer

    Ingredients

        300g chicken liver
        1 onion finely chopped
        4 cloves garlic, crushed
        2 red or green chilies, de-seeded and chopped finely (or ½ teaspoon of dried chilies.)
        1 tomato, chopped
        1 teaspoon of peri peri powder (or cayenne)
        1 teaspoon Worcestershire sauce
        1 tablespoon of tomato puree (paste)
        100ml chicken stock
        Salt and freshly ground black pepper to taste.
        Low-fat spray

    Method

    1. Spray a large frying pan (skillet) with low-fat spray, add livers, salt & pepper to taste.
    2. Sauté until chicken livers are cooked but do NOT overcook; they need to be a little pink in the middle as they will be re-cooked later, remove from pan.
    3. Using the same pan and juices, fry the garlic, chilies, and onion until soft, add the tomatoes and fry for a couple of more minutes.
    4. Add the rest of the ingredients and simmer for about 5 minutes; if the sauce is too thick, add a little more stock.
    5. Check to taste the sauce and add more chilies if you prefer it hot.
    6. Return the chicken livers to the sauce and let it simmer for one or two minutes or until livers are fully warmed through.
    7. Serve immediately with salad.

    I do hope that I have persuaded you to try this inexpensive delicacy; I am sure that you will be converted once you’ve tried it.