The Best Homemade Lemonade for Summer Gatherings and Everyday Sipping
When the temperatures rise and the sun is beating down, there’s one drink that never fails to hit the spot—classic homemade lemonade.
It’s cold, refreshing, and simple to make with ingredients most folks already have on hand.
This recipe is as easy as it gets, and it’s perfect for anyone looking for a quick homemade lemonade with fresh lemon juice.
You may also like:
- Strawberry Lemonade
- Strawberry Lemon Parfait
- Frozen Lemonade Pie
- Lemon Blueberry Bundt Cake
- Lemon Drizzle Loaf Cake
- Slow Cooker Blueberry Lemon Dump Cake
Why This Easy Homemade Lemonade Belongs in Your Recipe Box
This isn’t just any lemonade—it’s made the old-fashioned way, the way our mamas and grandmas used to mix up a pitcher for backyard BBQs or porch-sitting afternoons.
If you’re searching for how to make lemonade with fresh lemons, this recipe gives you that tart and sweet balance without being complicated.
No mixes, no powders—just real lemons, water, and sugar.
When and Where to Serve This Classic Lemonade Recipe
This lemonade is a go-to drink for summer cookouts, potlucks, birthday parties, and casual weekends at home.
Serve it in mason jars with a few lemon slices and a sprig of mint to make it feel a little extra.
It’s also a great option for baby showers, bridal showers, church gatherings, or to keep in the fridge for your kids after school.
You can even freeze it in ice cube trays for lemonade ice cubes to drop into water or tea later.
If you’re hosting a gathering, consider setting up a lemonade bar—let folks add fresh berries, herbs like basil or mint, or even a splash of sparkling water to customize their glass.
Who Will Love This Lemonade Recipe
This one’s for anybody looking for a quick, no-fuss homemade lemonade recipe with real lemons.
Whether you’re a busy parent trying to beat the heat, someone planning a summer event, or just need something cold and fresh on a hot afternoon—this recipe works for all ages.
It’s kid-friendly and grown-up approved. You can even turn it into an adults-only beverage with a splash of vodka or bourbon for backyard get-togethers.
How to Make Lemonade with Fresh Lemons the Easy Way
Making lemonade from scratch doesn’t mean you need to spend all day squeezing lemons and stirring sugar.
This method uses a quick simple syrup so everything blends smoothly without gritty sugar settling at the bottom of the pitcher.
It comes together in about 15 minutes, and once it’s chilled and poured over ice, you’ll see why homemade lemonade with simple syrup is worth the few extra steps.
Creative Ways to Use Leftover Lemonade
If you happen to have some leftover (which doesn’t happen often), use it to make lemonade popsicles—just pour into molds and freeze.
Or mix it with sweet tea for a homemade Arnold Palmer. You can even blend it with frozen fruit like strawberries or peaches for a quick lemonade slushie on a hot day.
This is one of those recipes you’ll want to keep in your rotation all summer long.
It’s easy to double for a crowd, easy to adjust for sweetness, and always a hit when the heat cranks up.
Whether you’re prepping for a weekend barbecue or just need something cold after mowing the yard, this easy homemade lemonade recipe is a southern classic that never goes out of style.
Homemade Lemonade
Ingredients:
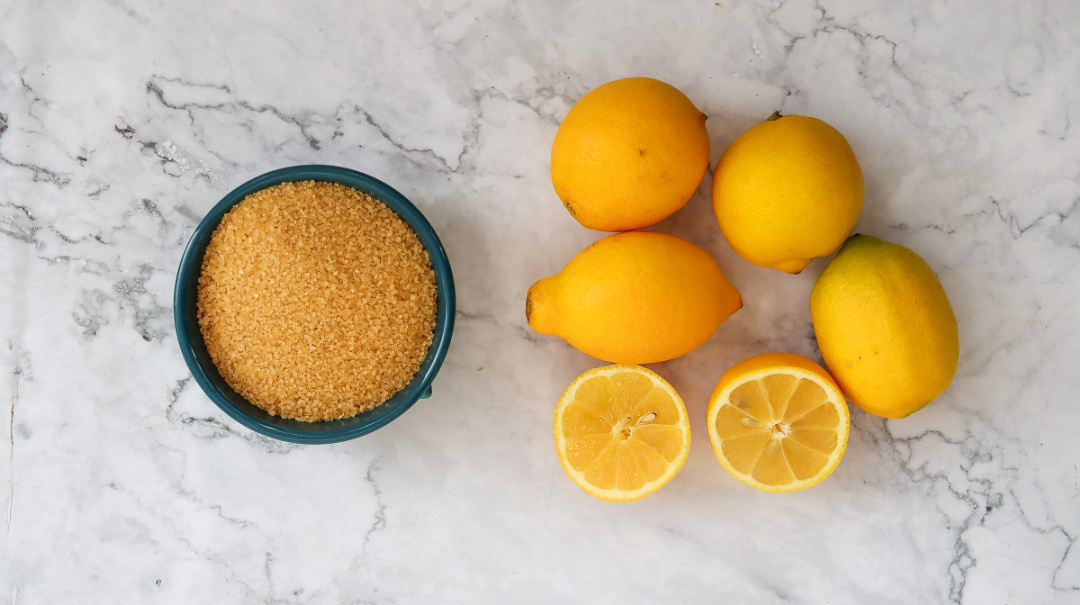
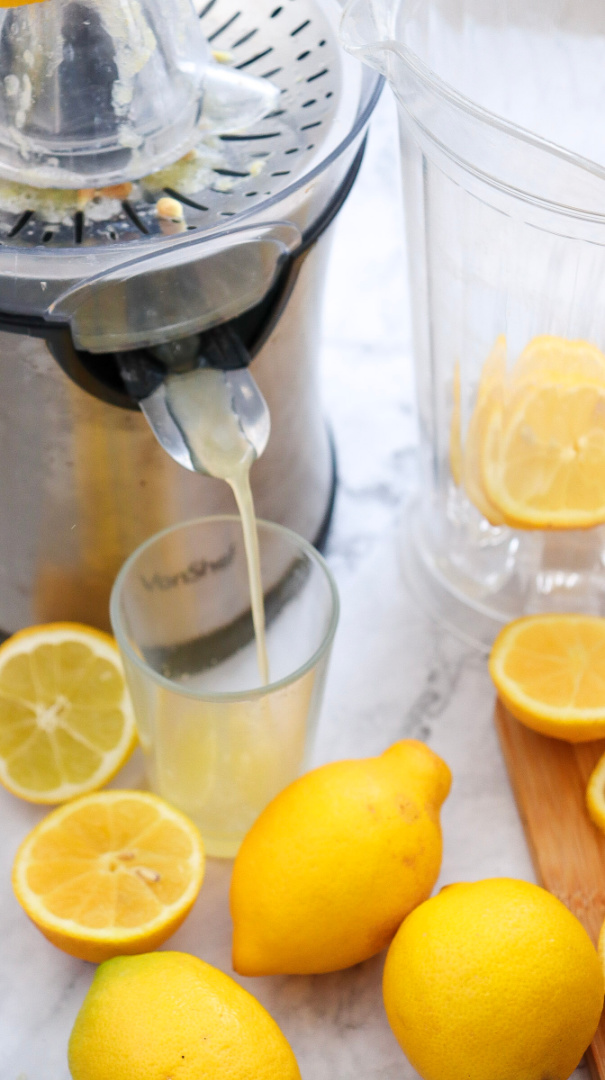
- 1 cup freshly squeezed lemon juice (about 4-6 lemons)
- 4 cups water (divided)
- 1 cup granulated sugar or simple syrup
- Ice
- Lemon slices and mint for garnish (optional)
Directions:
Squeeze the juice from the lemons until you have about 1 cup of lemon juice, removing any seeds.
In a saucepan, combine 1 cup of sugar with 1 cup of water and heat until the sugar dissolves completely. Let it cool.
In a pitcher, mix the lemon juice, simple syrup, and 3 cups of cold water. Stir well and adjust the sweetness to taste.

Pour over ice, garnish with lemon slices and fresh mint if desired, and enjoy!

Frequently Asked Questions About Homemade Lemonade with Fresh Lemons
How many lemons do I need to make 1 cup of lemon juice?
You’ll need about 4 to 6 medium lemons to get 1 cup of freshly squeezed lemon juice. This can vary slightly depending on the size and juiciness of your lemons.
Can I use bottled lemon juice instead of fresh?
While you can use bottled lemon juice, fresh lemon juice makes a big difference in flavor. If you want the best tasting homemade lemonade, stick with freshly squeezed lemons whenever possible.
How do I make homemade lemonade less tart?
If your lemonade is too tart, add more water or increase the amount of simple syrup until you reach your preferred sweetness level. Start small and adjust gradually.
What’s the best way to make simple syrup for lemonade?
To make a basic simple syrup for lemonade, heat equal parts water and sugar (usually 1 cup each) in a saucepan until the sugar fully dissolves. Let it cool before mixing it with the lemon juice and water.
Can I make lemonade ahead of time?
Yes, you can make homemade lemonade a day in advance. Store it in the refrigerator in a sealed pitcher and give it a good stir before serving. For best flavor, wait to add ice until you’re ready to serve.
How long does homemade lemonade last in the fridge?
Homemade lemonade will stay fresh in the refrigerator for up to 5 days. Keep it covered tightly and store without ice so it doesn’t get watered down.
Can I make this lemonade recipe without sugar?
Yes, you can substitute granulated sugar with honey, maple syrup, or a sugar substitute like Stevia or monk fruit. Keep in mind that the flavor may change slightly depending on the sweetener you use.
What’s the best way to serve homemade lemonade at a party?
Serve your lemonade over plenty of ice in a large pitcher or beverage dispenser. Garnish with lemon slices and mint leaves for a nice presentation. For a crowd, consider setting up a lemonade bar with fresh fruit mix-ins and flavored syrups.
Can I freeze homemade lemonade?
Yes, you can freeze lemonade. Pour it into ice cube trays or freezer-safe containers. Use the frozen cubes in water or tea for extra flavor or blend them into slushies.
What’s the difference between homemade lemonade and store-bought?
Homemade lemonade is made with real lemons, water, and sugar—no preservatives or artificial flavors. It has a cleaner, fresher taste and can be customized to your liking.
Can I turn this lemonade recipe into pink lemonade?
Absolutely! Add a splash of cranberry juice, pomegranate juice, or fresh strawberry purée to create homemade pink lemonade with real ingredients.
How much lemonade does this recipe make?
This easy homemade lemonade recipe makes about 6 to 8 cups, depending on how much ice and additional water you add to taste. It’s perfect for a family or small gathering.
Homemade Lemonade
Ingredients
- 1 cup freshly squeezed lemon juice (about 4-6 lemons)
- 4 cups water (divided)
- 1 cup granulated sugar or simple syrup
- Ice
- Lemon slices and mint for garnish (optional)
Instructions
Squeeze the juice from the lemons until you have about 1 cup of lemon juice, removing any seeds.
In a saucepan, combine 1 cup of sugar with 1 cup of water and heat until the sugar dissolves completely. Let it cool.
In a pitcher, mix the lemon juice, simple syrup, and 3 cups of cold water. Stir well and adjust the sweetness to taste.
Pour over ice, garnish with lemon slices and fresh mint if desired, and enjoy!