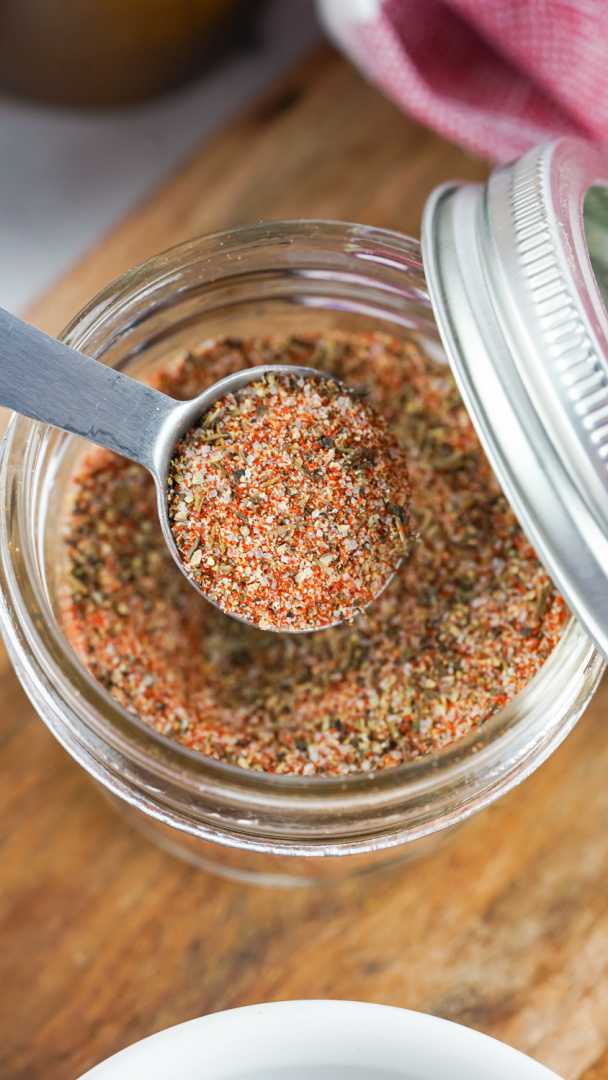
Steak is a delicious and versatile dish, but it can be tricky to get the seasoning just right. That’s why I recommend making your own steak seasoning at home.
Not only is it easy to do, but you can tailor the flavor to your own taste.
There are a few key ingredients that you’ll need for steak seasoning: salt, pepper, garlic, paprika, and thyme. You can also add in other spices like onion powder or cumin. Just mix them all together in a bowl and you’re good to go!
Once you’ve made your seasoning, simply sprinkle it on both sides of the steak before cooking. You can either grill, pan-fry, or bake your steak – whichever method you prefer.
Just make sure to cook it to your liking and enjoy!
So add a kick of flavor to your steaks with this homemade steak seasoning!
If you want even more flavor, you can add a tablespoon of onion powder or dried onion.
If you don’t have paprika, you can skip it as it’s mostly for color more than anything. If you would like to add flavor with your paprika, use smoked paprika instead.
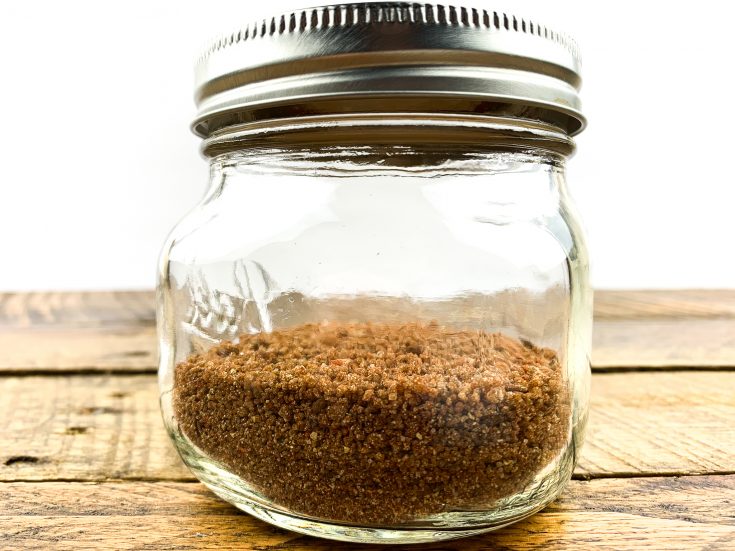
Store in a sealed container in the pantry for up to a month. Do not freeze.
If you like the herby vibe with your steak, add a tablespoon of dried rosemary to the mix as well.
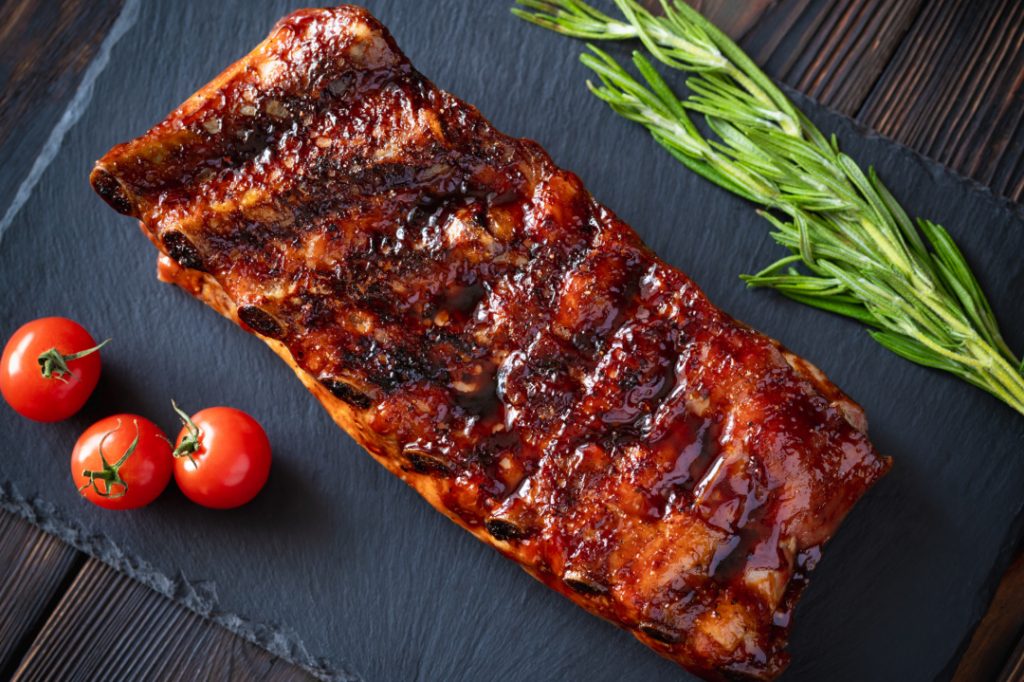
The secret to good ribs is the rib rub! Learn how to make this simple rib rub for your rack of ribs.
There are lots of different ways to enjoy ribs.
Most folks prefer them smoked low and slow in a barbecue pit, but there’s no wrong way to to enjoy them! Ribs can also be cooked in an oven, in a crockpot, or even hot and fast over a grill.
I have found that there are sometimes when I need to stray from my own tradition of cooking either due to time constraints or availability of my preferred cooking medium.
The common theme for any way to cook ribs is the way they are seasoned, because it doesn’t matter how they are cooked, it is all about the taste!
I’ve tried several different combinations of rib rubs over the years, and some of them can be very complex with their flavor profiles.
I love to try and taste new things, especially barbecue ribs, but I’ve also found that the simplest recipes are not only quicker, but they are usually the most delicious.
Simple recipes give just enough flavor, but they also let the flavor and tenderness of the meat speak for itself. I have tinkered with several different rubs and this one I’m sharing with you is my favorite.
Most all good rib rubs start with some kind of sugar, and I love the flavor that dark brown sugar gives to ribs. It also gives ribs a deep mohogany color when the dark brown sugar caramelizes.
Of course, humble salt and pepper give all food great flavor. Next, the savory flavors of onion and garlic give great compliment to all of the sweet with the brown sugar base.
Finally, I believe that just a small amount of cocoa powder gives the rib rub that added richness and perfectly balances out the sweet and savory from all of the other flavors.
What’s really great about this rib rub recipe is that is can be used on just about any piece of meat for barbecue including other cuts of pork, beef, and chicken.
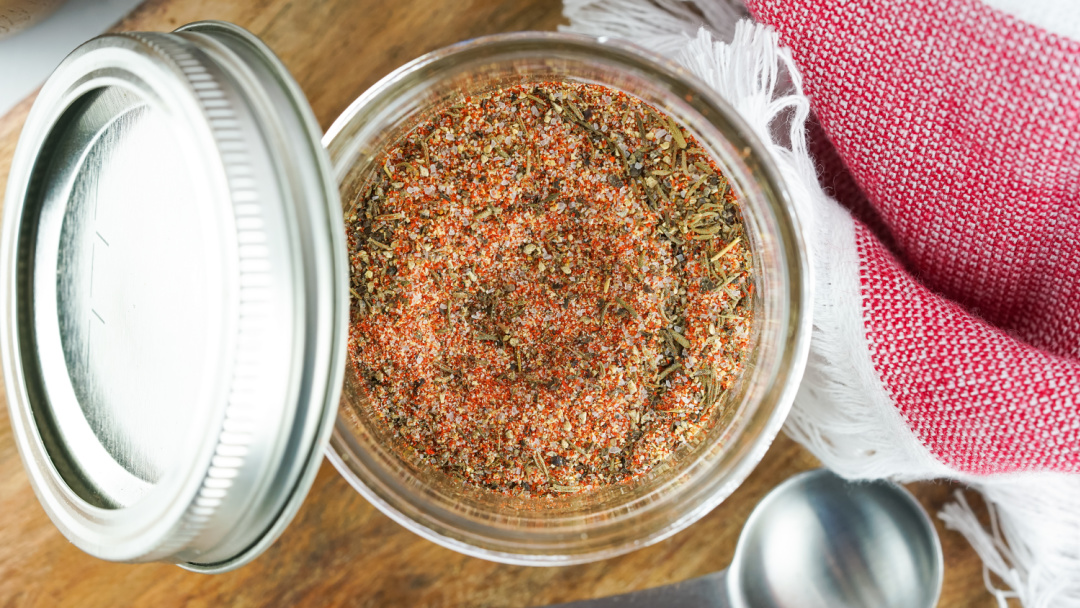
Rib Rub
Ingredients:
1/4 cup dark brown sugar
2 tsp. salt
2 tsp. black pepper
1 tsp. garlic powder
1 tsp. onion powder
1/2 tsp. cayenne
1/2 tsp. cocoa powder
Directions:
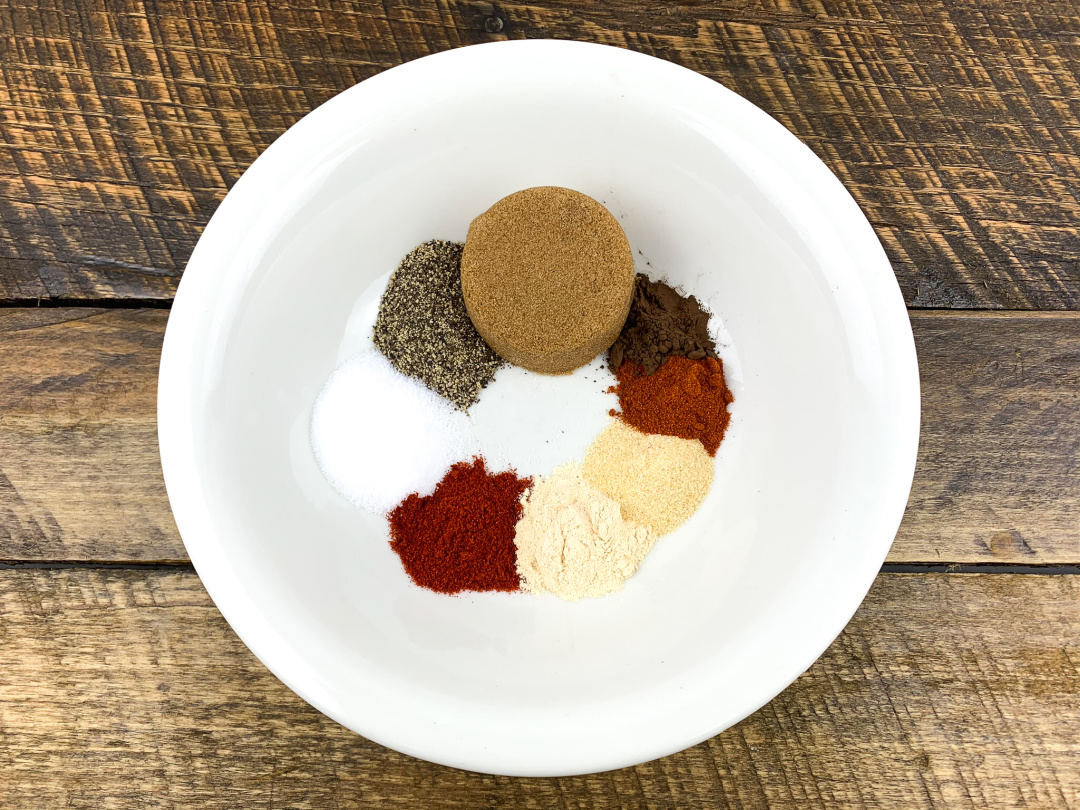
Add the sugar and spices to a mixing bowl.
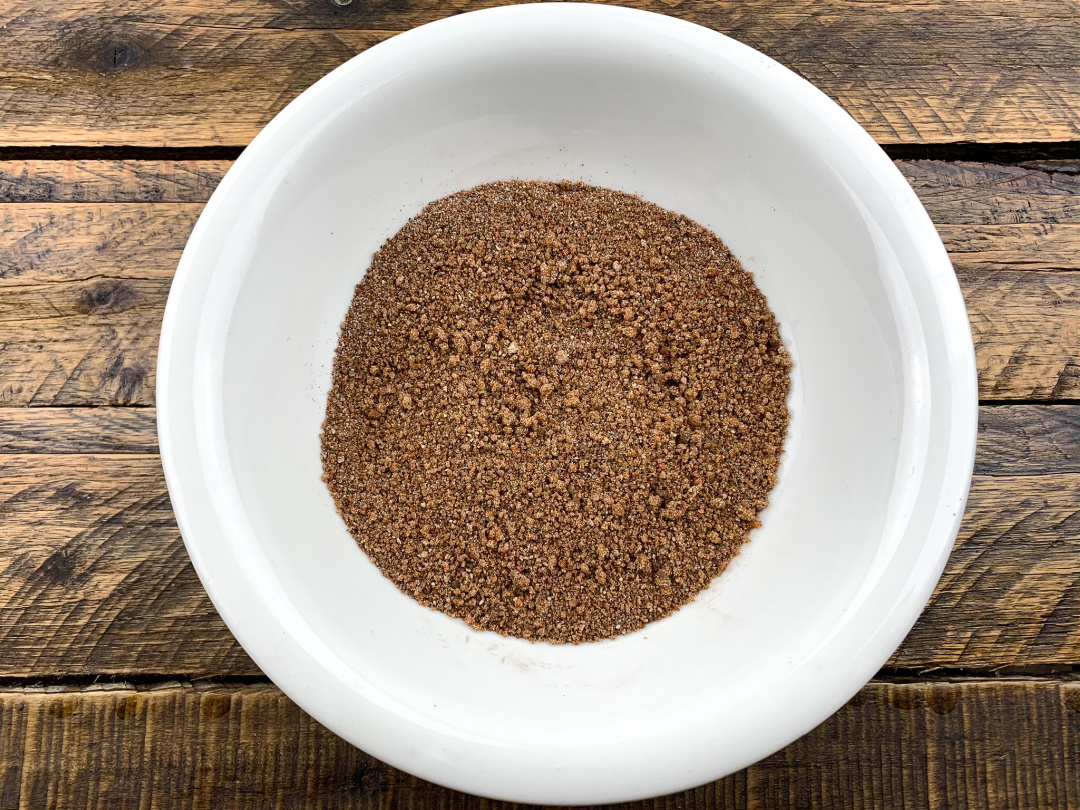
Mix up well.
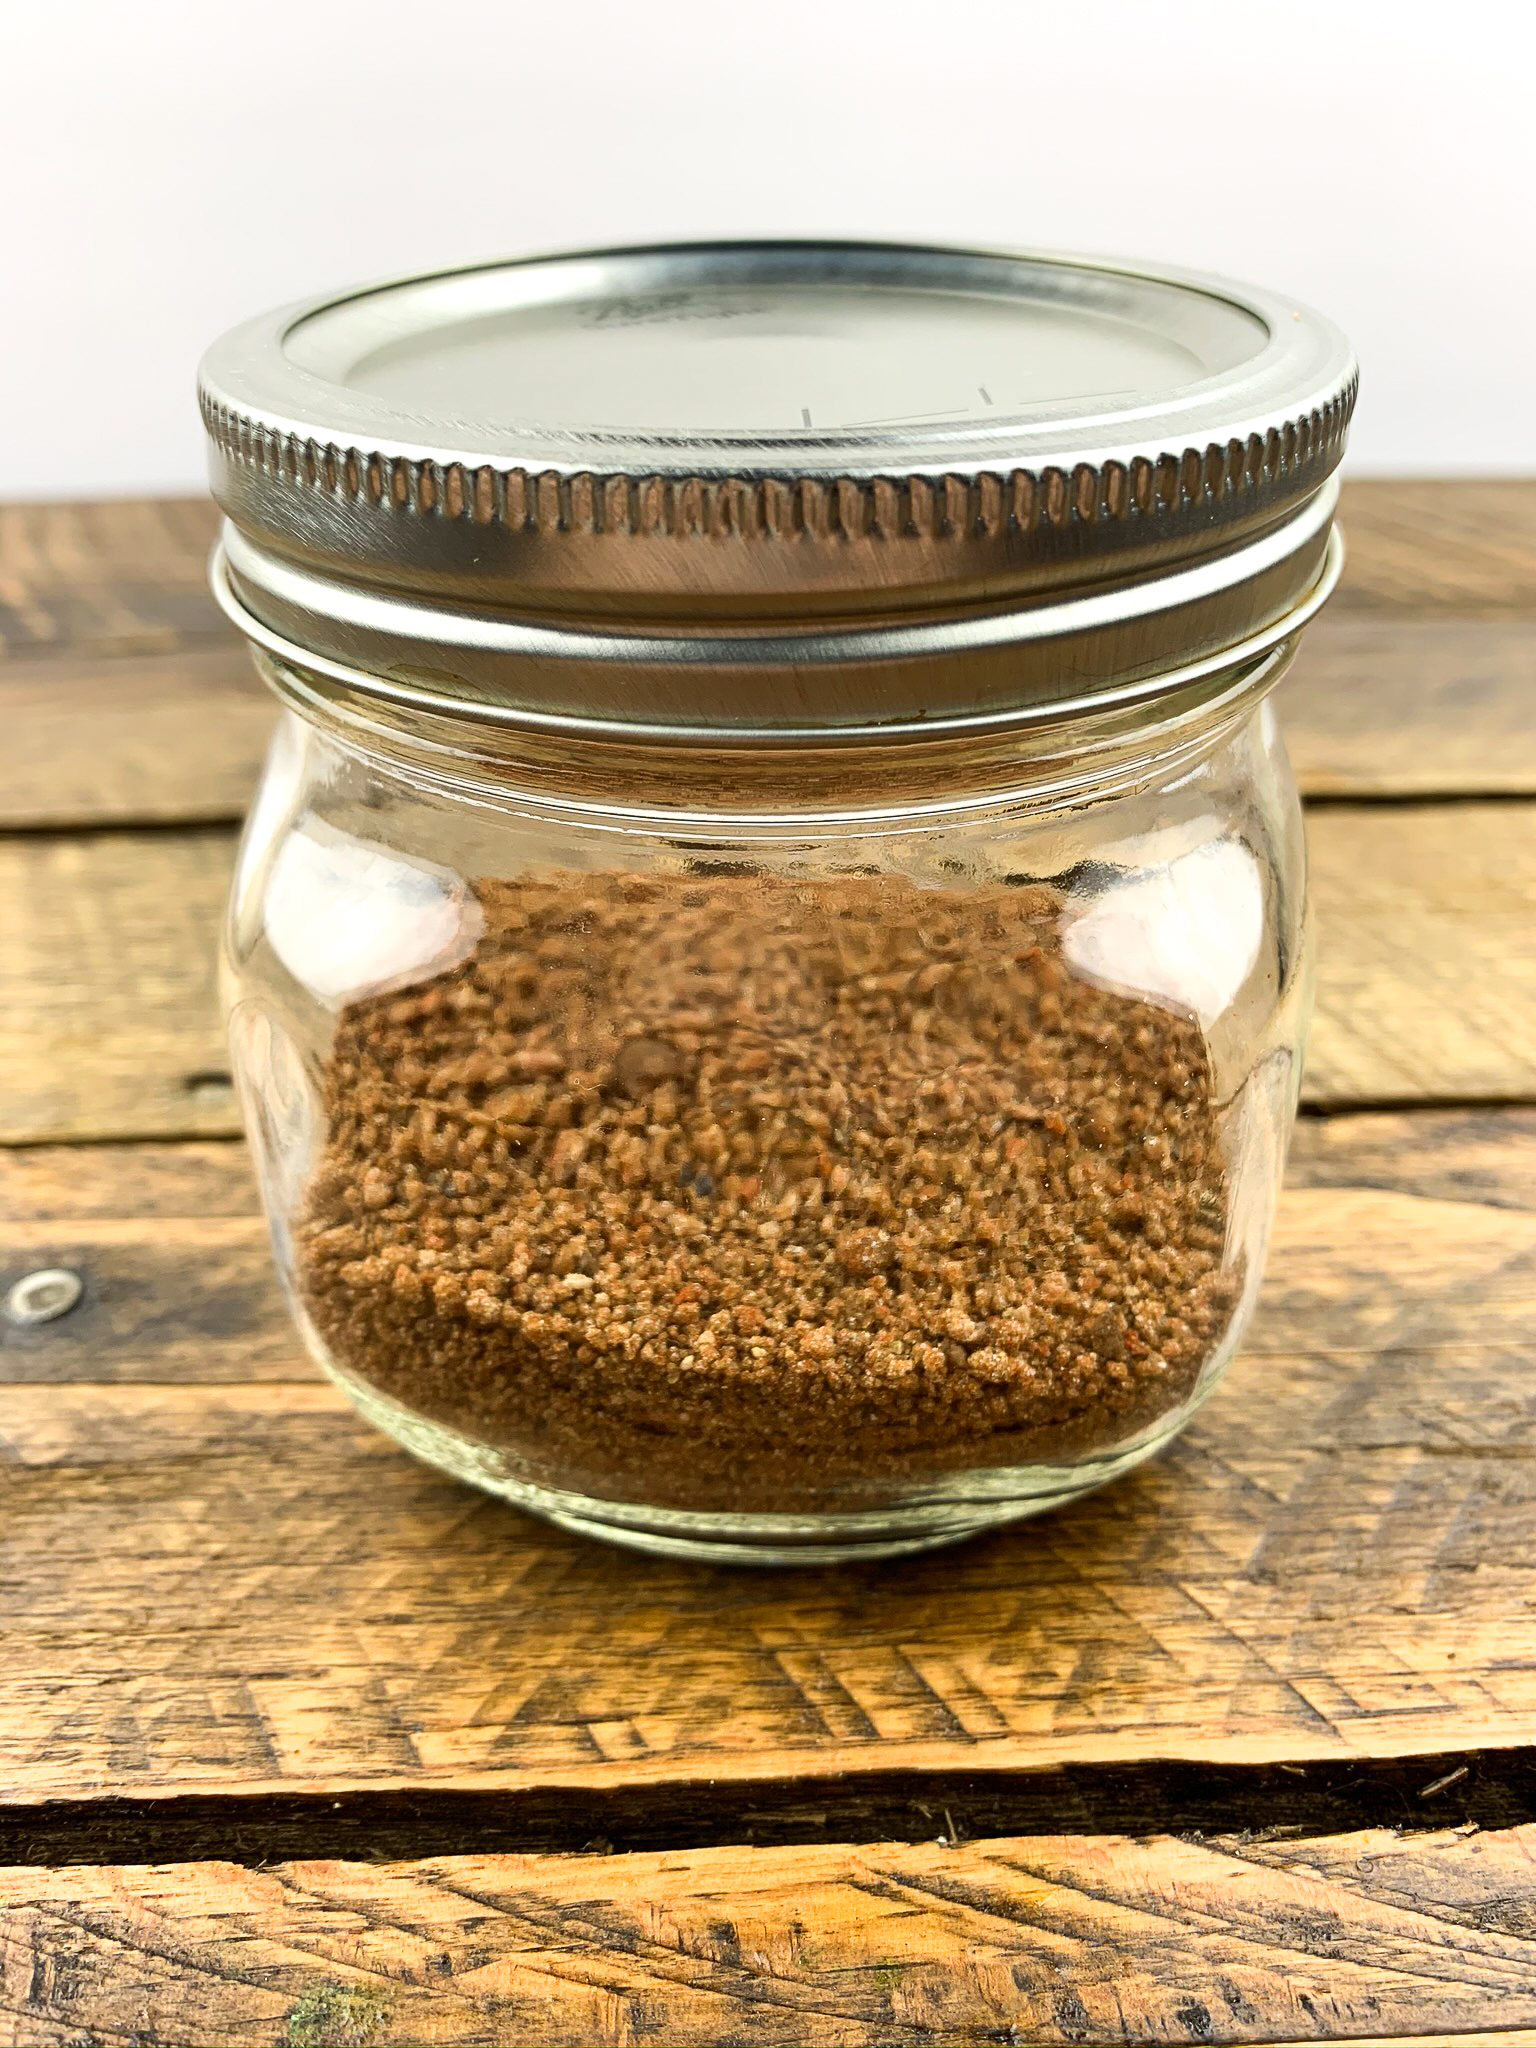
Once well combined, add the rib rub to an air-tight jar. Secure the lid.
Store the rib rub until you are ready to use it to coat your ribs.
Rib Rub
Ingredients
1/4 cup dark brown sugar
2 tsp. salt
2 tsp. black pepper
1 tsp. garlic powder
1 tsp. onion powder
1/2 tsp. cayenne
1/2 tsp. cocoa powder
Instructions
Add the sugar and spices to a mixing bowl.
Mix up well.
Once well combined, add the rib rub to an air-tight jar. Secure the lid.
Store the rib rub until you are ready to use it to coat your ribs.
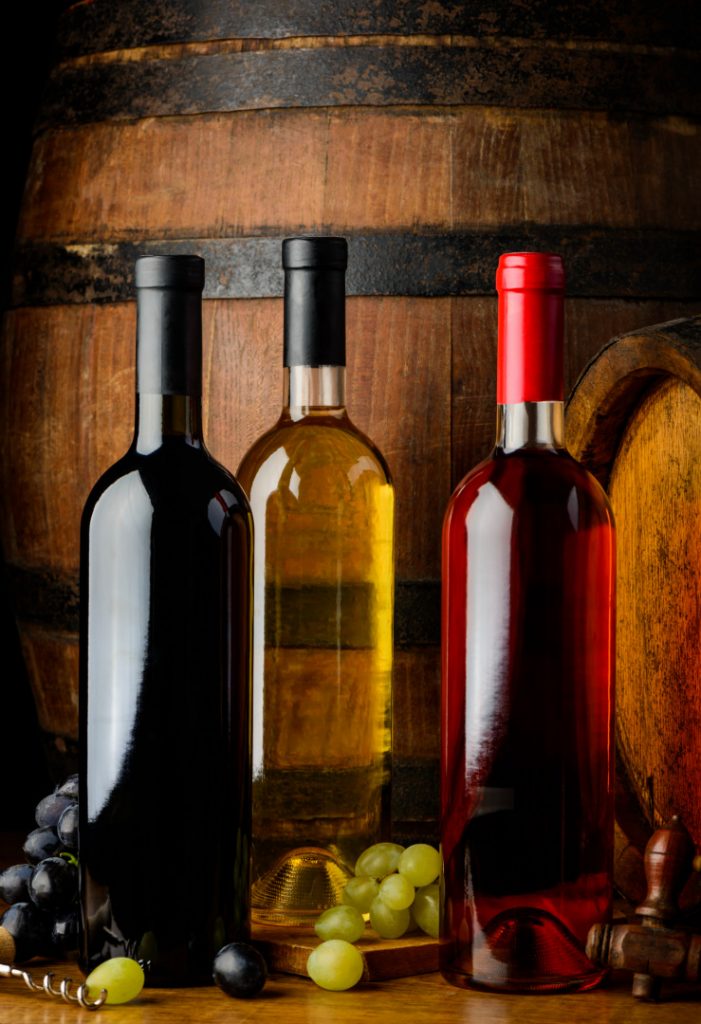
Do you want to try new flavors with your recipes? Cook with wine! Read my tips for cooking with wine. Plus, you’ll see a Baked Ham Pontalba recipe at the end of this post to try!
There are few meat or fish dishes that are not enhanced by a few dollops from your favorite wine bottle while they are simmering on the stove.
It isn’t a question of spiking the food since alcohol evaporates as soon as it reaches the boiling point. Like thyme or any other seasoning, wine is used to round out the flavor.
This does not mean that you should buy the cheapest wine available in the mistaken belief that, since it is boiled, it doesn’t matter. Bear in mind the fact that a wine that is too sweet or too sour for your drinking taste will hardly improve the entree.
As a matter of fact, once it cooks down, the taste of wine becomes considerably more pronounced.
In short, never pour into the pot a wine you wouldn’t pour into your glass.
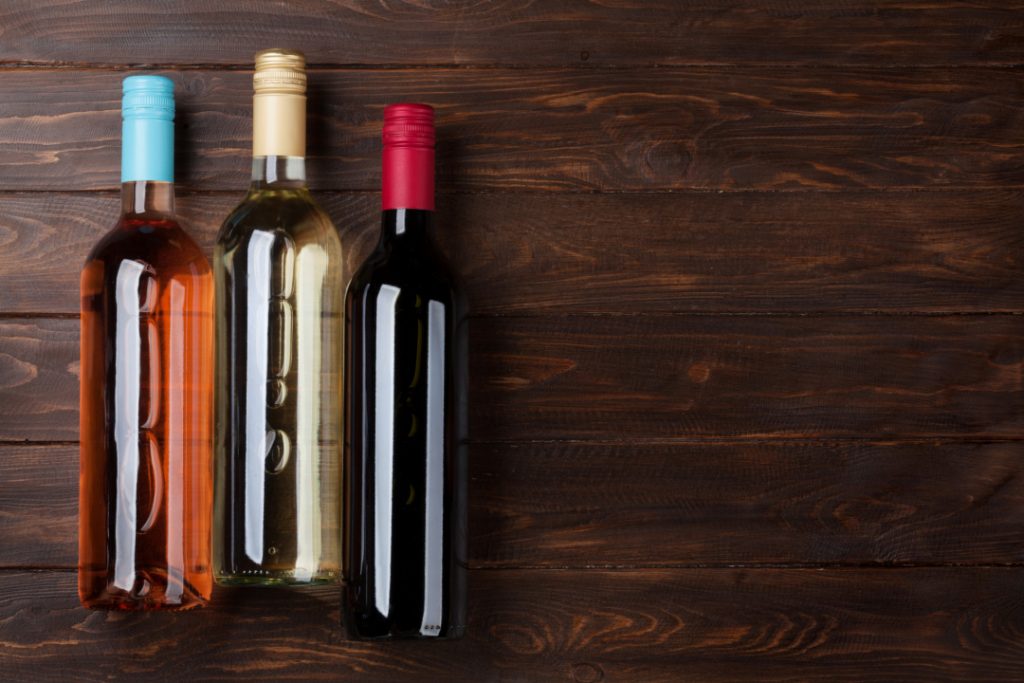
The old adage of white wine with white meat and red with red is pretty silly whether you are going to drink it with your meal or cook with it. With the exception of fish which is generally better cooked with white wine, both red and white, or rose for that matter, go equally well with chicken, veal or beef.
Generally speaking, it is preferable to use a full-bodied wine that is on the dry side but not too tart, whether it be red or white. Reasonably priced red wines obtainable in this country include Pinot Noir and many of the Chiantis.
White wines are a little more tricky if you’re looking for bargains, and it is often safer to cook with dry white vermouth.
If the meat you are cooking tends to toughness, it is wise to marinate it overnight in wine, keeping it in the refrigerator.
Sherry is popular in seafood dishes, but the sherry should be dry. Since sherry has a pronounced flavor, use it sparingly.
Sweet dessert wines like Marsala give a lift to fruit compotes or custards like Zabaglione, that toothsome Italian concoction of sugar and egg yolks.
Wine cookery became popular in America during the 18th and 19th centuries with the influx of thousands of emigres from the countries of Europe. Many of the finest dishes were developed in the kitchens of Louisiana’s Creoles, those descendants of French and Spanish settlers.
Who but the Creoles could have conceived such a delectable dish as Ham Pontalba with its tongue-tingling stuffing of onion and truffles bathed in Madeira wine?
Baked Ham Pontalba
    14 pound ham baked
    4 cups shelled pecans ground
    3 onions chopped fine
    1 small can truffles cut in pieces
    6 bay leaves
    2 sprigs (½ teaspoon dried) thyme
    3 teaspoons dried sage
    3 teaspoons ground cloves
    ¼ teaspoon cayenne
    ½ cup Madeira wine
    1 apple
    1 cup cane syrup
    Brown sugar
    Fine dry bread crumbs
Have your butcher at your local supermarket or meat market bone the ham.
If a dry, smoked ham is used, the ham must be soaked in cold water for 12 hours. When a modern, cured ham is used, you do not have to soak the ham.
Prepare the Stuffing
Cut out about ½ lb. ham to make a cavity. Work the ham through a food grinder.
Blend mixture with pecans, one chopped onion, truffles, two crumbled bay leaves, thyme, one teaspoon sage, one teaspoon ground cloves, cayenne, and Madeira.
Pack the stuffing into ham cavity, sewing or skewering it securely.
Add these seasonings on the ham: one chopped onion, two bay leaves, one teaspoon sage, one teaspoon cloves. Sew a cloth securely around the ham and place it in a large kettle.
Add enough water to the kettle to cover. Add the remaining chopped onion, bay leaves, sage, cloves, whole unpared apple, and the syrup. Bring to a boil, cover, reduce heat and simmer for about six hours or until tender.
Allow the ham to cool in the liquid. Once cooled, remove the rind, pat ham with a mixture of brown sugar and crumbs.
Bake in a preheated 375-degree oven until the surface is well-browned and the ham is hot!
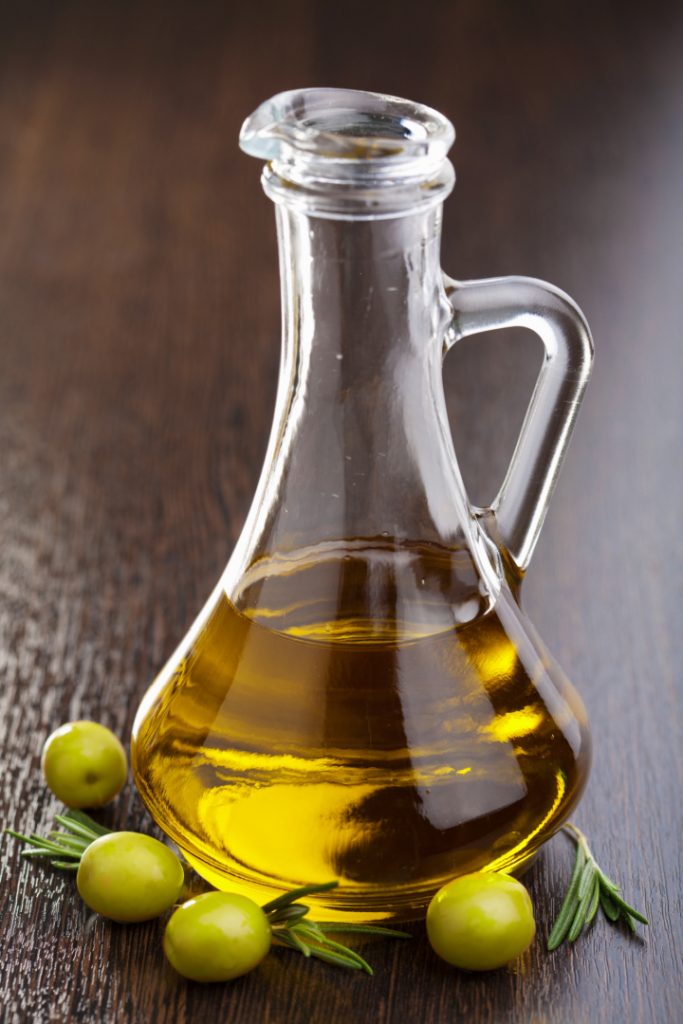
You will always find a bottle of olive oil in my kitchen! Here are my best tips for cooking with olive oil.
Savor the delicate aromas and earthy flavors, and you’ll understand why olive oil is the cornerstone of wholesome cooking. The popular Mediterranean Diet, Weight Watchers, and other plans herald olive oil as a healthy source of fat. Even the FDA has suggested replacing sources of saturated fats with extra virgin olive oil for its positive health effects, such as balancing cholesterol.
Olive oil is versatile and easy to use, whether for dipping with a generous chunk of artisan bread, as a base for salad dressing, or to saute vegetables. Like good wine, some olive oils pair better with certain foods. Some brands can taste more bitter than others or have a pungent fragrance. Taste several brands of extra virgin olive oil to determine which fall into your range of preference.
The highest grade of olive oil is extra virgin, often called EVOO by celebrity chefs Rachel Ray and Mario Batali. Properties vary within grades by taste, color, shelf life, smoke point, and anti-oxidant levels, so it can be difficult to tell by the label or color exactly what you are buying. Using EVOO ensures the best results for most cooking purposes.
Tips for Cooking With Olive Oil
Condiment
Select a lighter oil for salad dressings, top a baked potato, drizzle over tomatoes, or brush onto bread. Unheated olive oil is at its finest for health benefits and mild flavor. Use more robust extra virgin oils for mixing with intense flavors such as garlic, or pepper for marinades or sauces, like pesto or tomato.
Marinade
Extra virgin olive oil is an ideal base for marinades to add flavor and tenderize meats prior to cooking. To 1/4 cup olive oil, add an equal amount of an acid source, such as vinegar, wine, or even papaya or pineapple. Mix in desired seasonings, such as rosemary, garlic, onion, or herb blend. Cover the meat, fish, or other food to be marinated and refrigerate. Seafood only needs to be marinated 20 minutes to an hour—chicken, beef, or other meat an hour or more.
Browning or sauteing
Try a more robust flavored oil to brush onto the pizza crust or in cooked sauces. Heating to a high temperature evaporates the alcohols inherent in olive oil, dampen flavors, and can even become bitter. More expensive extra virgin products are not needed here. To add a buttery flavor without the total cholesterol load, try mixing equal parts EVOO with butter.
Frying
EVOO has the highest smoke point of all the grades of olive oil but is still lower than some other cooking oils, such as canola or soy. If deep fat frying, olive oil must be watched closely, so it doesn’t burn.
Infusion
EVOO readily picks up the flavors of herbs and spices that are placed in it, and infusions make a lovely gift. Fill an attractive bottle with olive oil and add a sprig of rosemary or garlic clove for a lovely gift. However, be very careful. Do not place anything in the olive oil that can contain water or moisture. Oil does not promote bacterial growth, but water from the fresh lemon peel or recently washed herbs can. Use only dried herbs, or preserve the garlic cloves or peels in a strong brine before introducing it to the olive oil.
Storage
Olive oil quickly begins to oxidize when exposed to light, heat, and air. Take care to seal a bottle quickly after use and store it in a darkened pantry or cabinet away from heat sources. The ideal temperature in which to store olive oil is about 50*F, and if stored at temperatures below this, the oil can become cloudy and form crystals or clumps that sink to the bottom. Note that this does not ruin the oil, and it will return to normal appearance at room temperature. Properly stored, olive oil can keep for up to a year.
Olive oil can easily be substituted for butter or margarine in most uses where a liquid shortening is appropriate. The standard conversion formula is 1 unit of butter or shortening to .75 units of olive oil. For uses where the product must stay firm at room temperature, such as frosting, olive oil is not a good choice.
With a little practice and experimentation, olive oil can become your “go-to” basis for healthy, great cuisine.
Are you smoking or grilling spare ribs or baby back ribs this weekend? Learn how to make homemade BBQ sauce for pork ribs!
This recipe works for either spare ribs or baby back ribs. After cooking these ribs, stand back and listen to the compliments. Food, glorious food.
Food is good, and it’s good for you; just think where you would be without it. Cooking can be almost as much fun as eating, especially when the cooking is done outdoors in a BBQ pit. One of America’s all-time favorite BBQ foods is pork ribs. This recipe will produce ribs that will rival any of a BBQ restaurant.
Try my Smoked Rib recipe! This recipe uses a different sauce as another option for you!
Homemade BBQ Sauce
This sweet, smoky sauce works well on ribs and other cuts of pork:
 2 cups ketchup
 1 cup molasses
 1/2 cup white vinegar
 1 tablespoon paprika
 1 tablespoon garlic powder
 1 teaspoon onion powder
 1/2 teaspoon cinnamon
 1/2 teaspoon allspice
 1/2 teaspoon black pepper
Combine all of the above in a non-stick saucepan and simmer until all ingredients are dissolved. The product may be stored in a clean, plastic ketchup bottle in the refrigerator.
Dry Rub
While that is simmering, make this dry rub. It works well with pork ribs and shoulder, but might not be as good on beef:
 1/2 cup table salt
 1/2 cup white sugar
 1/4 cup brown sugar
 1 tablespoon garlic powder
 1 1/2 tablespoons onion powder
 1 1/2 tablespoons paprika
 3 tablespoons chili powder
 1 1/2 tablespoons black pepper
 1 tablespoon cayenne pepper
 1 tablespoon thyme
 1 tablespoon cumin
 1 tablespoon nutmeg
Combine all of the above and store in a plastic soda pop bottle with a lid.
Here’s another great recipe for rib rub to try! The best part about making your own rib rub is that you can get creative with the ingredients and try different spices.
Cooking BBQ Pork Spare Ribs
Preheat smoker to 225 degrees. Walnut, cherry, or other nut-bearing woods work well for pork, but other hardwoods may be used. While the smoker is warming, remove the paper-thin membrane from the bone side of the ribs. To do this, ‘scratch’ your fingernail against a rib bone till the membrane starts to peel off. When partially removed, grab the membrane with your fingers and pull off as much as you can. Place slabs on the cooking grate with the bones down. Close the lid and keep it closed. Monitor smoker temperature and add wood as needed. Every hour, rotate slabs. Move the slab from the hottest side of the smoker to the opposite side and slide all other slabs over a notch.
Total smoking time will be 4 hours. After three hours and 20 minutes, slather each slab with sauce (use a food-safe brush or knife) and sprinkle a liberal amount of rub. Repeat this 20 minutes later. Remember, whenever you open the smoker lid, some of the heat will escape. Be sure to monitor the smoker’s temperature carefully during this final hour.
There are differences between the baby’s back and spare ribs, but this recipe will work for either. After making this recipe a time or two, the diner’s tastes might dictate more or less sauce/rub, but avoid putting the sauce on the slabs until the final hour of cooking. The sugar in the sauce and rub can burn if applied earlier. Enjoy!
If you don’t have time to create your own homemade sauce or rib rub, you can always save time and purchase these to help!