-
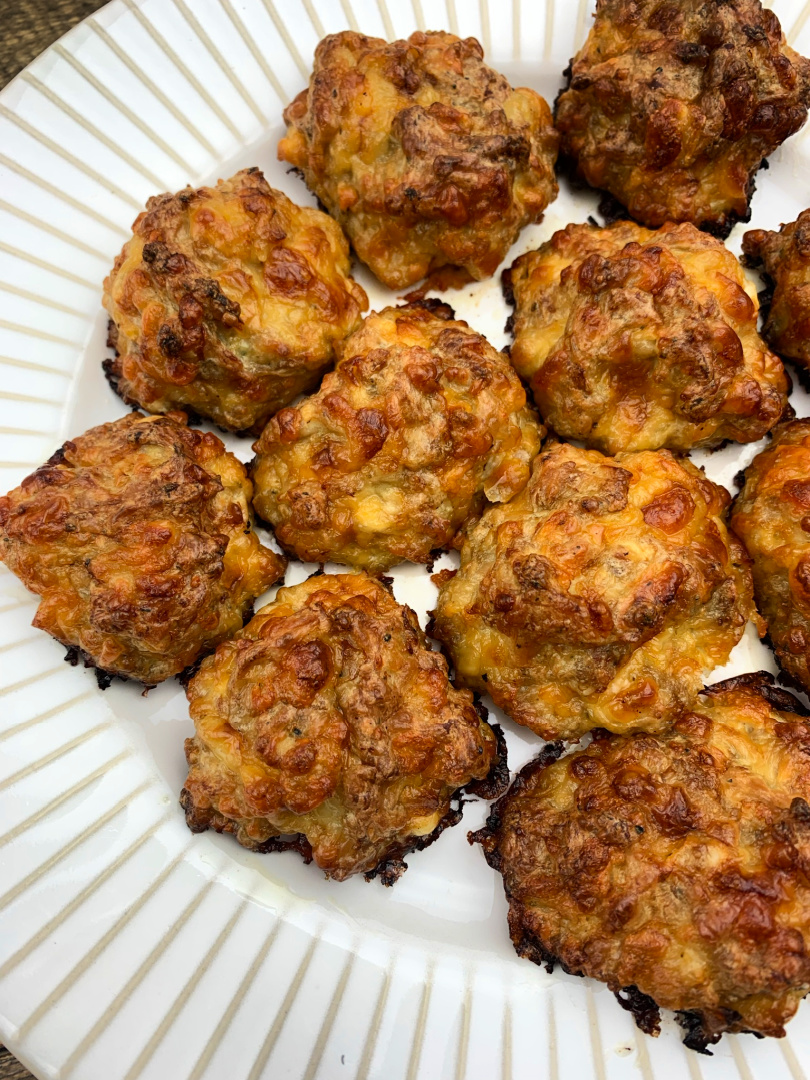
Low Carb Sausage Balls
Looking for a simple, low carb snack that’s perfect for busy mornings, game day parties, or meal prep? Low carb sausage balls are a go-to recipe that fits every occasion. Packed with protein, full of flavor, and naturally keto-friendly, these sausage balls are easy to make and even easier to enjoy. Whether you’re following a…
-
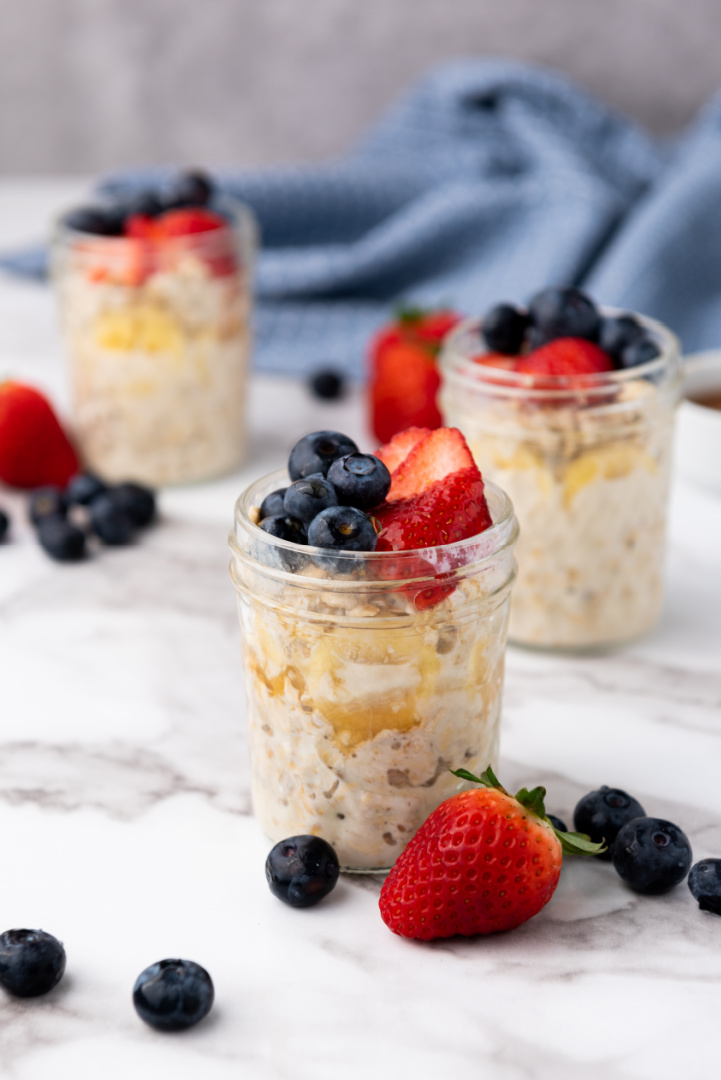
Overnight Vanilla Oats
Overnight Vanilla Oats might just be the perfect way to kickstart your morning, especially when you’re pressed for time. With just a few minutes of prep the night before, you’ll wake up to a delicious, ready-to-go breakfast. Whether you’re running out the door or enjoying a slow morning with a cup of coffee, these oats…
-
Hot Cakes
Fluffy Hot Cakes Recipe for Breakfast or Breakfast-for-Dinner Comfort There’s just something about a good, homemade hot cake that feels like a warm hug on a busy morning — or a cozy comfort on those lazy breakfast-for-dinner nights. These classic hot cakes are a Southern kitchen staple, and once you make them, you’ll see why…

-
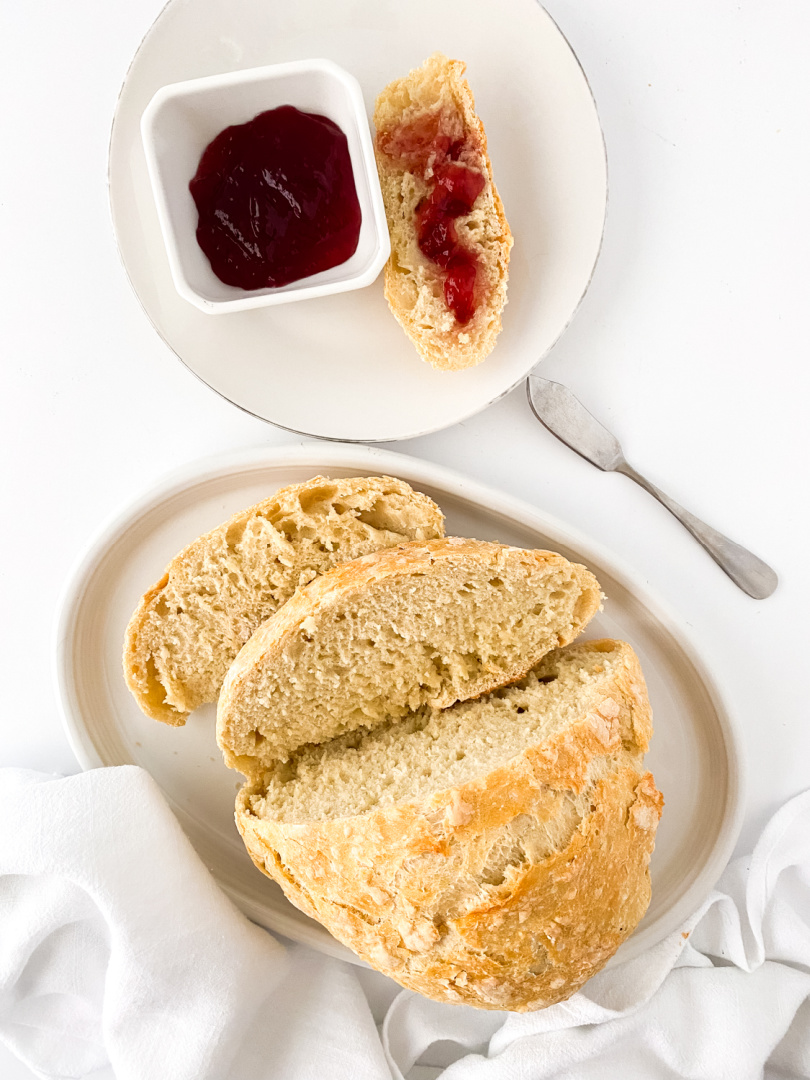
Dutch Oven Crusty Bread (No Knead Recipe)
Dutch Oven Crusty Bread Equipment: Prep time: 2.5 hours Cook: 20 mins Total: 3 hours Yield: 1 loaf Ingredients: Instructions: Mix together water, salt and yeast in measuring cup until yeast is dissolved. Pour into a large mixing bowl. Add in the flour and mix until a sticky dough forms. Cover and let sit in…
-
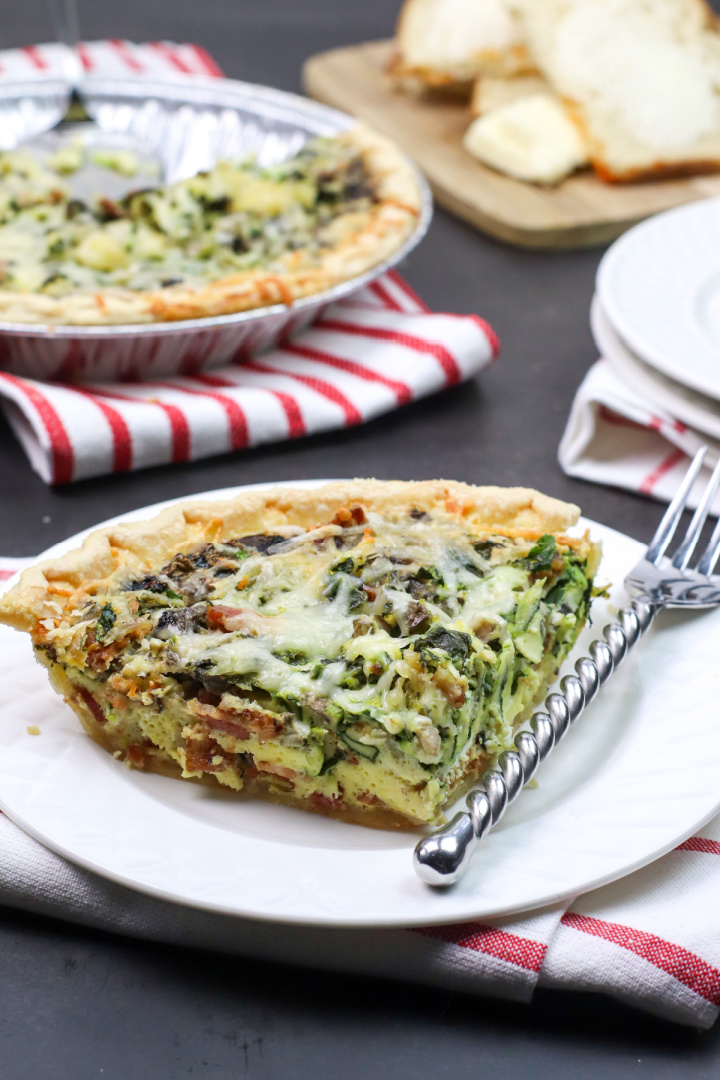
Bacon Swiss Quiche
Easy Bacon Swiss Quiche for Breakfast, Brunch, or Dinner When it comes to an easy meal that feels a little elevated but still uses everyday ingredients, this Bacon Swiss Quiche is a go-to. Whether you’re hosting Sunday brunch or pulling together a quick dinner with what you’ve already got in the fridge, this recipe brings…